
We will learn how to develop and register the plugin in Microsoft Dynamics 365 CRM. A plugin is a custom developed operational logic that is used to trigger and perform an action within Microsoft Dynamics CRM. Before we start, click here to understand the detailed information regarding the plugin in Microsoft Dynamics 365 CRM.

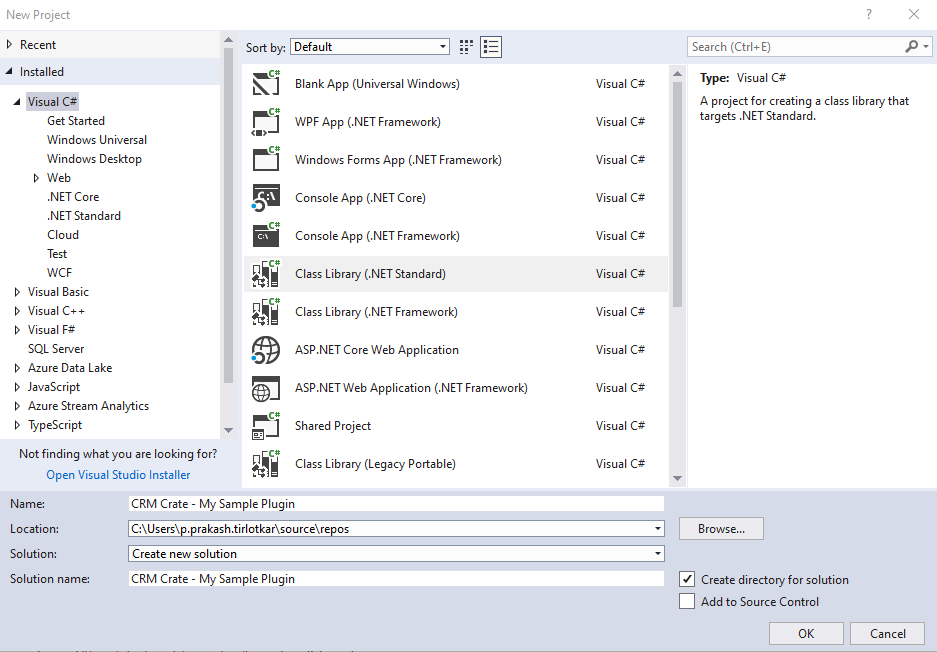
Create a new project of type Class Library
We have to develop and write our plugin in Visual Studios by creating a class library project. Open your visual studio >> New Project > >Class Library.
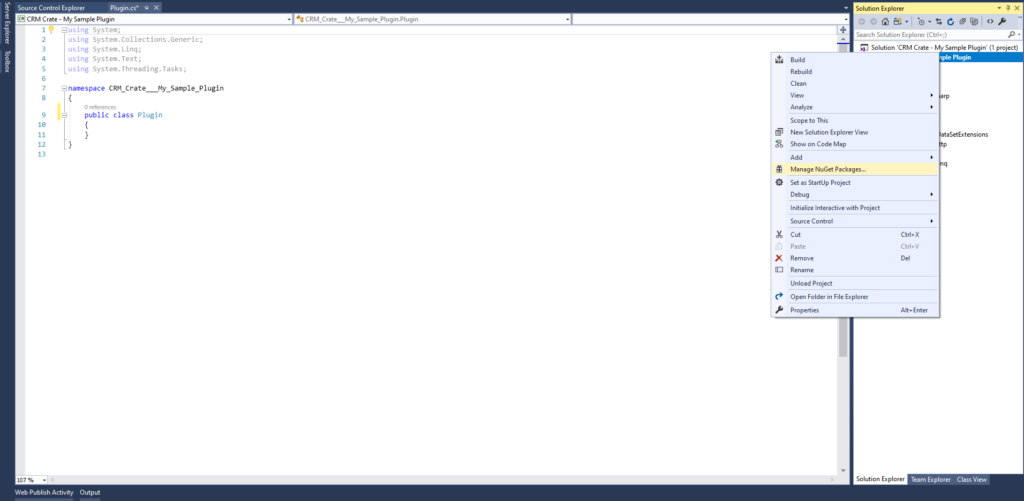
Now, we have to add the nuggets which are needed for performing operation in Dynamics CRM. Right click on the solution and click on “Managed NuGet Packages”.
Select Browse and search for Microsoft.CrmSdk.CoreAssemblies and install the latest version.
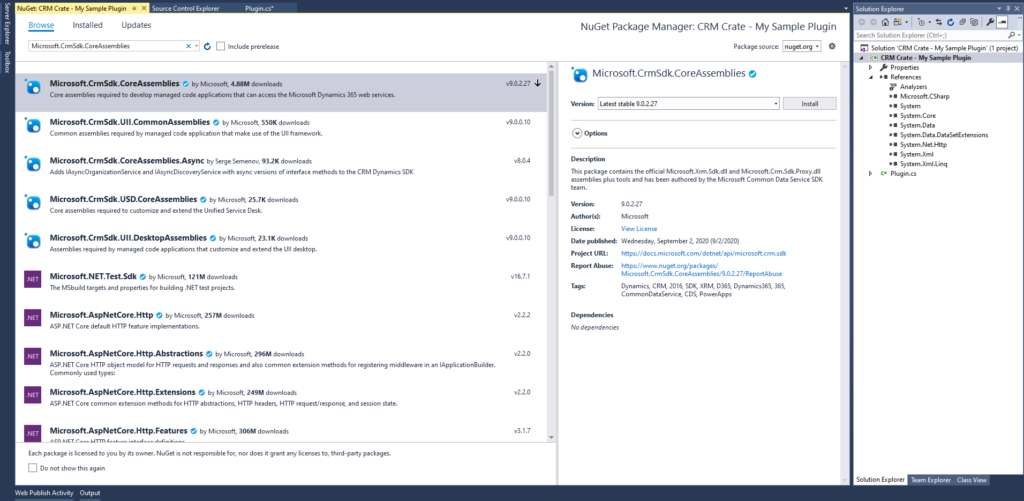
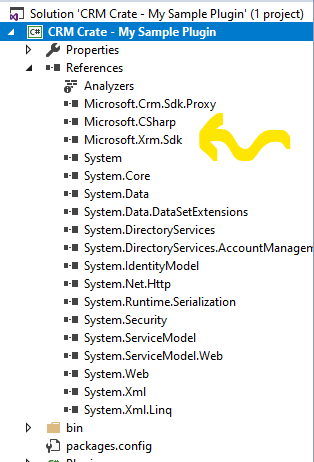
Once you have installed the package “Microsoft.CrmSdk.CoreAssemblies”, the Mircosoft.Xrm.Sdk assembly will get loaded in your project’s reference as shown below.
Reference the XRM SDK
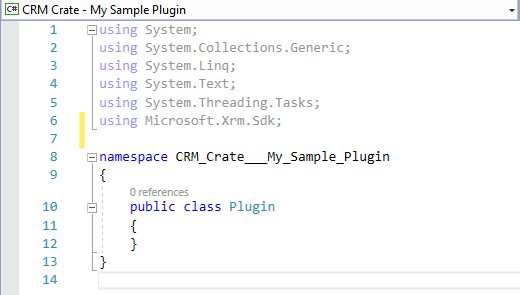
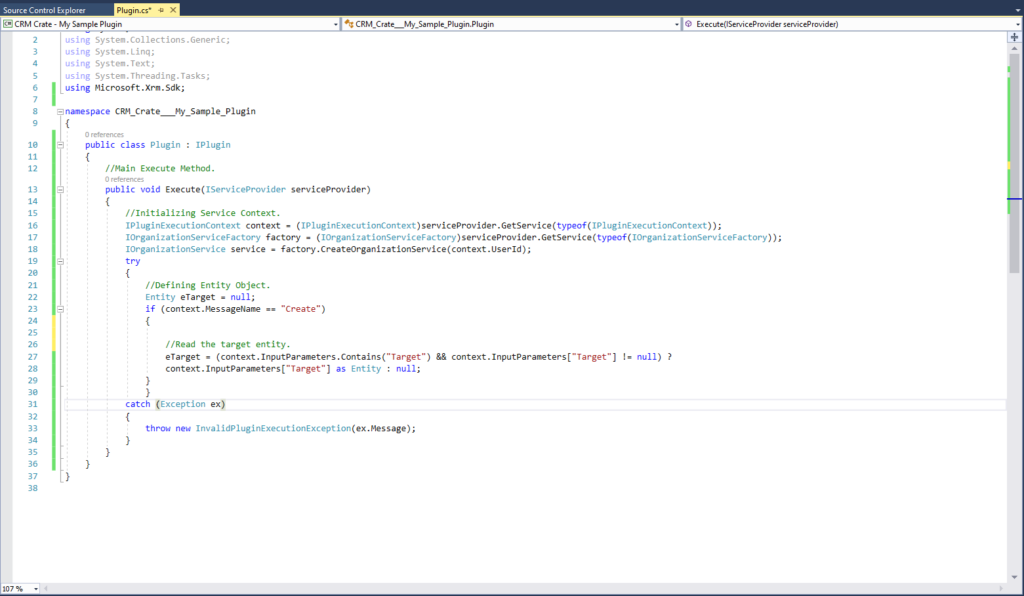
Now we have our project ready, lets start writing the code. As a first step, insert the Using statement referencing the XRM SDK.
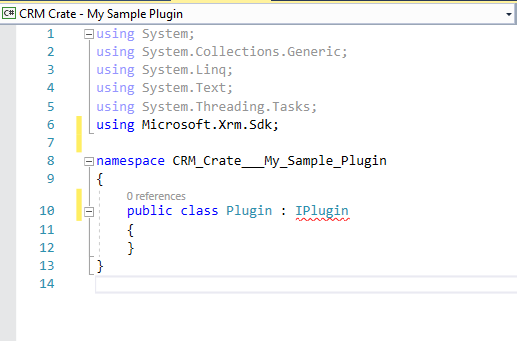
Implement IPlugin interface and create a execute method within the class.
Lets now create a IPlugin interface to access and consume various components provided by Microsoft.
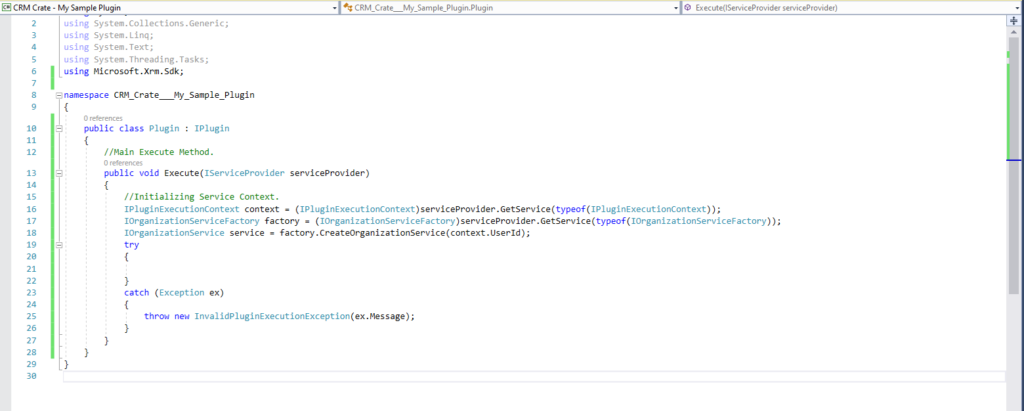
Now we will create an Execute method within the class as shown below.
Below are the details of the different interfaces which are used in the above code.
- IPluginExecutionContext Interface : Defines the contextual information passed to a plug-in at run-time. Contains information that describes the run-time environment that the plug-in is executing in, information related to the execution pipeline, and entity business information.
- IOrganizationServiceFactory Interface : Creates object of IOrganizationServiceFactory using the IServiceProvider object.
- IOrganizationService Interface : Provides programmatic access to the metadata and data for an organization.
Retrieving Target entity
We will need the target entity’s object from the context object’s InputParameters collection. This Entity class object refers to the Contact entity record on which our plugin would be registered. In simple words, the Target is the entity record from which our plugin is triggered. For example, if the plugin is registered on “Create” message of Account entity, then the target will be the entity object containing metadata of Account record which is been created. We will be using the target to retrieve the data from the record for which the plugin is triggered. Use the below code to read the target.
Implement necessary logic
Now we have created the main structure of the plugin, further we will require to write our own custom logic which we want to perform as part of the plugin.
In our case, we will trigger our plugin on creation of Account record. Once the Account is created, we will automatically create a new Contact record. Our newly created Contact record will have the name of parent Account in its field “Account Name”.
Observe the below code which will be used to create a new Contact once a new Account is created.
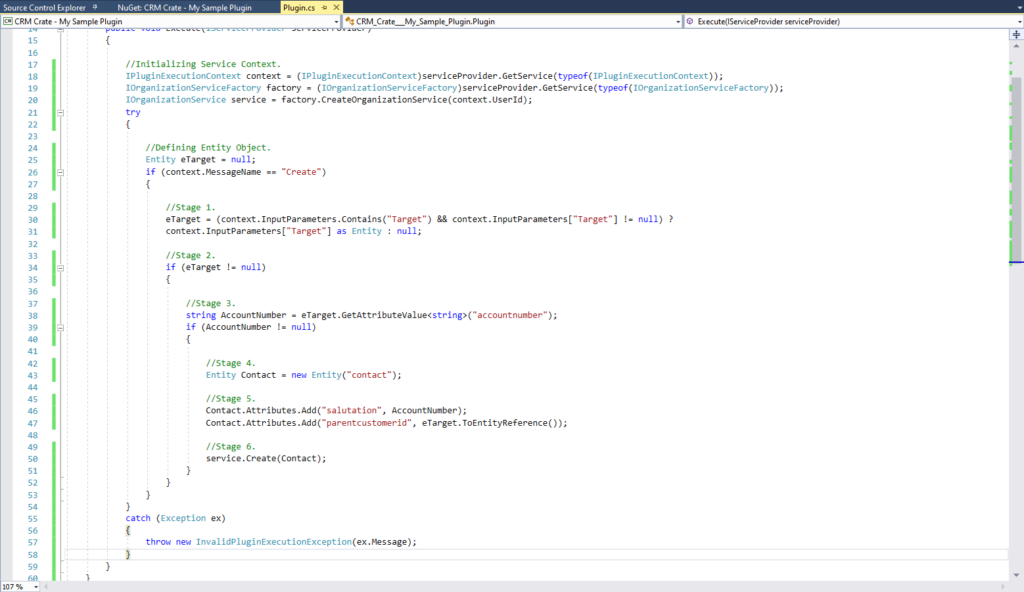
Below is the explanation of the above code snippet.
- Stage 1 :- Retrieved target entity in variable “eTarget”.
- Stage 2: – Trigger the logic if the target is not null.
- Stage 3 :- Reading value of field “Account Number” from the target Account record.
- Stage 4 :- Created a new entity object of Contact entity.
- Stage 5 :- Added value in field “Salutation” and “Parent Customer Id”. The above retrieved value from Stage 3 (Account Number) is inserted in Contact’s field “Salutation”. The Contact’s field “Parent Customer Id” is a lookup field to Account, therefore we inserted the current target Account record in the Contact’s lookup field.
- Stage 6 : – In the above stage, we provided the values for two of the Contact records attribute. Now we will create a Contact record with these two values. For creating a record, we will use the above created CRM services and send a create request by passing the same Contact entity object which we used in Stage 4 and Stage 5.
Once your code is ready, re-build the complete project.
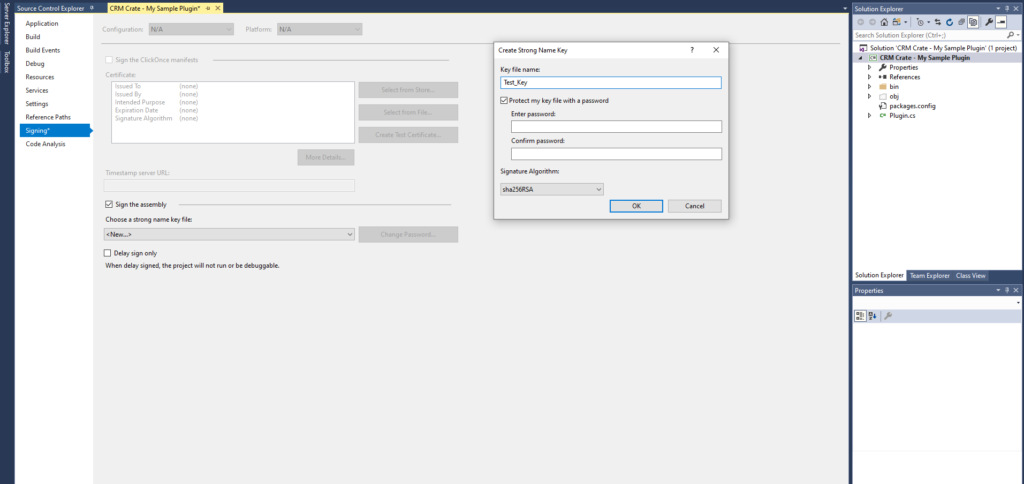
Now, we will have to create a signing key before we register the plugin. For that, right click on Project >> Properties >> Signing >> Check the “Sign the assembly” >> New >> Give any name for the key and click on save.
Register the plugin
As we have created our plugin, now its time to deploy it to the CRM by registering it. We have to deploy the plugin using the Microsoft’s “Plugin Registration Tool. If your do not have Plugin Registration Tool then download it from the given link : DOWNLOAD PLUGIN REGISTRATION TOOL.
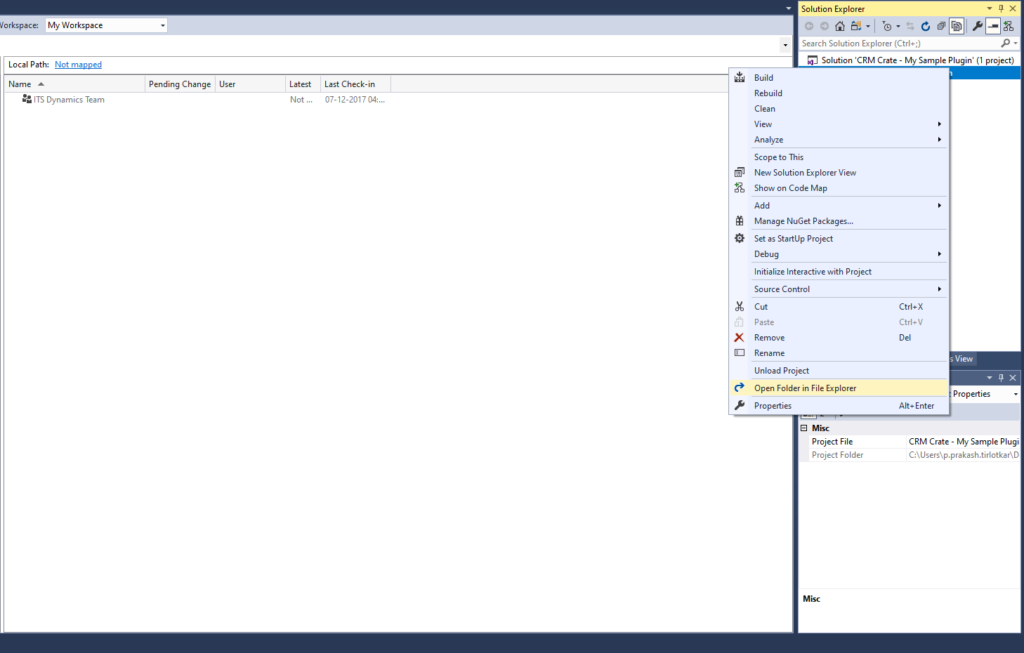
Now coming back to the visual studios, right click on your project and click on Open Folder in File Explorer.
Once your local project folder file gets open, click on Bin >> Debug . Copy the local file path.
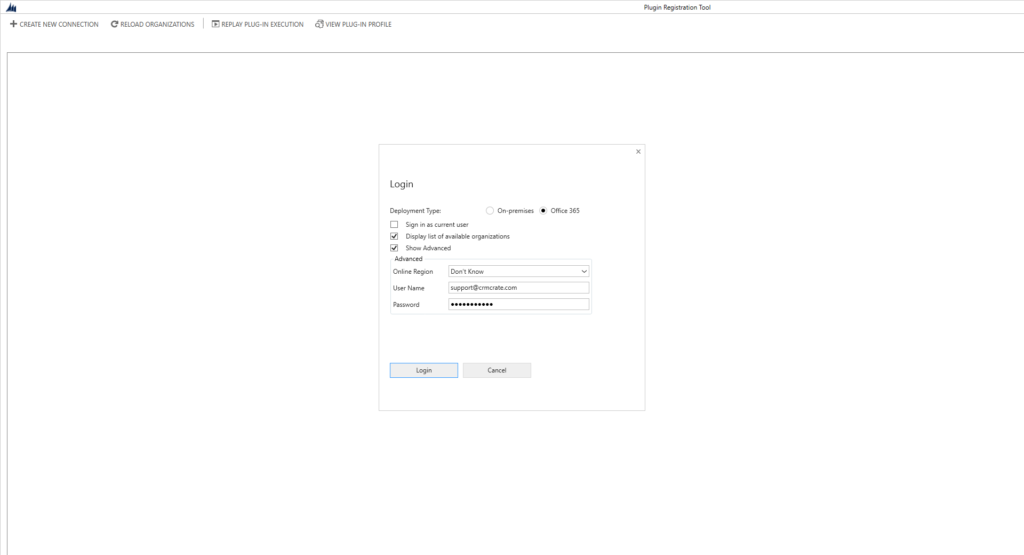
Open the Plugin Registration Tool and connect it to your CRM instance.
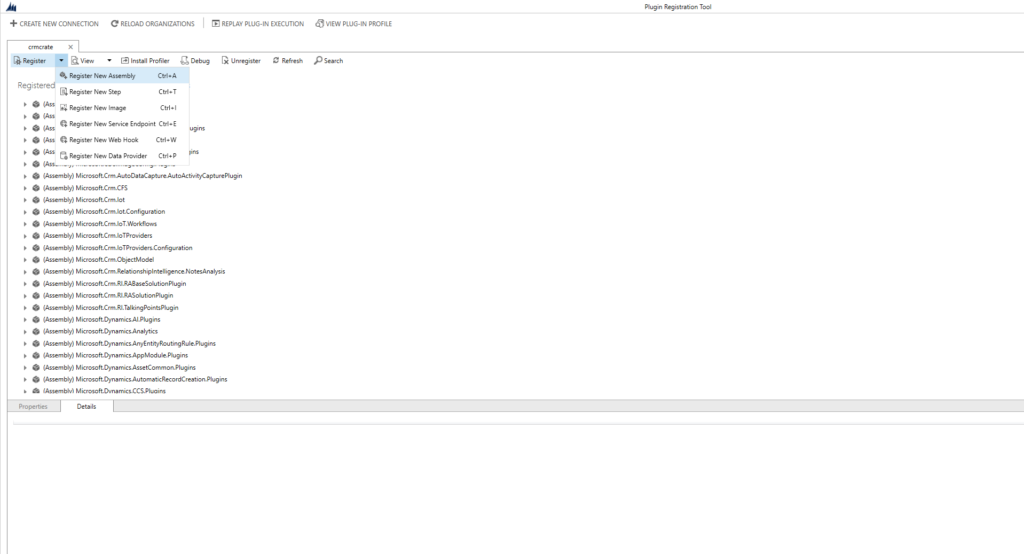
Once connected to CRM, the tool will display all the existing plugin assemblies within the CRM (Both Microsoft Out-of-The-Box and Customer Assemblies).
Now lets create a new plugin assembly for our newly created plugin. Click on Register >> Register New Assembly.
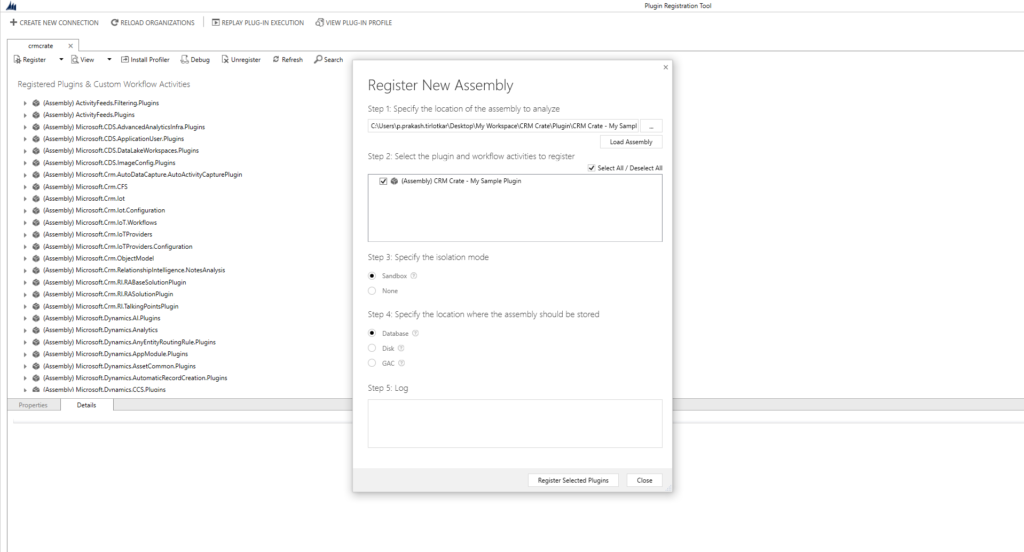
Now the tool should populate the Registration window. In step 1 >> Select the plugin dll from the local path which we copied above.
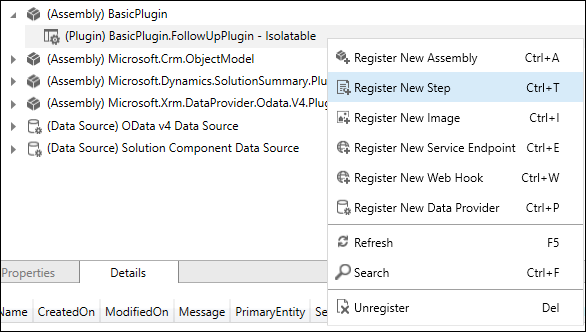
Once you register the plugin, its time to triggering your plugin on the dedicate entity. In our case we will trigger the plugin on creation of Account record.
Therefore, right click on the newly registered plugin >> Register New Step.
In the Step window, select message as “Create”, primary entity as “Account” and Event Pipeline Stage as “PostOperation”. Finally, click on Register.

Now, your new plugin is deployed and register in your CRM instance. To validate the plugin, once you create a new Account record a new Contact record will get auto-created.


