
We will learn to open a Canvas App on a ribbon button click in Dynamics 365. Before we start, make sure to subscribe to CRM Crate so that you stay up-to-date in the field of Dynamics 365 CRM.
Why do we need to open a Canvas App in Dynamics?
Consider a scenario where we need to open a canvas application during the “OnClick” event of form’s ribbon button. In such scenario, we can open and render the Canvas Application in a HTML iframe which will appear on the same form.
Using navigateTo(Client API) for calling the HTML web resource.
navigateTo (Client API reference)
Xrm.Navigation.navigateTo(pageInput,navigationOptions).then(successCallback,errorCallback);
JavaScript snippet for calling web resource using navigateTo API –
//CRM Crate - JavaScript Snippet.
function callMethod (executionContext) {

//Initiating Web Resource Parameter.
var pageInput = {
    pageType: "webresource",
    webresourceName: "cc_html"
};

//Declaring HTML Page Dimensions.
var navigationOptions = {
    target: 2,
    width: 1050, // value specified in pixel
    height: 900, // value specified in pixel
    position: 1
};

//Using navigateTo Client API.
Xrm.Navigation.navigateTo(pageInput, navigationOptions).then(
    function success() {
            // Run code on success
    },
    function error() {
            // Handle errors
    }
);
}
Create a HTML web resource and embedd the Canvas Application.
Step 1 – Copy the default Uniform Resource Identifier (URI).
If you have an app you want to embed, the first step is to set parameters for the Uniform Resource Identifier (URI), so that the iframe knows where to find the app.
Below is the default format of URI –
https://apps.powerapps.com/play/[AppID]?source=iframeThe only thing you have to do is change the ID of your app for [AppID] in the URI (including ‘[‘ & ‘]’).
Below is the detailed list of URI parameters.
- [appID] – It provides the ID of the app to run.
- tenantid – is an optional parameter to support guest access and determines which tenant to open the app from.
- screenColor – is used to provide a better app loading experience for your users. This parameter is in the format RGBA (red value, green value, blue value, alpha) and controls the screen color while the app loads. It is best to set it to the same color as your app’s icon.
- source – does not affect the app, but we suggest you add a descriptive name to refer to the source of the embedding.
- Lastly, you can add any custom parameters you want using the Param() function, and those values can be consumed by your app. They are added to the end of the URI, such as
[AppID]?source=iframe¶m1=value1¶m2=value2. These parameters are read only during launch of the app. If you need to change them, you must relaunch the app. Note that only the first item after [appid] should have a “?”; after that use the “&” as illustrated here.
Step 2 – Get App ID from your Canvas App
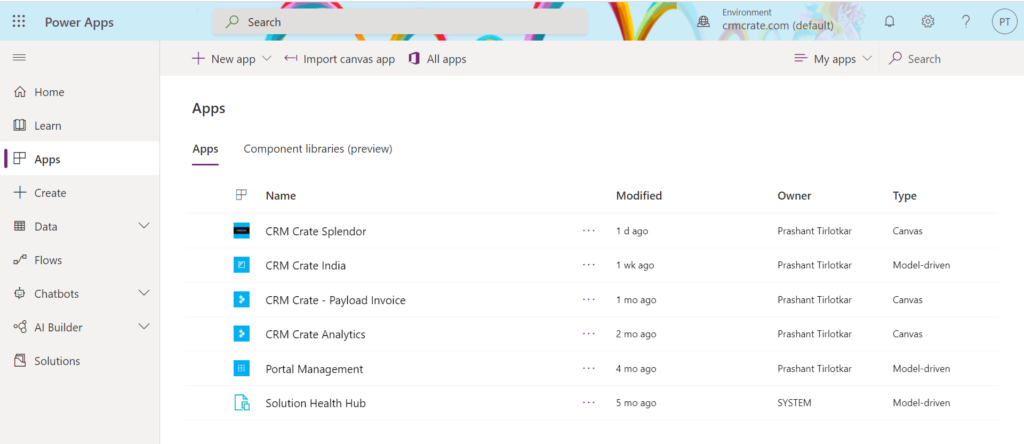
- Navigate to the Power App studio and open a Canvas App as shown below.
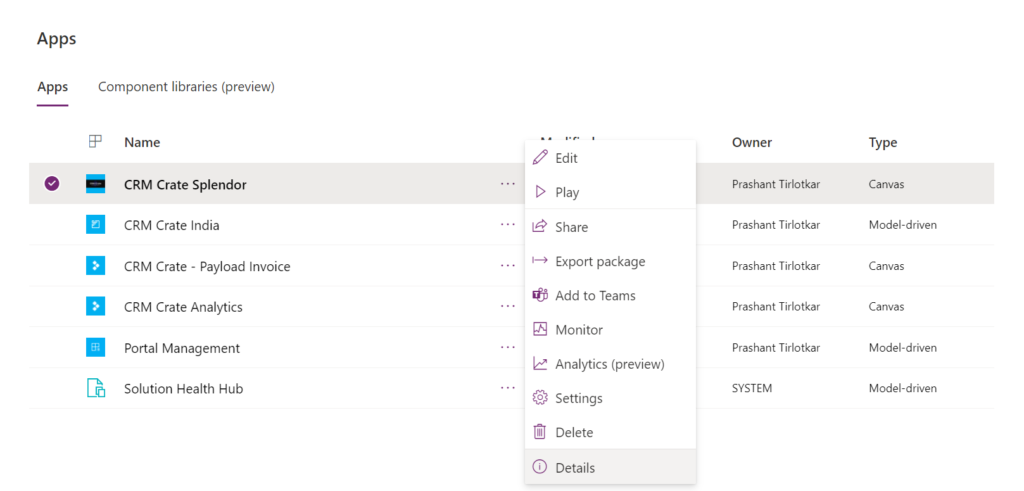
- Select the Canvas Application of your choice and navigate to the details as shown below.
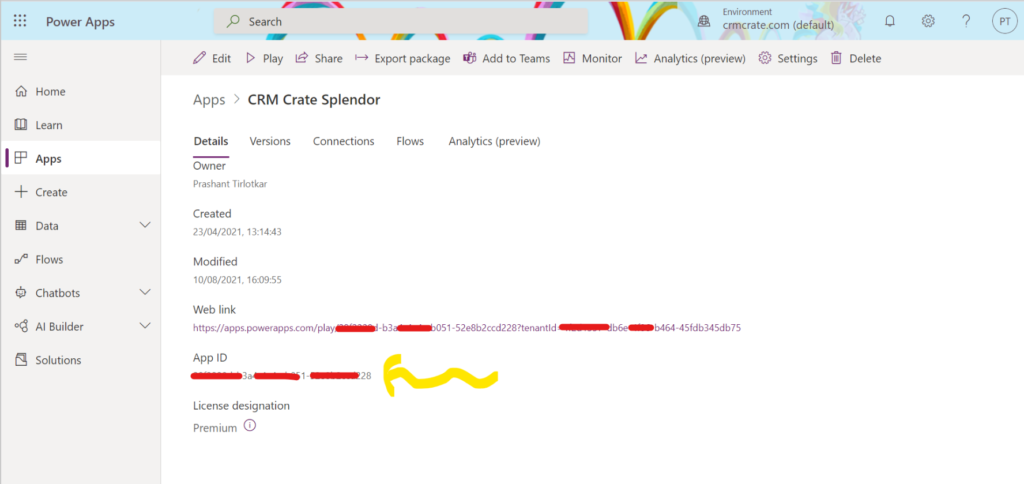
- Copy the App ID from the detail section and replace it in the above created URI.
Substitute the [AppID] value in the URI.
https://apps.powerapps.com/play/76897698-91a8-b2de-756e-fe2774f114f2?source=iframeStep 3 – Embed your app in a website or HTML Page
Embedding your app is now as simple as adding the iframe to the HTML code.
<iframe width="[W]" height="[H]" src="https://apps.powerapps.com/play/[AppID]?source=website&screenColor=rgba(165,34,55,1)" allow="geolocation; microphone; camera"/>Specify values for the iframe width and height, and substitute the ID of your app for [AppID].
Below is the final HTML code with the embedded Canvas App iframe.
<html><head><meta></head><body onfocusout="parent.setEmailRange();" style="overflow-wrap: break-word;">
<iframe width="1000" height="625" src="https://apps.powerapps.com/play/76897698-91a8-b2de-756e-fe2774f114f2?source=website&screenColor=rgba(165,34,55,1)" allow="geolocation; microphone; camera">
</body>
</html></iframe></body></html>Configure the web resource in Dynamics 365 and test the Canvas Application.
Call the above JavaScript function during the ribbon button’s “OnClick” event. Deploy the above HTML code as a HTML web resource in Dynamics 365.
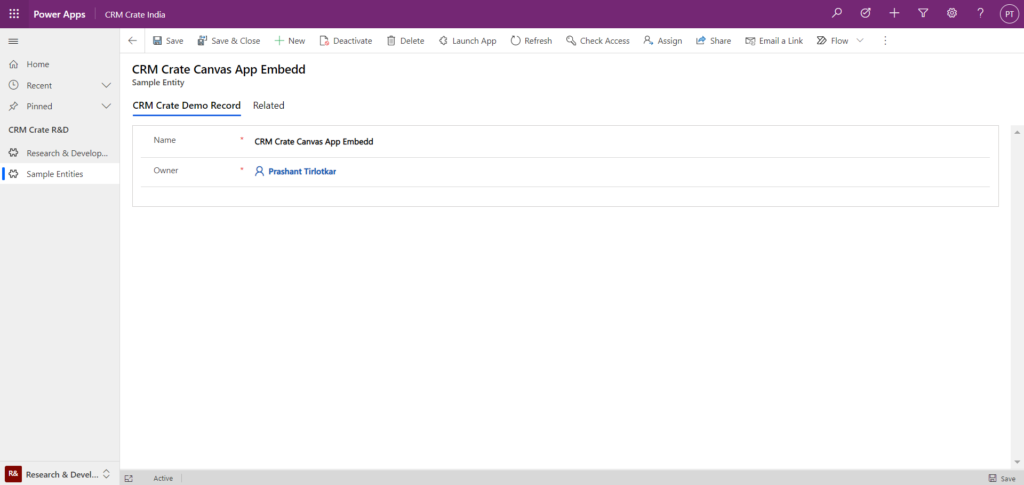
Below is the outcome of the above configuration where the Canvas App is opened in the new HTML model page.
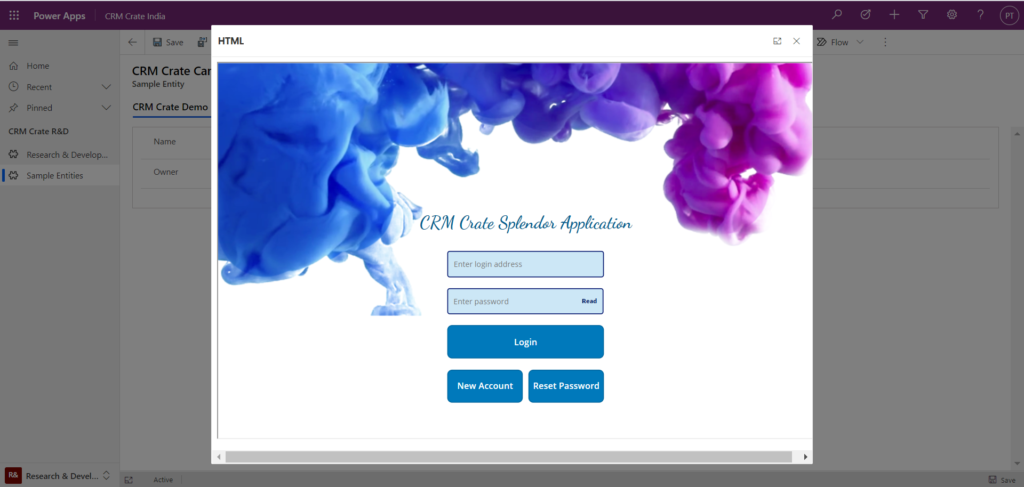
Thus we learned to integrate and open a Canvas App on a ribbon button click in Dynamics 365


