
In this course, we will learn to call a Power Automate flow from the JavaScript within the Dynamics 365 CRM. Before we start, make sure to subscribe to CRM Crate so that you can stay up-to-date in the field of Microsoft Dynamics 365 CRM.
Why do we need to call the Power Automate flow from the JavaScript?
There are multiple ways to call a Power Automate flow from the Dynamics 365 CRM (Model Drive App) and one of the used method is to call a flow using the JavaScript. There can be multiple business scenarios where we must need to call a flow to send request and receive response during the client side JavaScript execution runtime. For such scenarios, we can use the below method of triggering / calling the flow.
Step 1 – Create a Power Automate flow with a HTTP trigger
- We need to create a flow which would be triggered after hitting the HTTP request.
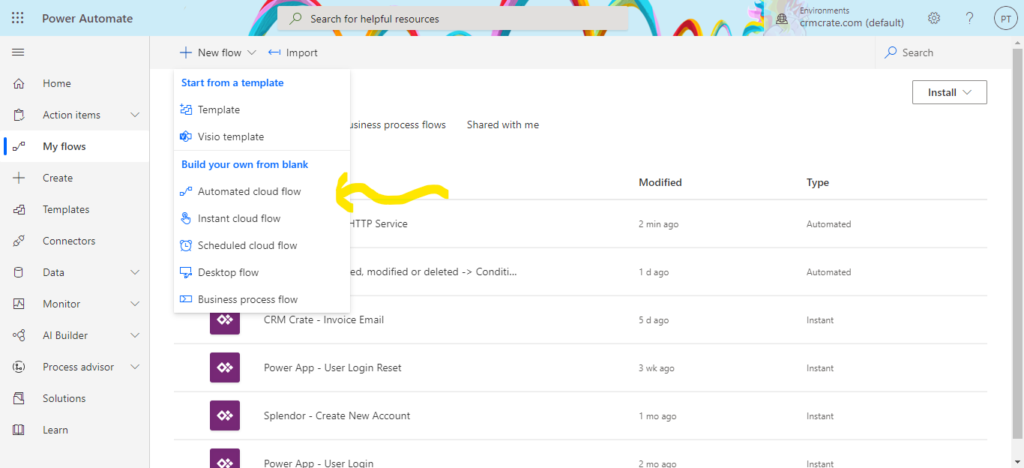
- Open the Power Automate studio and create a blank flow (Automated Cloud Flow) as shown below.
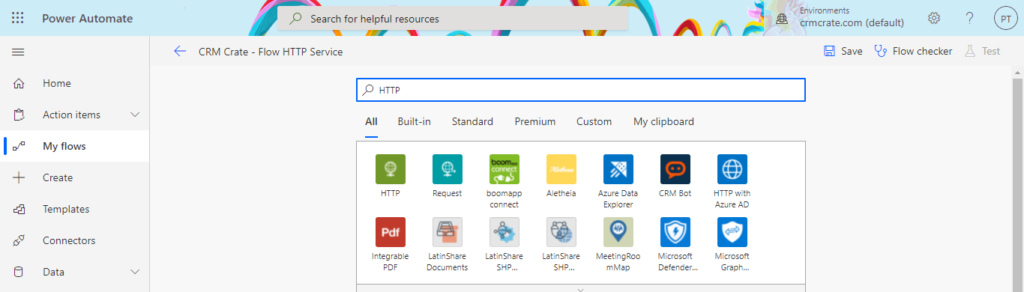
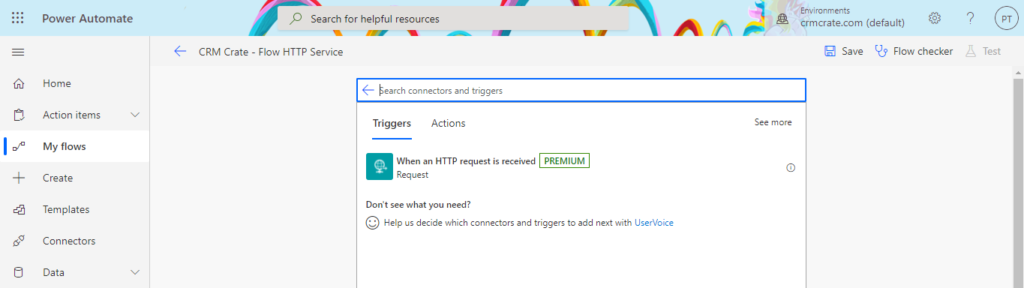
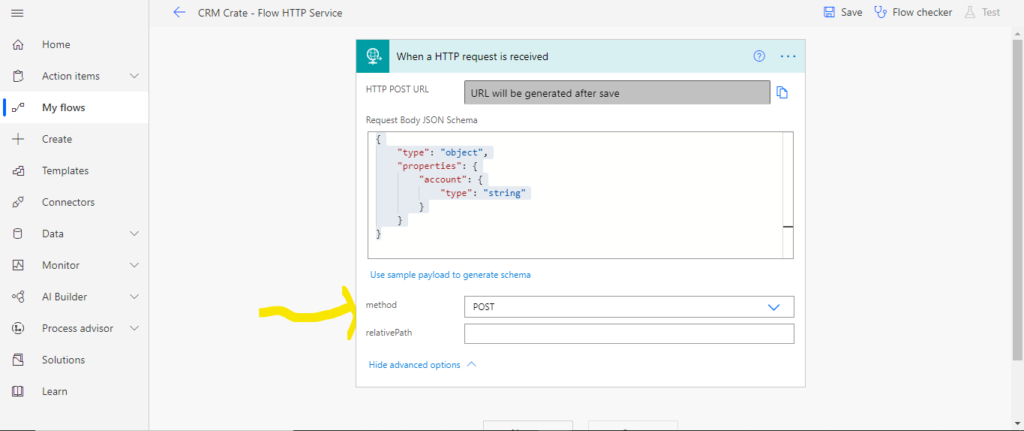
- Search for the trigger “HTTP” and select the “Request” as shown below.
- Now we will have to add HTTP body JSON schema so that our HTTP request can receive the input parameters. For our scenario, we will use a single parameter called “Account” of data type “String” and create a JSON structure the same as shown below.
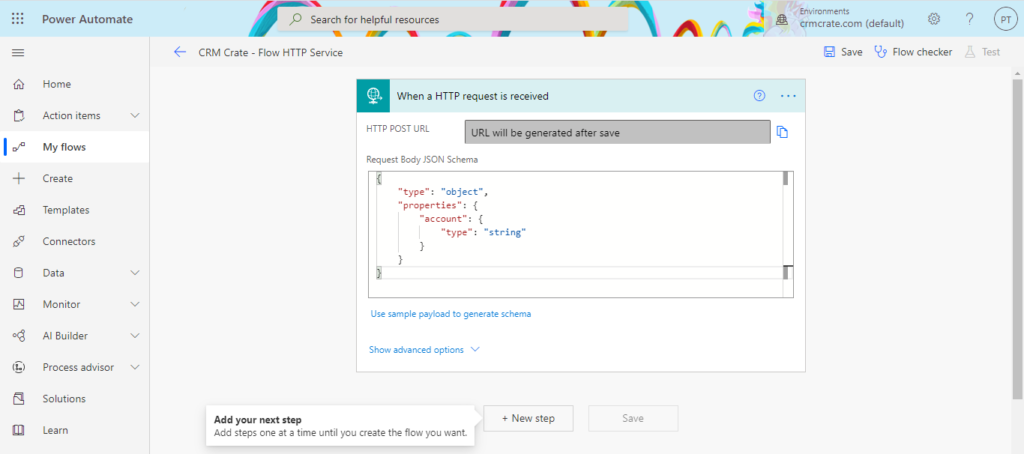
{
    "type": "object",
    "properties": {
        "account": {
            "type": "string"
        }
    }
}
- In the HTTP trigger, click on “Advance Options” and select the method as “POST”.
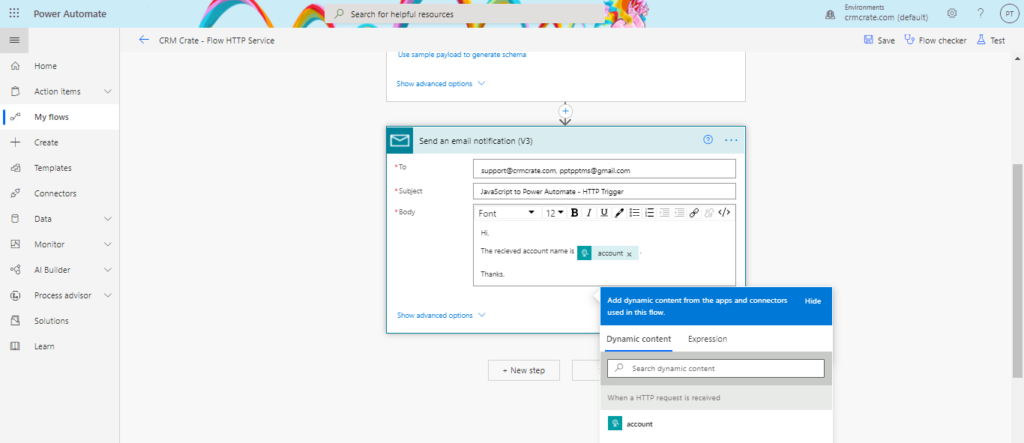
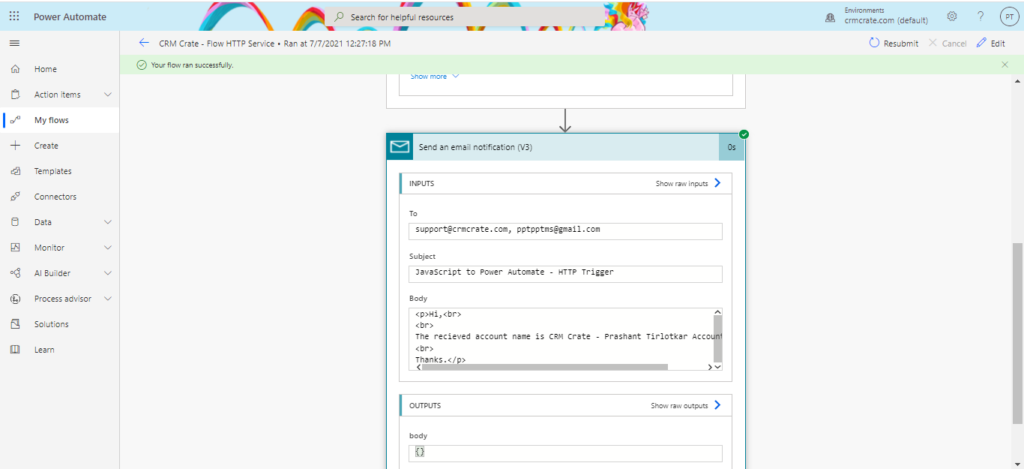
- We need to add an Action to the flow in-order to generate the HTTP request URL. For our scenario, we will add an email action and pass the above used parameter “Account” within the same email action.
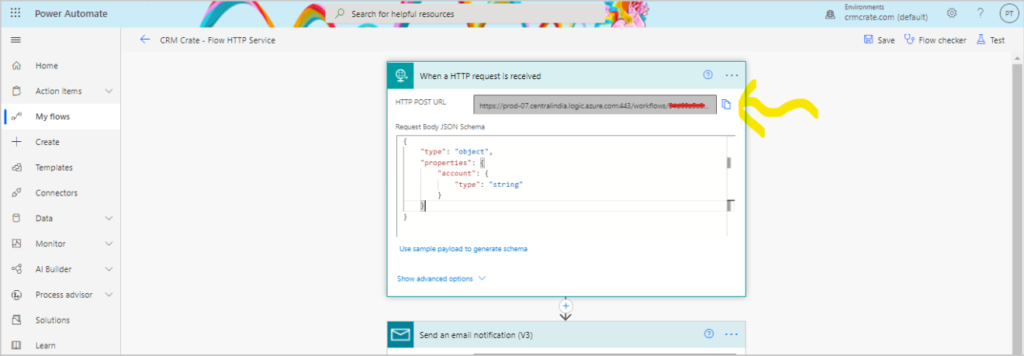
- Save the flow and navigate back to the HTTP trigger. This will generate the HTTP URL as shown below. Copy the HTTP URL so that we can utilize it in our JavaScript code.
Step 2 – Create a JavaScript snippet and configure it in the Dynamics 365 CRM
For our scenario, we will trigger our JavaScript during the field OnChange event.
- We will utilize the XMLHttpRequest and create the JavaScript snippet to call the above created Power Automate flow.
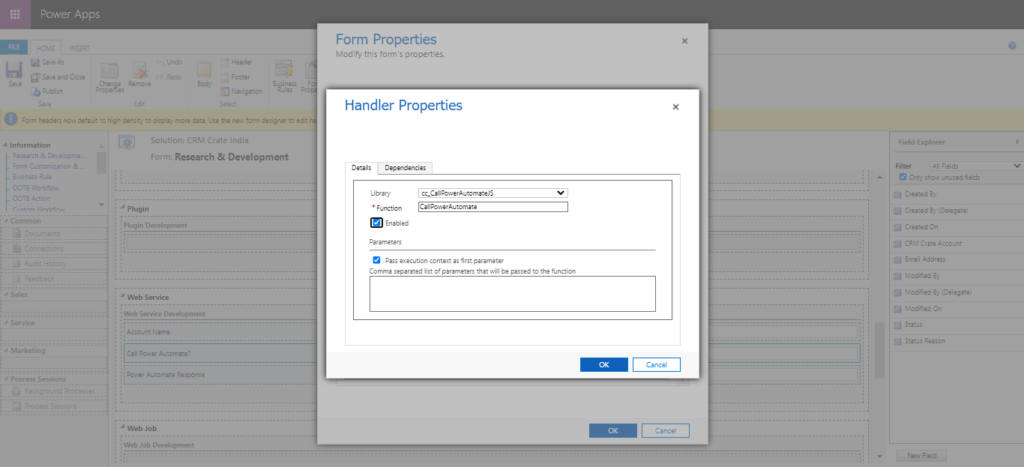
function CRMCrate_CallPowerAutomate (executionContext) {

var formContext = executionContext.getFormContext();

//Read Value From The Field.
var account = formContext.getAttribute("FieldSchemaName").getValue();

if (account != null) {
  var req = new XMLHttpRequest();

  //Power Automate HTTP URL.
  var url = "<Paste Your Flow URL>";

  req.open("POST", url, true);
  req.setRequestHeader('Content-Type', 'application/json');
  req.send(JSON.stringify({
    "account": account}));
 }
}
- We will now execute the above JavaScript during the OnChange event of field “Call Power Automate?” as shown below.
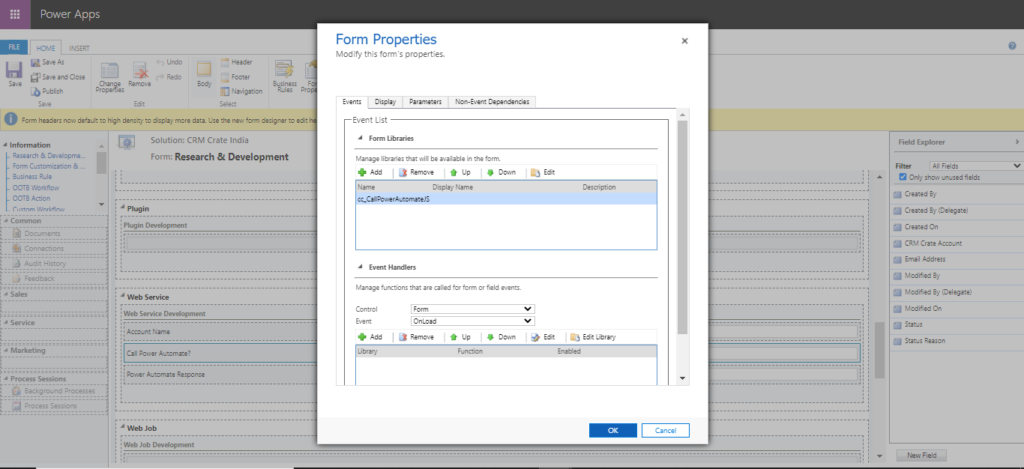
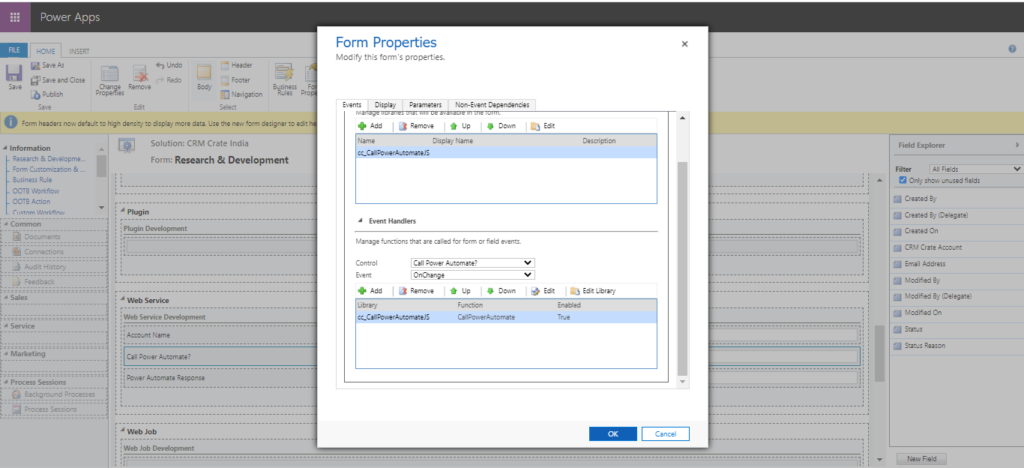
- Save the form and click on the “Publish” button.
Step 3- Validate the flow execution in real-time.
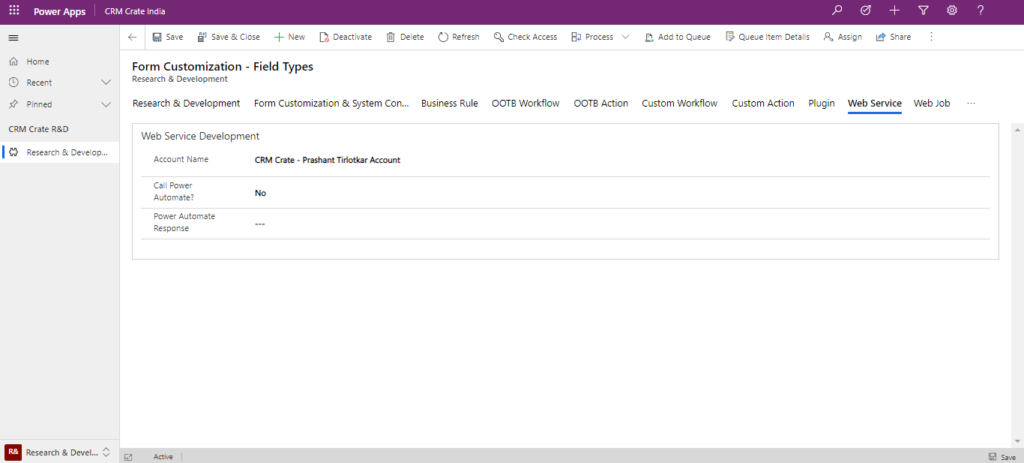
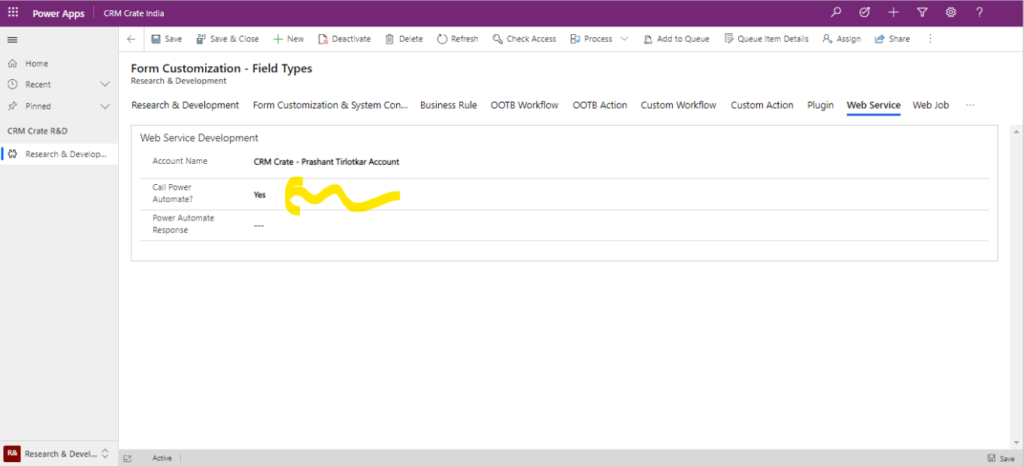
- Navigate to the Dynamics 365 CRM entity form and change the value of field “Call Power Automate?” in-order to trigger the Power Automate flow. We will change the value of field “Call Power Automate?” from No to Yes as shown below.
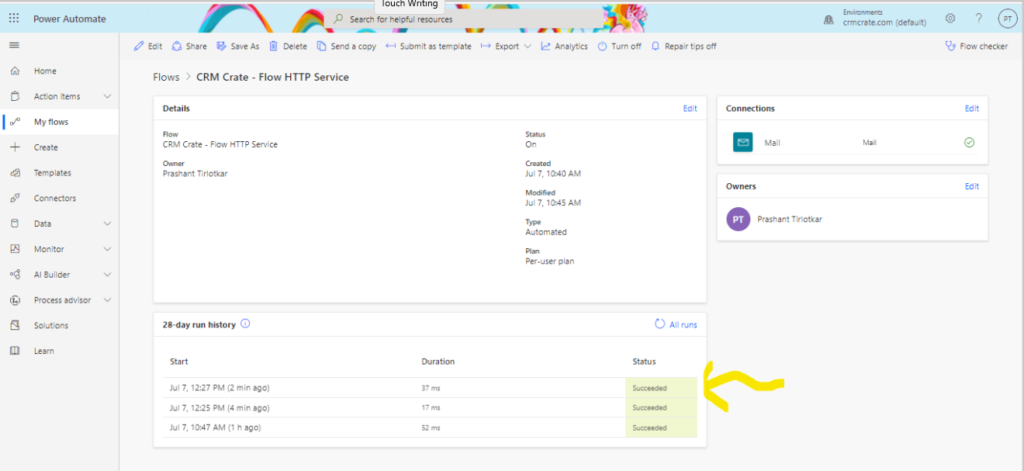
- Navigate to the Power Automate studio and open the previously created flow. Click on the execution history and confirm whether the Power Automate flow has been triggered as expected.

Thus we learned to call / trigger the Power Automate flow from the JavaScript within the Dynamics 365 CRM.


