
In this course, we will learn to create an approval process using Power Automate. Before we start, make sure to subscribe to CRM Crate in-order to stay up-to-date in the field of Microsoft Dynamics 365 CRM.
Why do we need to build an approval process using Power Automate?
Every business requires its own unique approval system, especially in Dynamics CRM we need to use the approval process by requesting an approval from the system user and updating the records in CDS as per the needs. This process of capturing and responding an approval can be easily achievable in a no-code approach using the Power Automate.

Overview of building an approval process using the Power Automate.
- Build a Power Automate flow
This flow should get trigger on an update event of an entity record.
- Approve the requested approval in the Power Automate Approval Center
We can approve the dedicated approval in the Approval Center section of the Power Automate.
Step 1 – Build a Power Automate flow and trigger it on dataverse record update.
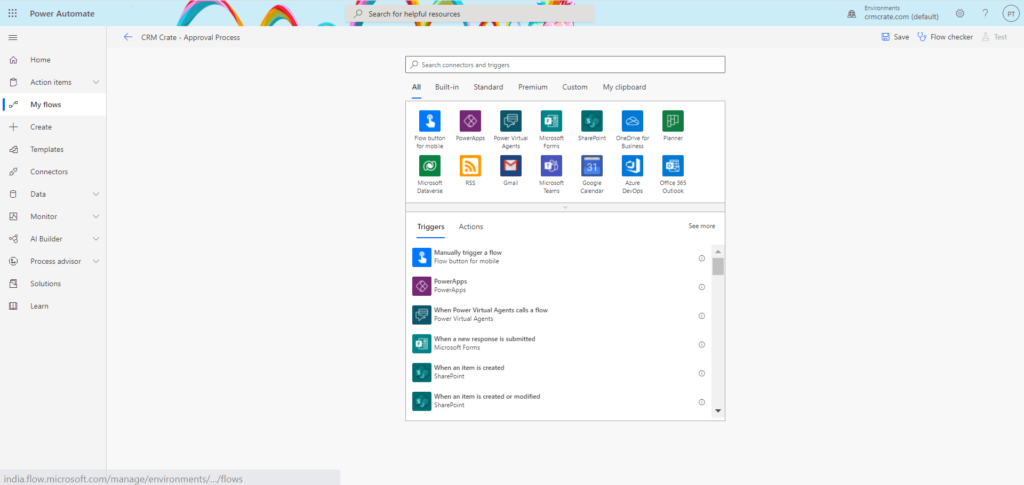
- Open the Power Automate studio and create a new blank flow as shown below.
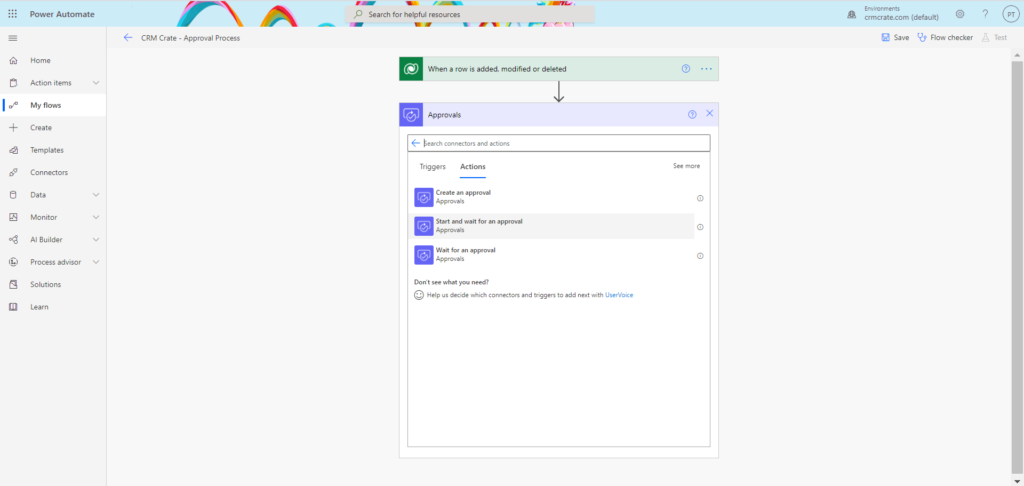
- Use the dataverse connector for triggering the field on update of the dataverse entity record. In our case,we will trigger our flow on update of “Research & Development” entity record.

- Now search for the action called “Approvals” and select “Start and wait for an approval” as shown below.
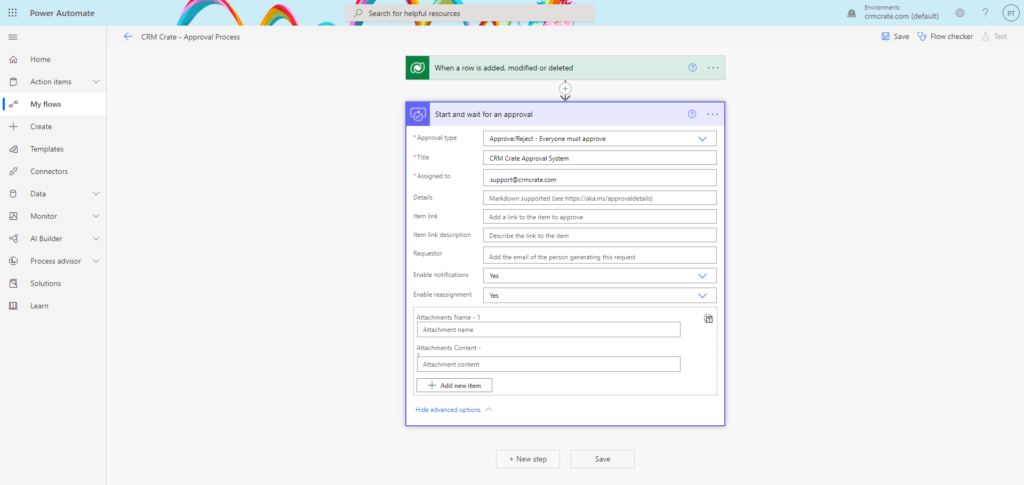
- Select the below parameters for this newly used action –
| Parameter Name | Parameter Value |
| Approval Type | Approve/Reject – Everyone must approve |
| Title | Any title as per your need |
| Assign to | Email address of the system user who needs to approve the created request |
| Enable notification | Yes |
| Enable reassignment | Yes |
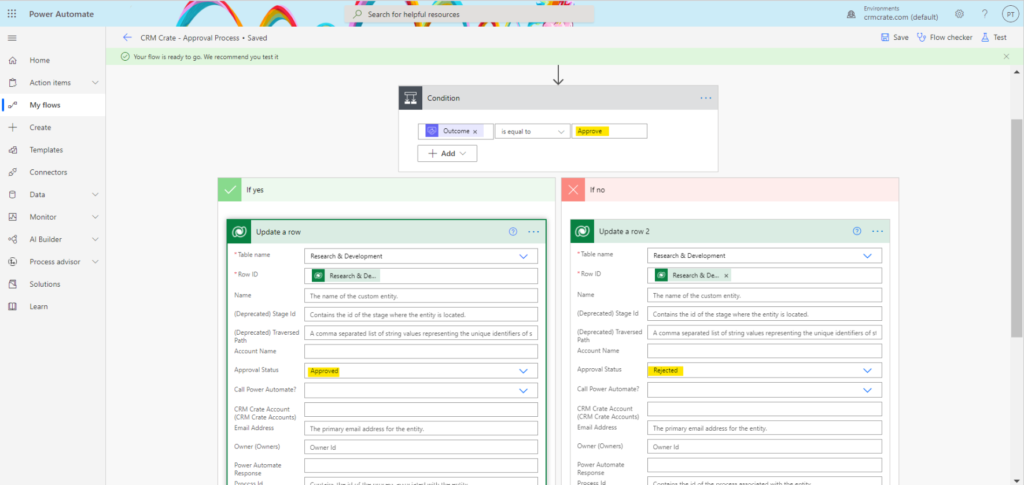
- Now, lets use the condition operator to do the dedicate operation depending upon the response from the above created Approval action. For example, if the approval response is “Yes”, then we will update the entity field value to “Approve” and if the approval response is “No” then the we will update the entity field to “Rejected”.
- The approval action will give the output called “Outcome”. Use this dynamic content output “Outcome” in the below shown condition operation.
- Save the above created Power Automate flow.
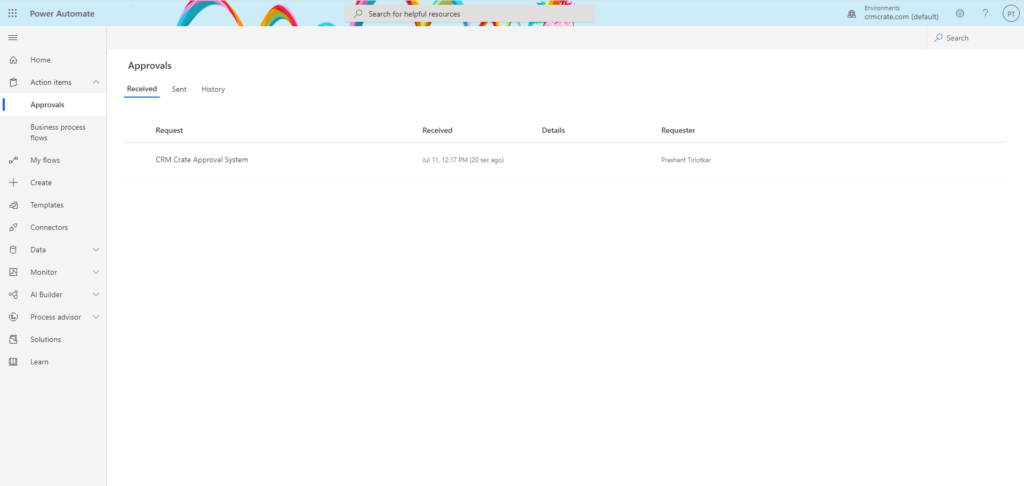
Step 2 – Approve the requested approval in the Power Automate Approval Center
- Let us know test our above created Power Automate flow. Navigate to the Dynamics 365 CRM and trigger the flow by updating the record. In our scenario, we will change the value of field “Request Approval” from No to Yes.

- Navigate to Power Automate’s Approval Center as shown below and veridy whether the above triggered approval has been received in the approval center.
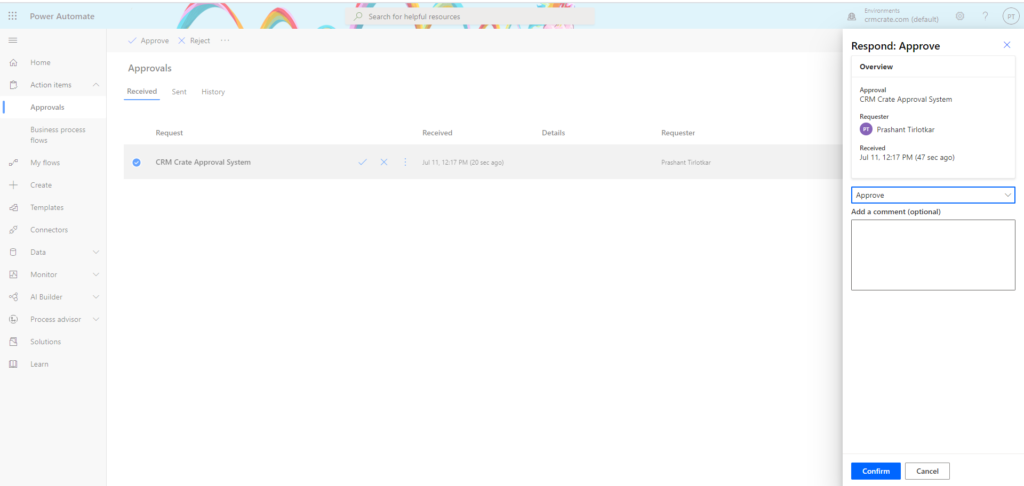
- Open the received approval and select the approval response as “Approve >> Click on confirm. Note: – Only the configured approval recipient can respond to this particular approval process.
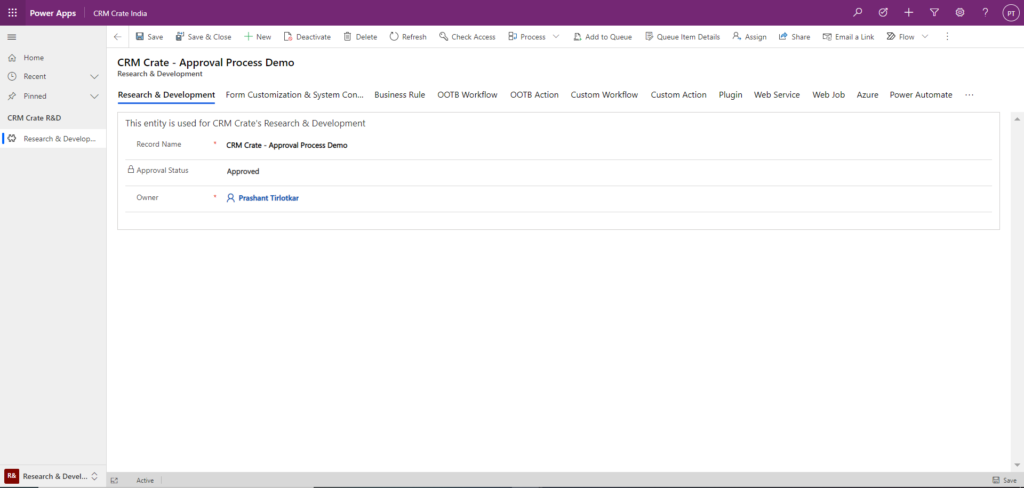
- Navigate back to the Dynamics 365 record and verify whether the “Approval Status” is automatically updated to “Approved”.
Thus we learned to implement the Approval Process using Power Automate in Dynamics 365 CRM.


