
We will learn to understand and create a custom connector in Power Automate. Before we start, make sure to subscribe to CRM Crate so that you stay up-to-date in field of Dynamics 365.

What are connectors in Power Automate?
A connector is a wrapper or a proxy around an Web API that allows the downstream services to talk to Microsoft Power Automate, Microsoft Power Apps, and Azure Logic Apps. Connector provides a way for users to connect their business applications and leverage a set of pre-built actions and triggers to build their apps and workflows.
Each connector in Power Automate offers a set of operations defined as triggers and actions. Once you connect to the underlying service, these operations can be easily used within your apps and workflows.
Actions – Actions are changes directed by a user. For example, you would use an action to look up, write, update, or delete data in a SQL database. All actions directly map to operations defined in the swagger.
Triggers – Several connectors provide triggers that can notify your app when specific events occur. For example, a Power Automate Flow with a trigger “SharePoint List” will get triggered as soon as a new row is added in the underlying SharePoint list.
What are Custom Connectors & why do we need them in Power Automate?
A custom connector is also wrapper around REST API that allows Power Automate to communicate with the REST or SOAP API. These Web APIs can either be private or public. Microsoft offers on-premises data connectivity through an on-premises data gateway for private APIs. The gateways are supported by Logic Apps, Power Automate, and PowerApps.
Microsoft provides thousands of built-in connectors but there can be a scenario where we need to perform a dedicated set of operations for a specific downstream application which does not have its custom connector in Power Automate. In such cases we can create our own custom connector for communicating with our downstream applications using API calls.
Prerequisites for creating Custom Connectors –
Below are the key prerequisites for create a custom connector from scratch.
- An existing API Service.
- Power Automate License.
Create a new Custom Connector from scratch –
Follow the below steps to create a new custom connector from scratch.
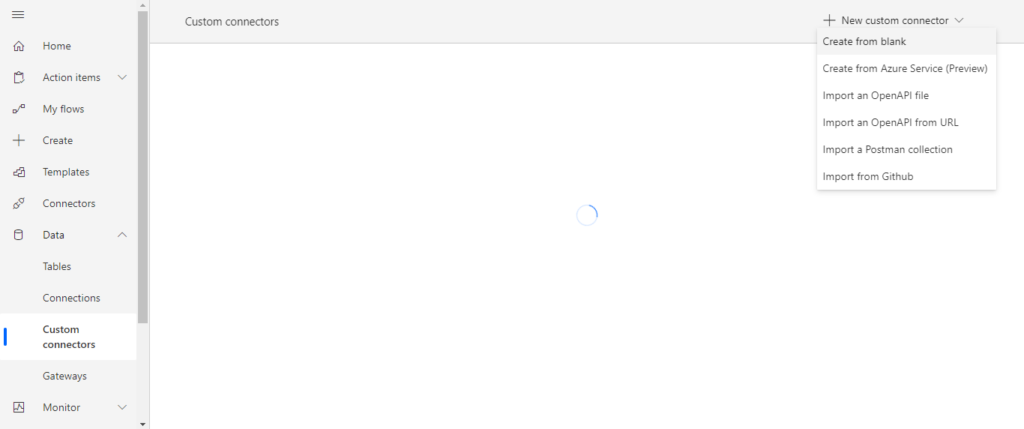
Step 1 – Create a custom connector from blank.
- Open the Power Automate studio and navigate to Data >> Custom Connectors. Click on +New Custom Connector and select “Create from blank”.
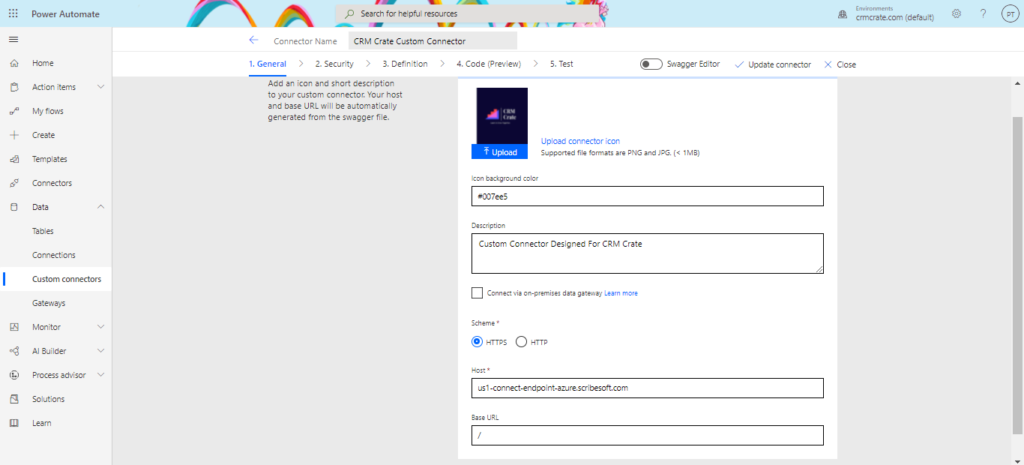
Step 2 – Custom connector’s general information.
- Fill out the basic information such as Custom Connector logo, icon background color and description as shown below.
- Enter the host address of your API service. In our case, we are using our own dedicated API service which is been hosted on Azure.
- Select the scheme as HTTPS or HTTP as per the nature of API service.
- Keep the base URL as “/” .
- Note: – Click here to learn about the On-Premise Gateway checkbox.
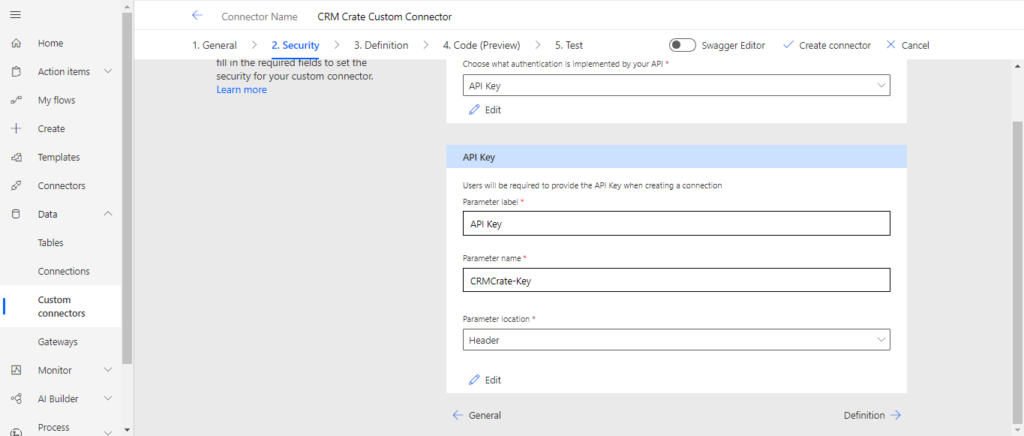
Step 3 – Specify the authentication type of your custom connector.
- There are several options available for authentication in custom connectors. We will use the API Key based authentication in our demonstration.
- We need to declare the parameter scheme for the authentication. Below is the structure followed in our demonstration.
- Parameter Label = API Key
- Parameter name = CRMCrate-Key
- Parameter location = Header
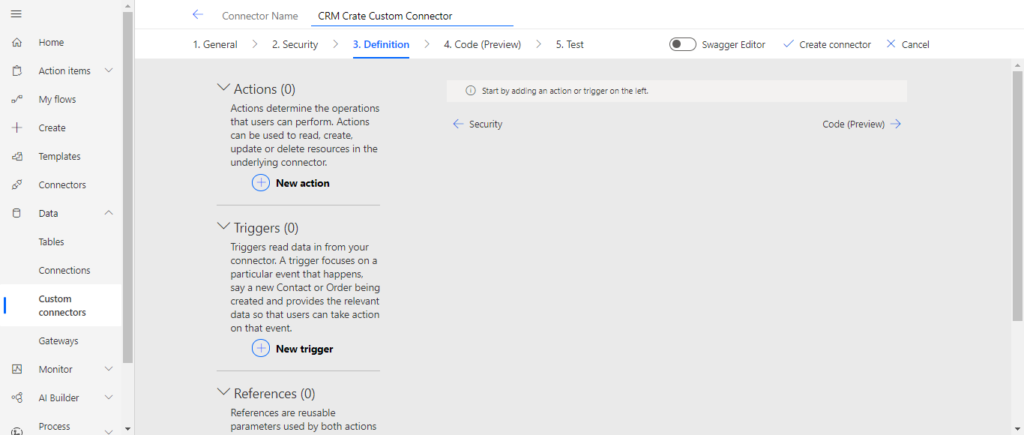
Step 4 – Create a definition for the custom connector.
- The custom connector built-in wizard provides you many options for defining how your connector functions, and how it’s exposed in the Power Automate. The connector definition covers two aspects “Triggers” and “Actions” as explained above.
- For our demonstration, we will create a new action for our custom connector. This action will take two parameters in its input, one will be the Access Token and other would be an Input Text. Our custom API is been designed to perform the below actions.
- Receive request with a JSON input of type string.
- Process an input and validate if the provided input is an email address or not. If an input is an email address then the service will return “true” and if no then the service will return “false”.
- In the Definition tab, navigate to the section called “Actions” and click on new Actions as shown below.
- In the General area, update the generic fields such as Summary, Description, Operation ID and Visibility.
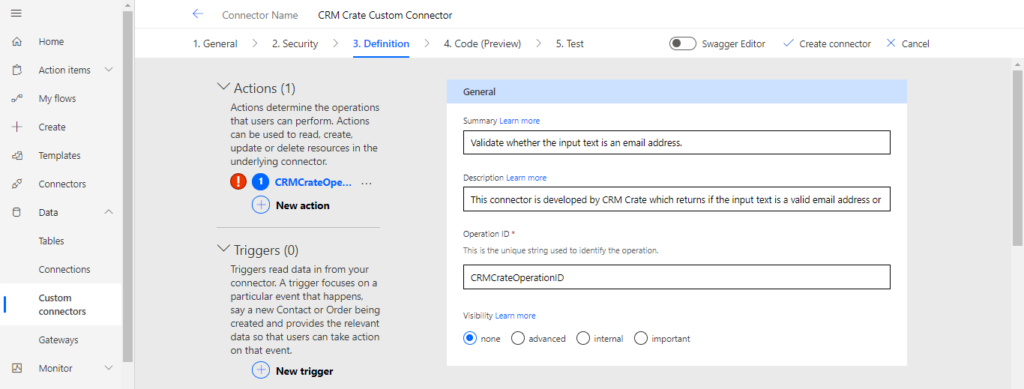
- Click here to learn more above Visibility.
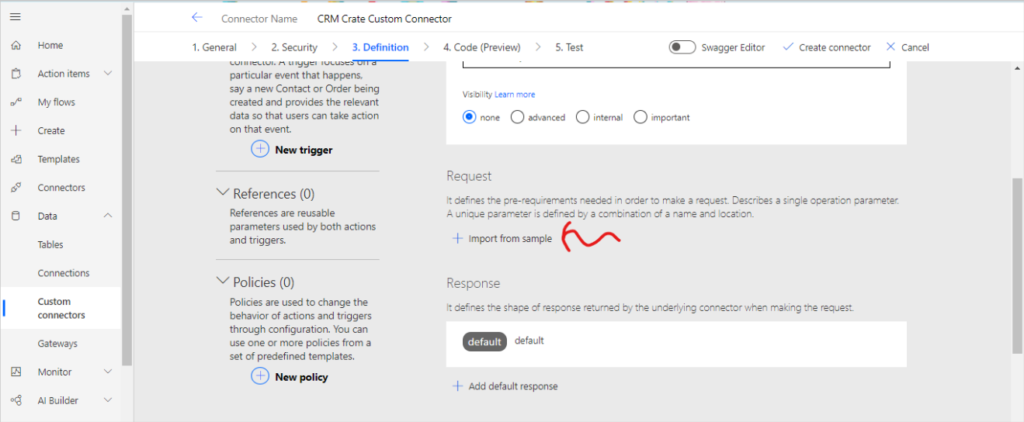
- Now, scroll down to the Request area and click on “Import From Sample”.
- Here we have to configure the request according to the nature of our API service. In our case, we will configure the request with the below details.
- Verb (Call) = POST
- URL = Enter your API endpoint URL.
- Body = JSON data required for your API in request.
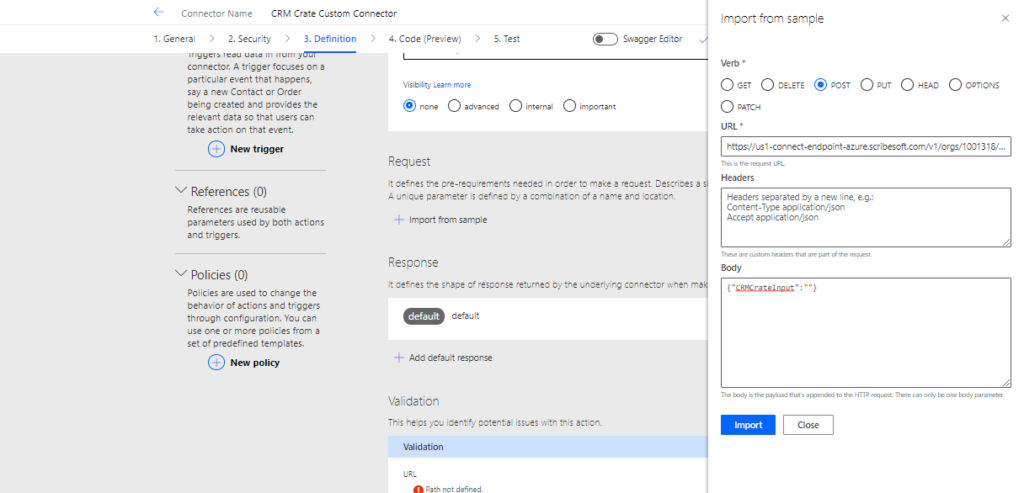
- Click on “Import” once the configuration has been completed.
- We can also add a default response for our custom connector. To do so, scroll down to the Response area and click on “Add default response”. You can either import the default response or define it directly into the editor as shown below.
Note: – “IsEmailOutput” is the name of object which is returned by our custom API service in its response.

- Once the action configuration is completed, proceed to the next step.
Step 5 – (Optional) Use custom code support.
- Custom code transforms request and response payloads beyond the scope of existing policy templates. Transformations include sending external requests to fetch additional data. When code is used, it will take precedence over the codeless definition. This means the code will execute, and we will not send the request to the backend.
- You can either paste in your code or upload a file with your code. Your code must meet the following requirements
- Be written in C#.
- Have a maximum execution time of 5 seconds.
- Can’t be more than 1 MB (size of the code file).
- Click here to learn more about custom code support.
- We have skipped this stage in our demonstration.
Step 6 – Test the new custom connector.
- Save and create the custom connector and proceed to the testing stage.
- When using an API key, it is not recommend to perform testing of the connector immediately after you create it. It can take a few minutes until the connector is ready to connect to the API.
- On the Test page, choose New connection.
- Enter the API key of your service, then choose Create connection as shown below.

- Once the connection is established, the custom connector will get populated in the connection dropdown as shown below.

- Navigate to the “Operations” area, enter an input defined for the connector and click on “Test Operation” button.
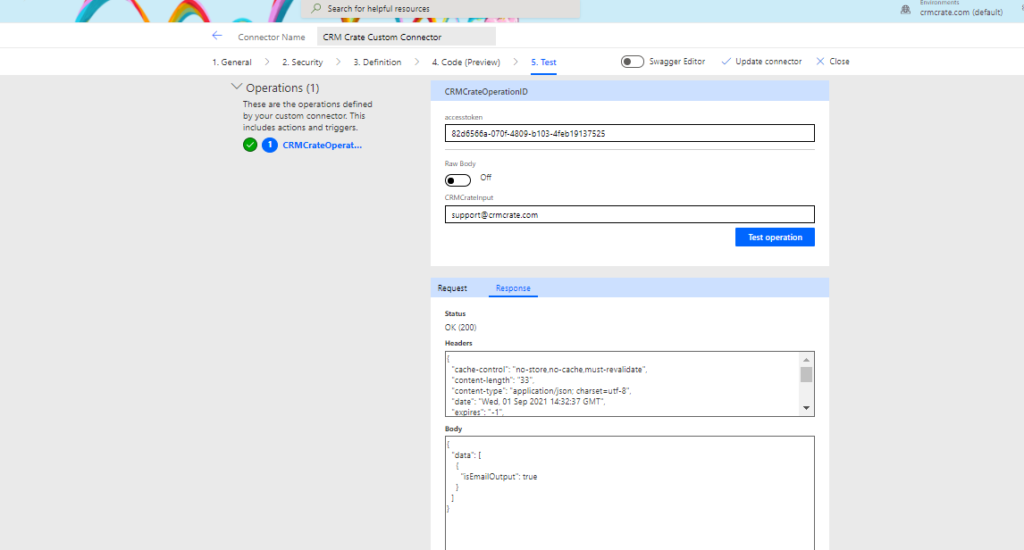
Now are custom connector is ready for the live testing in the Power Automate flow.
Use the custom connector in Power Automate flow –
Since we have successfully created the custom connector, let us now use it in the live Power Automate flow.
- Open the Power Automate Studio and create a new flow.
- Click on new step and validate if the above created custom connector is visible in the “Custom” tab as shown below.
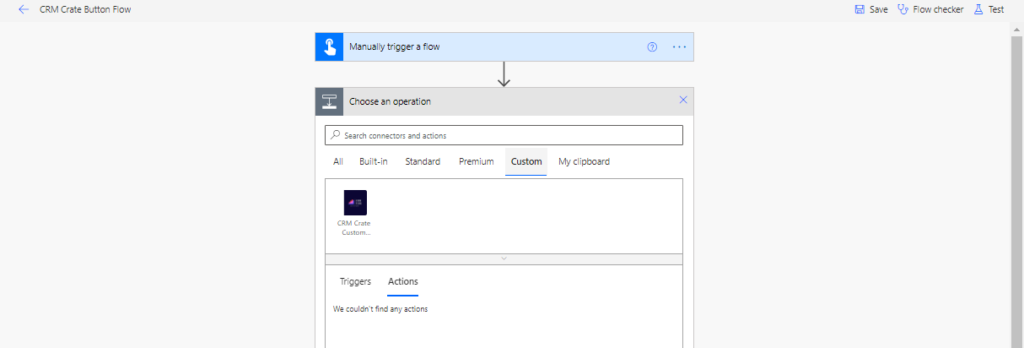
- Use, configure and test the Power Automate flow with the newly created custom connector as shown below.

Thus we learned to create a Custom Connector in Power Automate.


