
We will learn & explore the Modern Advance Find in Dynamics 365 CRM. Before we start, make sure to Subscribe to CRM Crate so that you can stay up to date in the field of Dynamics 365.

What is Modern Advance Find in Dynamics 365?
Modern Advance Find is an enhanced version of the legacy Advance Find. With modern advanced find, you can access any entity table within a model-driven app through search and use advanced filters to explore the data easily. Be more productive with navigation by searching for a view by its name in the enhanced view selector. The new view management experience will provide you options to share views so you can collaborate with your team easily. Managing views is simpler with personalization options to build your own set of views.
How to enable Modern Advance Find?
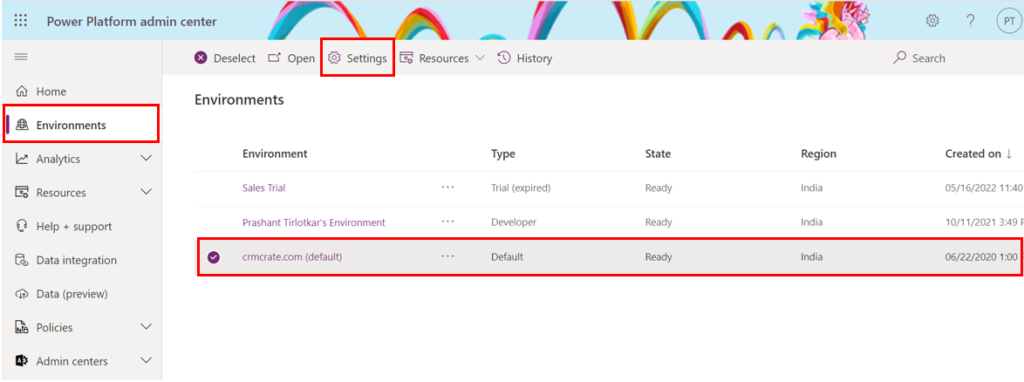
- Navigate to Power Platform Admin Centre (https://admin.powerplatform.microsoft.com/), select the Environment and click on Settings as shown below.
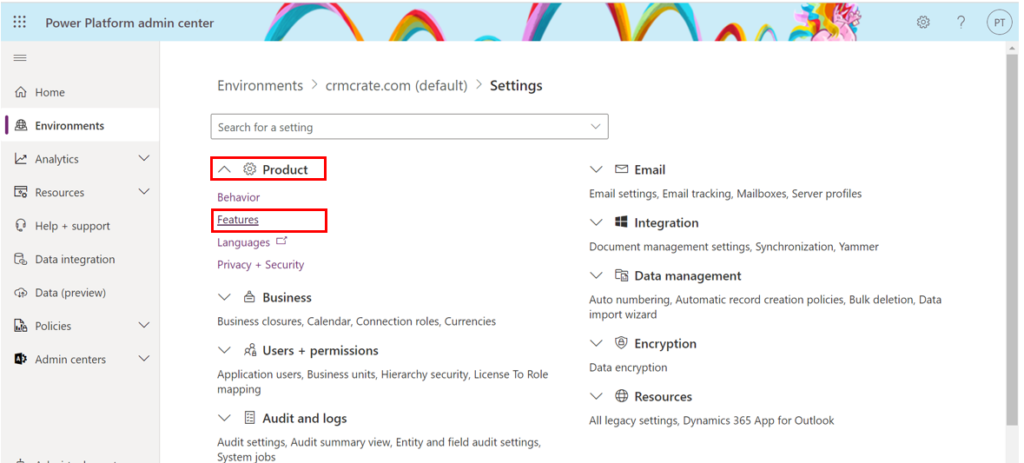
- Navigate to Product >> Features as shown below.
- Search for the feature called “Advanced find options” and enable the “Modern advanced find in model-driven apps”.
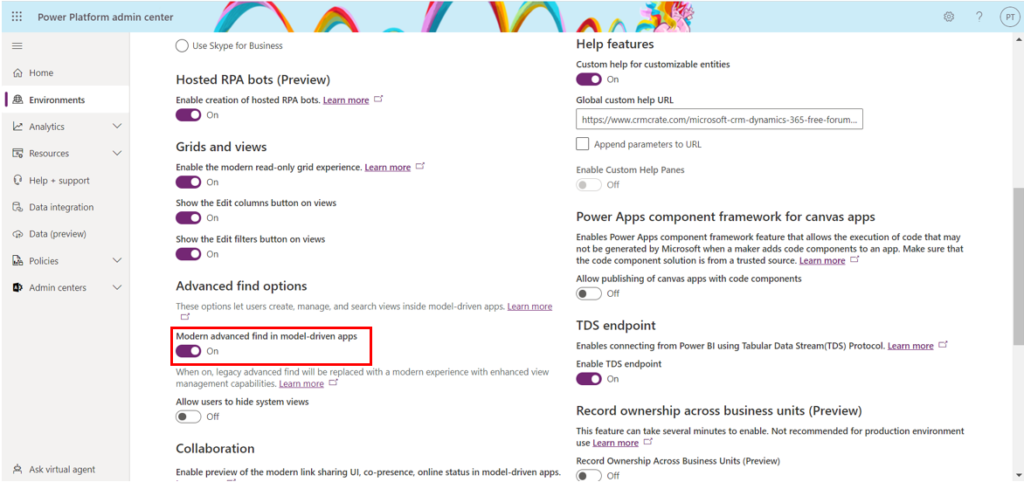
- Save the settings on completion of the above configuration. This steps will enable the Modern Advance Find in your Dynamics 365 environment.
What are the features of Modern Advance Find?
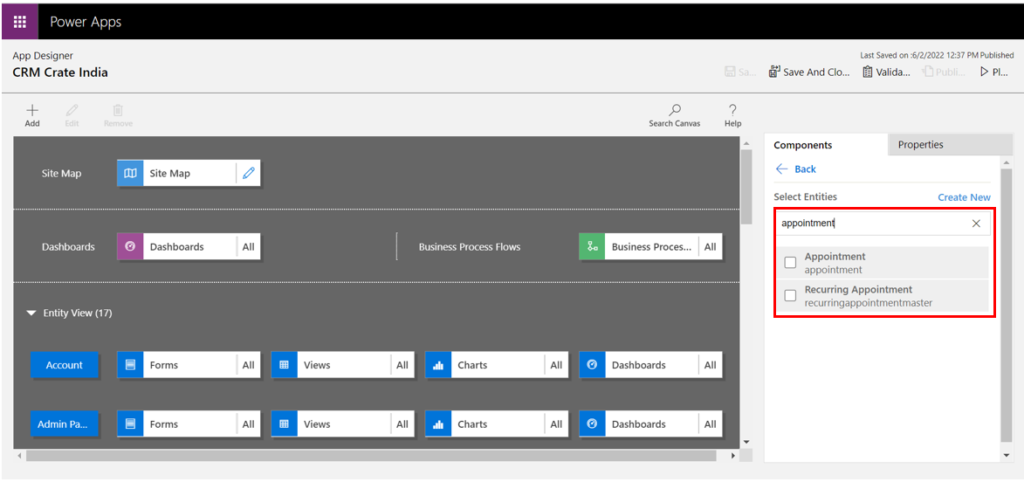
Feature 1 – Display tables / entities specific to the Model-Driven App
We can now limit the tables / entities from appearing into the Modern Advance Find. The Modern Advance Find will only display the tables which are present in the Modern-Driven Apps metadata.
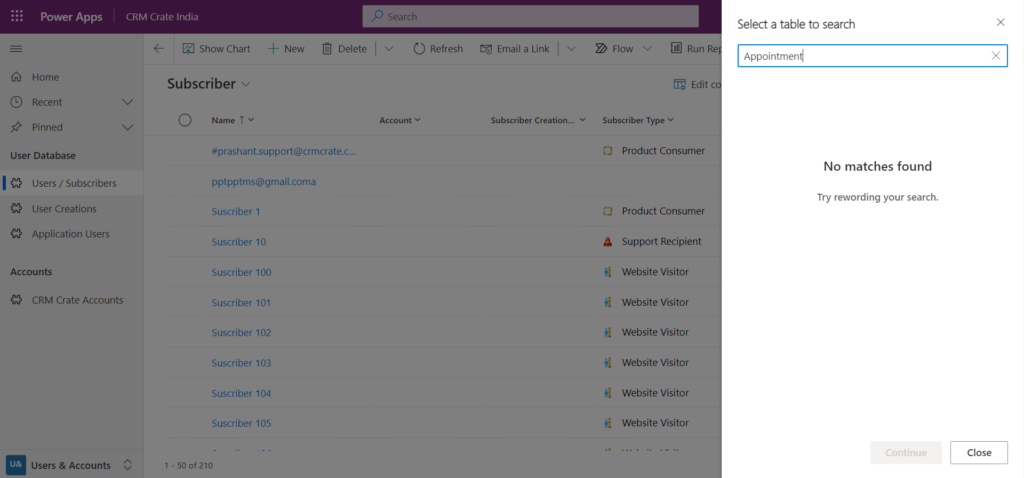
In our example, we cannot view the “Appointment” table in the Modern Advance Find as this Appointment table is not added in Model-Driven App’s metadata as shown below.
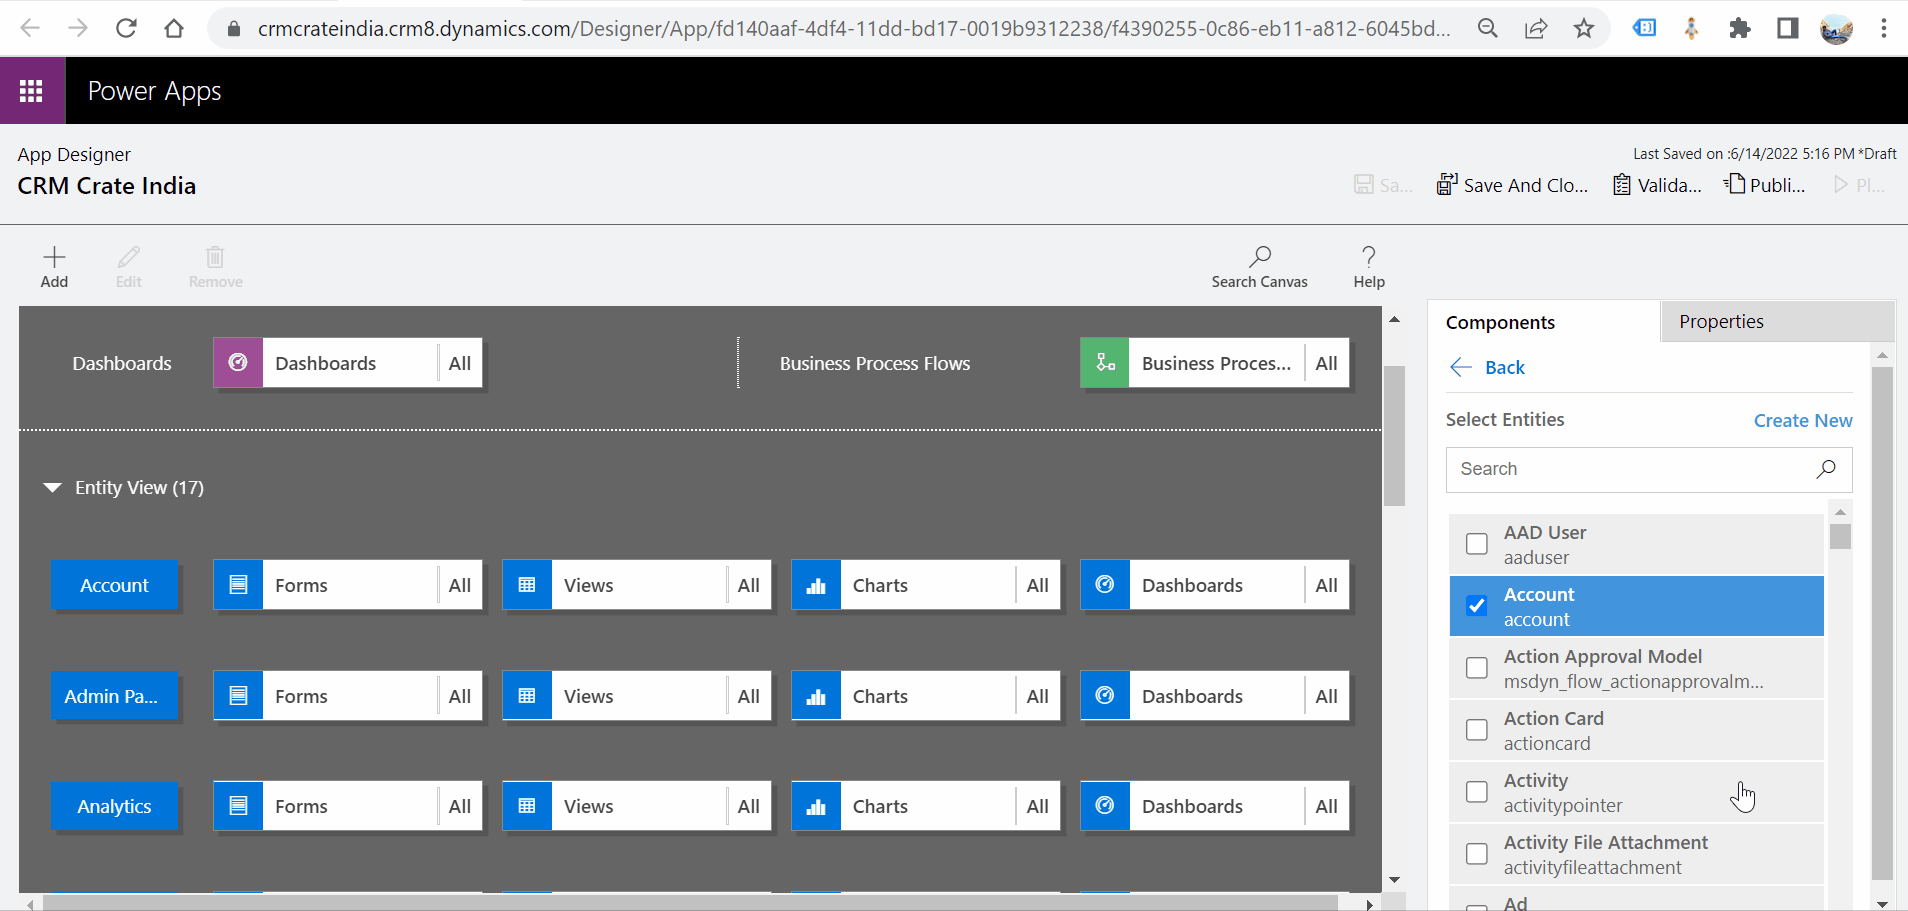
We need to add the missing tables in the Model-Driven Apps in-order to display them in the Modern Advance Find as shown below.
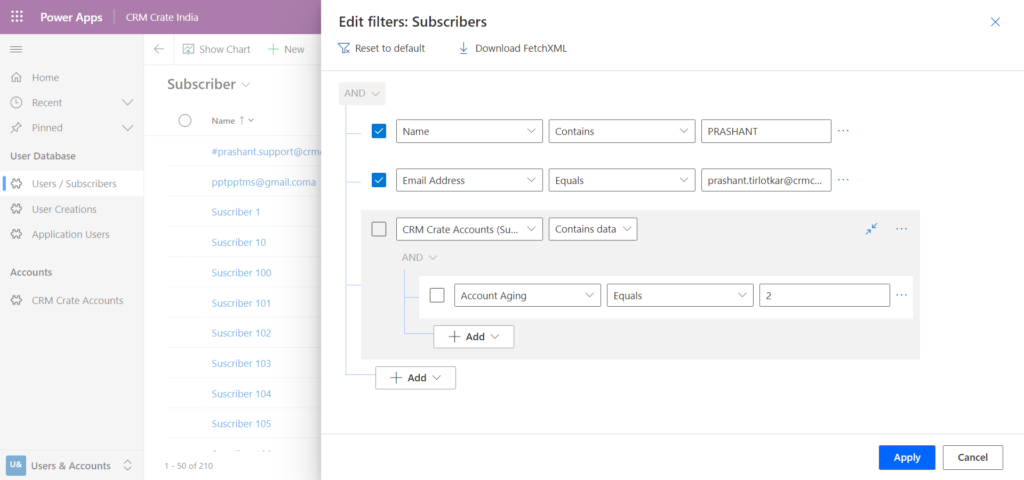
Feature 2 – Filter Table Rows in Modern Advance Find
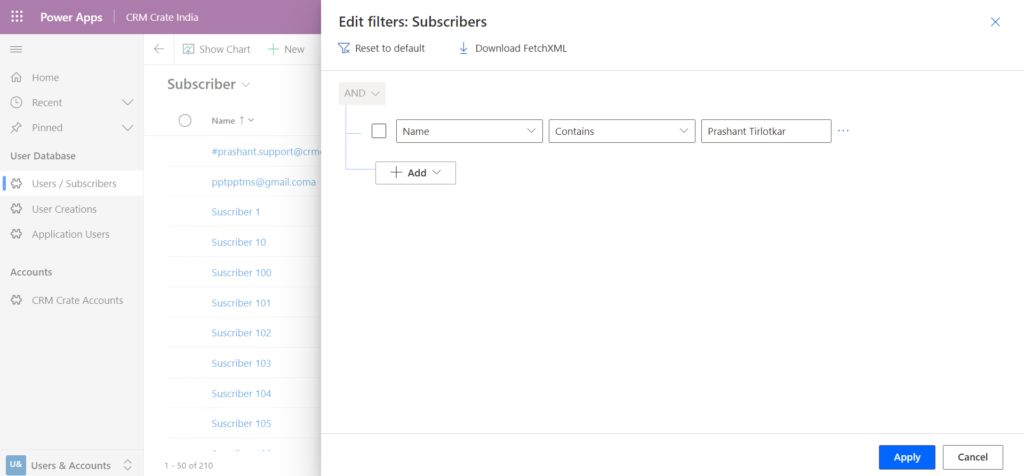
The row filtering is similar to the legacy Advance Find. We can filter the rows by clicking on the row addition and grouping options as shown below.
Feature 3 – Sharing a View in Modern Advance Find
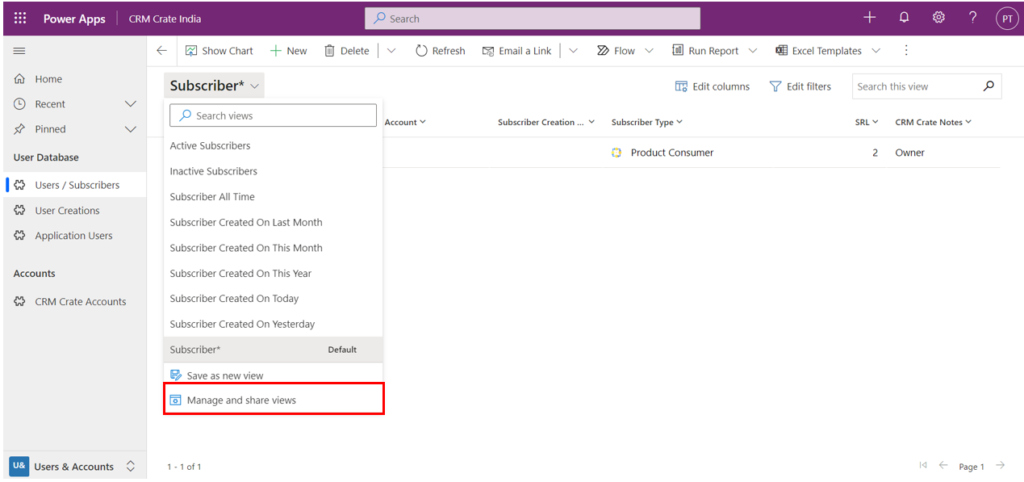
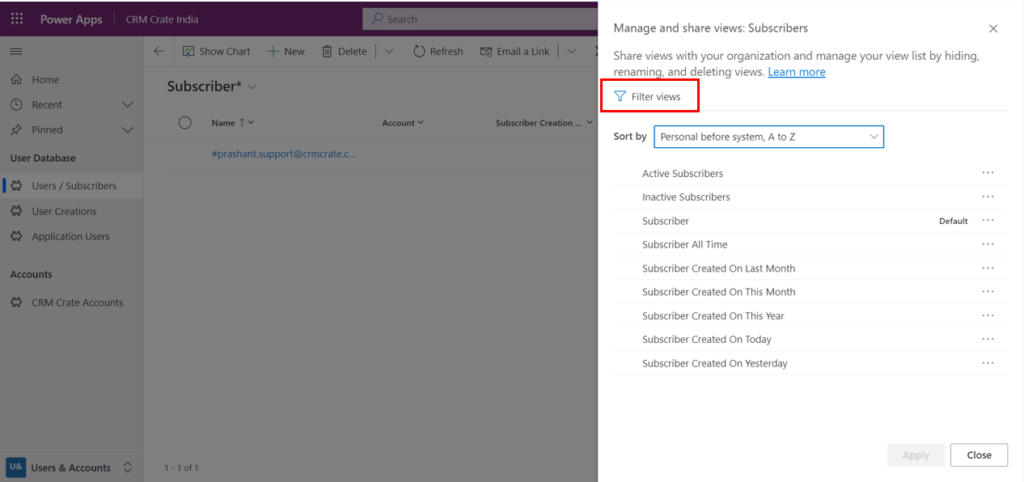
Open the Modern Advance Find and apply the filter as per the requirement. Further click on the view selector and click on “Manage and share views” as shown below.
Now click on the button “Filter View” as given below.
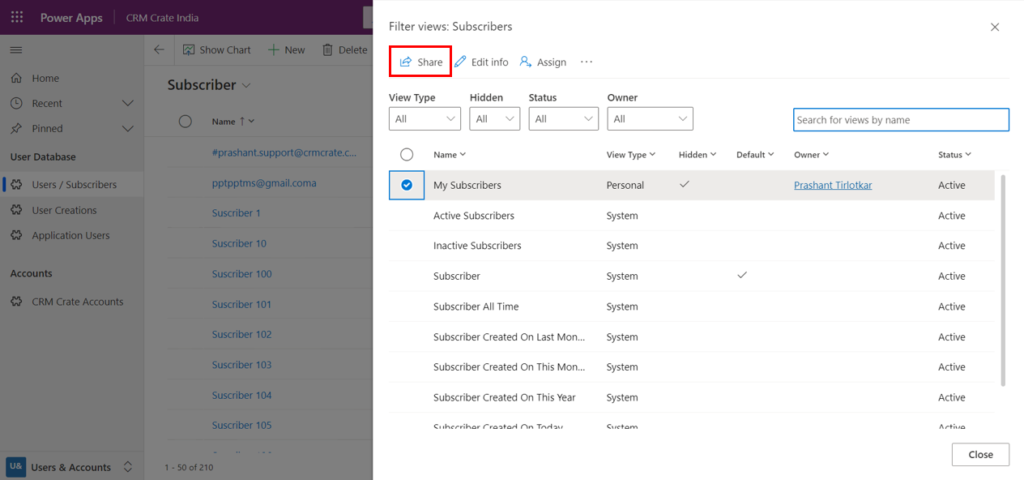
Select the personal view as per the requirement and click on the Share button as shown below.
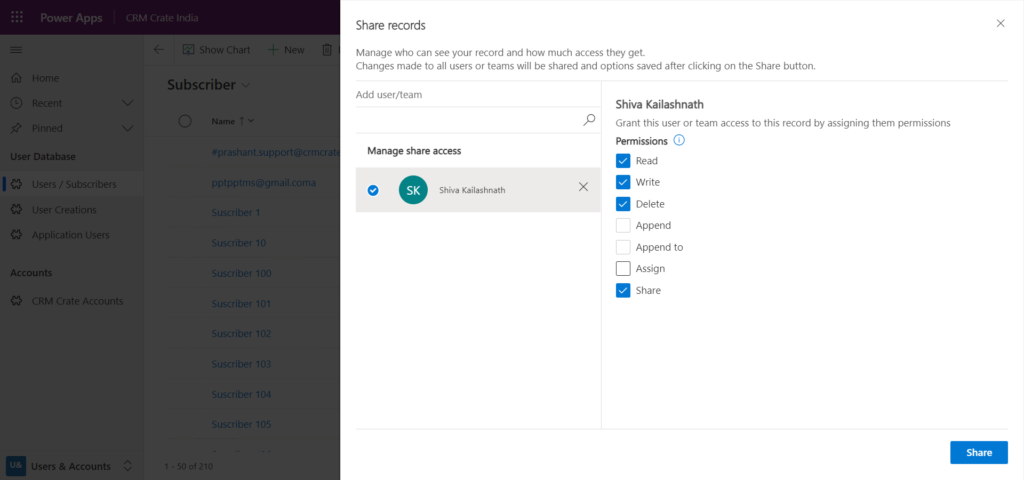
Select the user and provide the access as per the requirement. Click on Share once done.
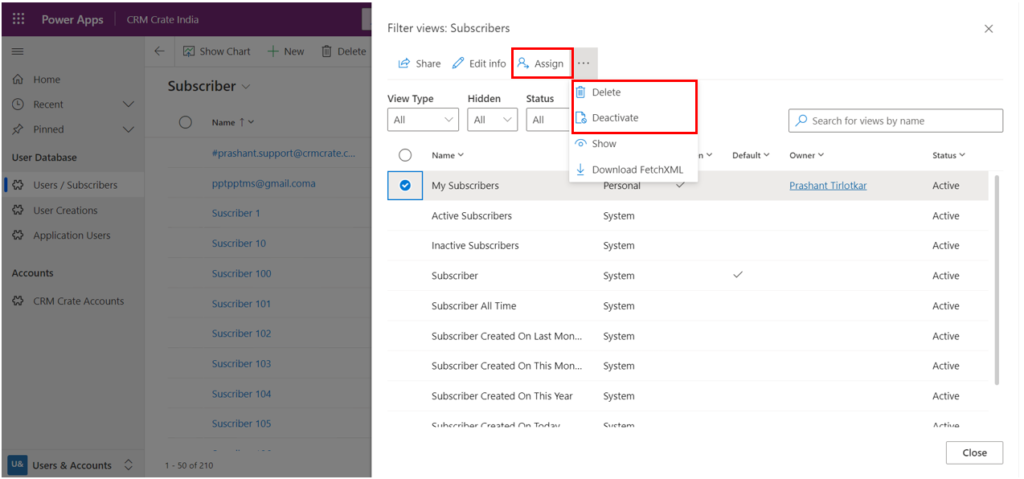
Feature 4 – Assign, deactivate & delete views
Open the Modern Advance Find and apply the filter as per the requirement. Further click on the view selector and click on “Manage and share views” as shown below.
Now click on the button “Filter View” as given below.
Select the personal view as per the requirement and click on the Share button as shown below.
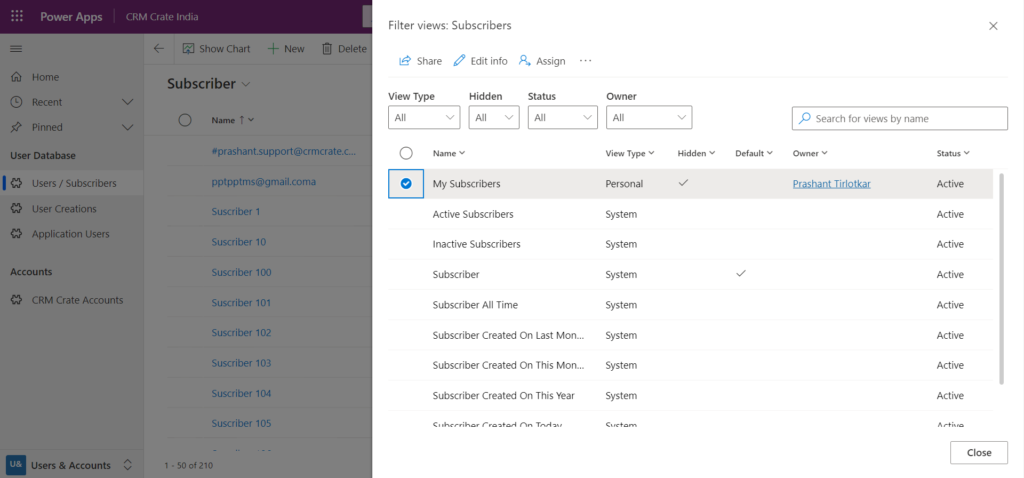
Now you can perform the Assign, Deactivate and Delete operation of the selected view as shown below.
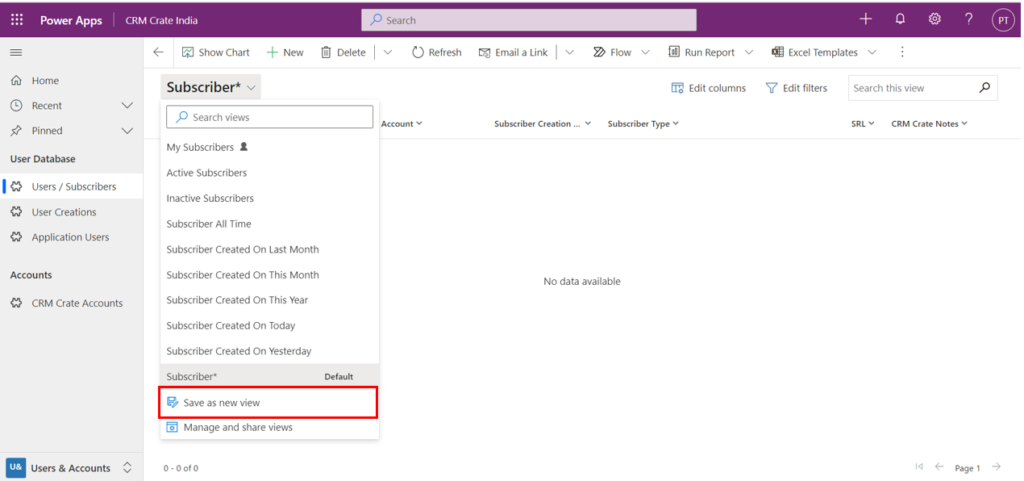
Feature 5 – Create & save a new View
Open the Modern Advance Find and add the query conditions as per the requirement and click on Apply.
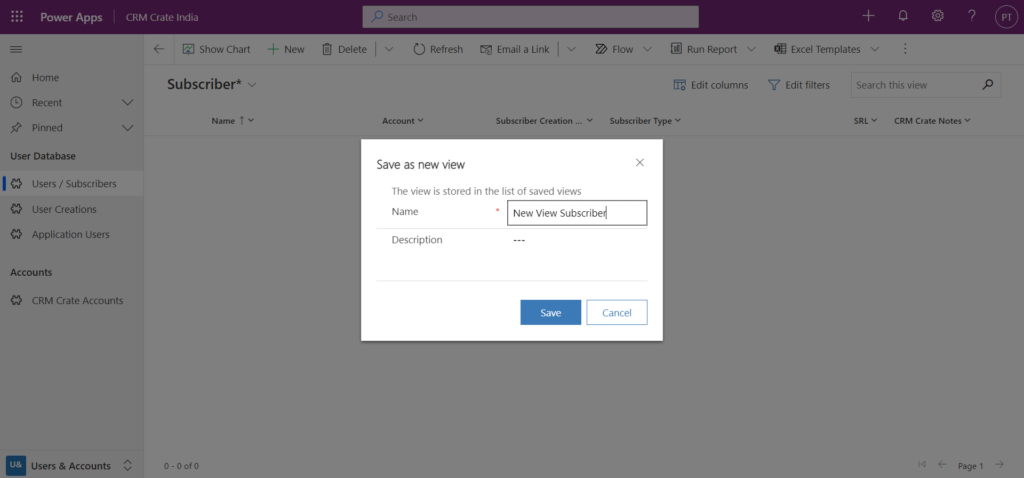
Now click on the view selector >> “Save as new view”. This will save and create a new personal view in the Dynamics 365 CRM.
Thus, we learned the basic features provided in the Modern Advance Find functionality.


