
We will learn to call a Power Automate flow from a Business Process Flow (BPF) in Dynamics 365 CRM. Before we start, make sure to subscribe to CRM Crate so that you stay up-to-date in field of Dynamics 365.

Why do we need to call a flow from a BPF?
There are multiple ways to call a Power Automate flow in Dynamics 365 including the execution from Business Process Flow (BPF). Consider a business scenario where we need to enable the users to perform a dedicated set of operations on a dedicated BPF stage, we can easily achieve this requirement using the below given procedure.
Create a BPF and Power Automate flow –
For the demonstration purpose, we will create a new Power Automate flow and a Business Process Flow.
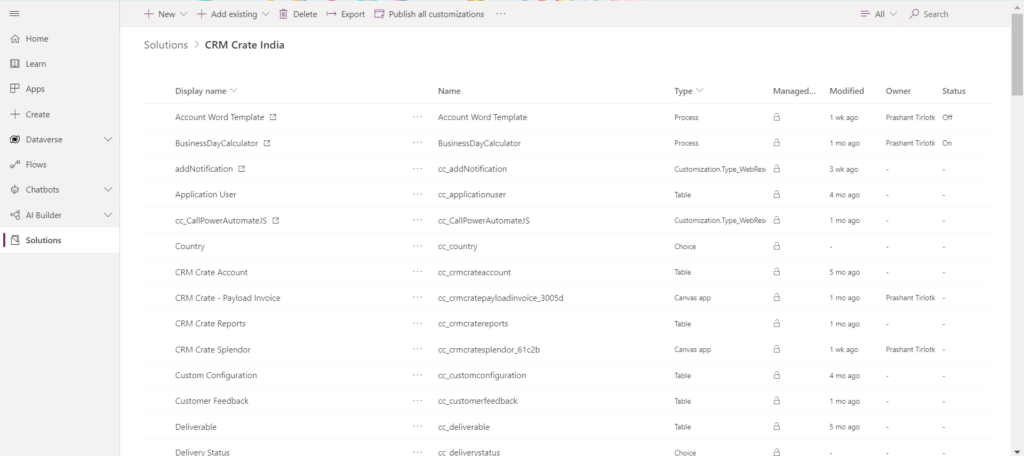
Step 1 – Create a new solution or use any existing solution in the Dynamics 365.
We are using an existing solution called “CRM Crate India” as shown below.
Step 2 – Create a new Power Automate Flow.
We need to create a new Power Automate flow in the above-mentioned solution.
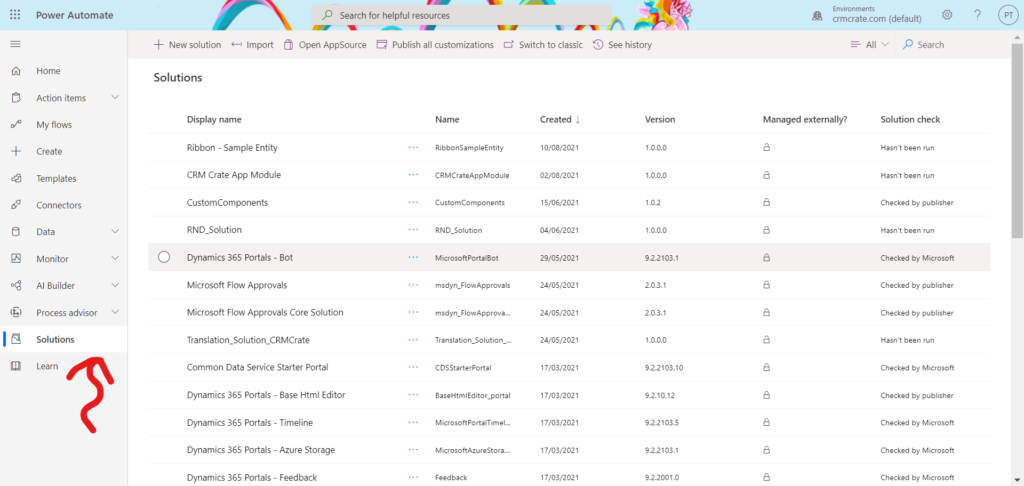
- Navigate to the Power Automate studio and open the solutions.
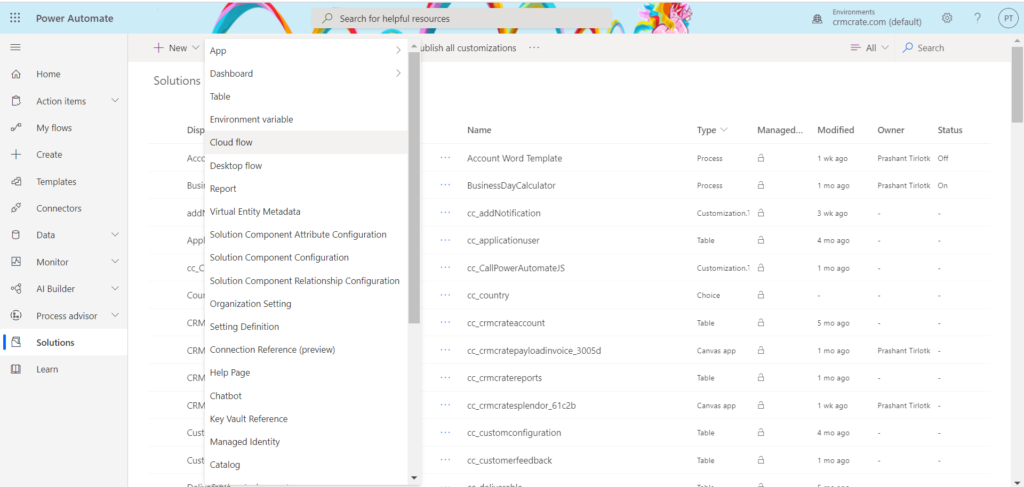
- Open the solution and create a new cloud flow.
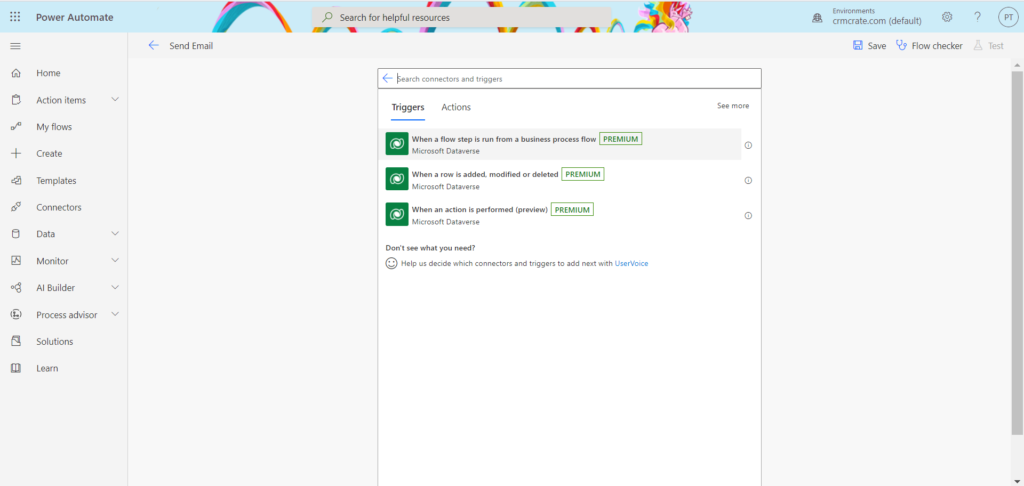
- Configure the new flow trigger as “When a flow step is run from a business process flow“.
- We can add the input needed by the flow for performing the executions. This means that the user will be prompt to submit the inputs declared in the flow before calling the flow.
- In our case, we will declare a text input called “Email Address” in the flow.
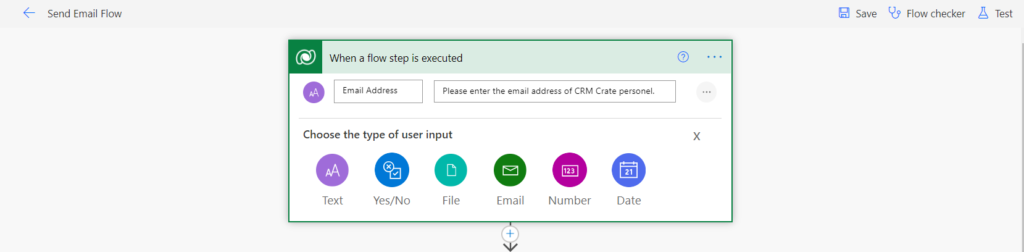
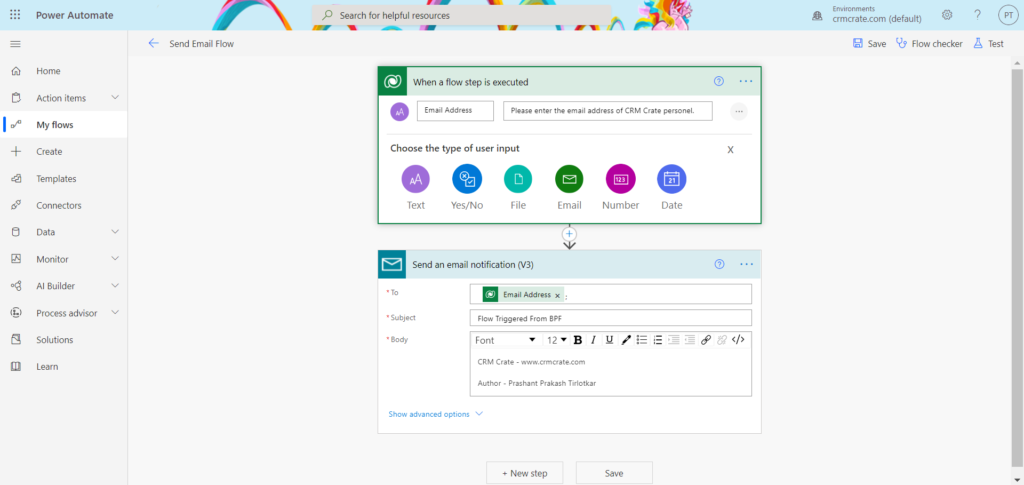
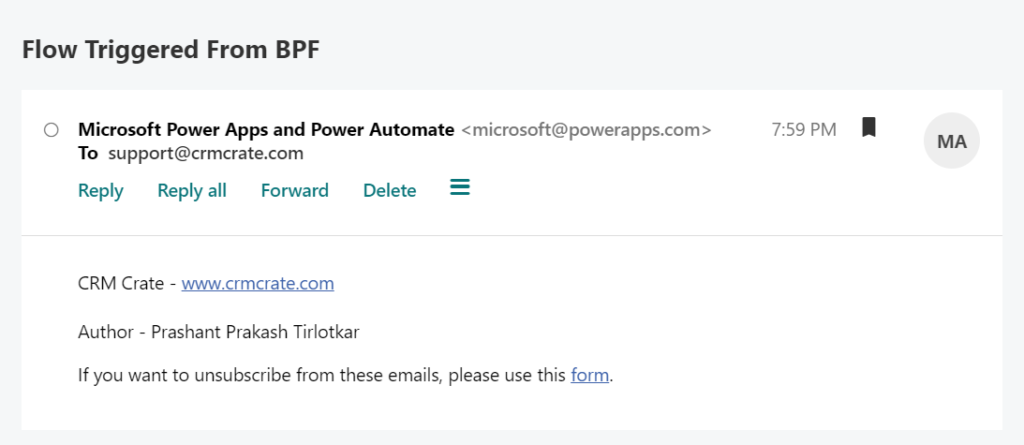
- Now design the flow action as per your requirement need. In our scenario, we will send out an email message to the mailbox recieved in the flow’s input.
- Save the flow and exit the Power Automate studio.
Step 3 – Create a new Business Process Flow.
- Create a new Business Process Flow (BPF) in the above-mentioned solution (Same solution as that of the above created Power Automate flow).
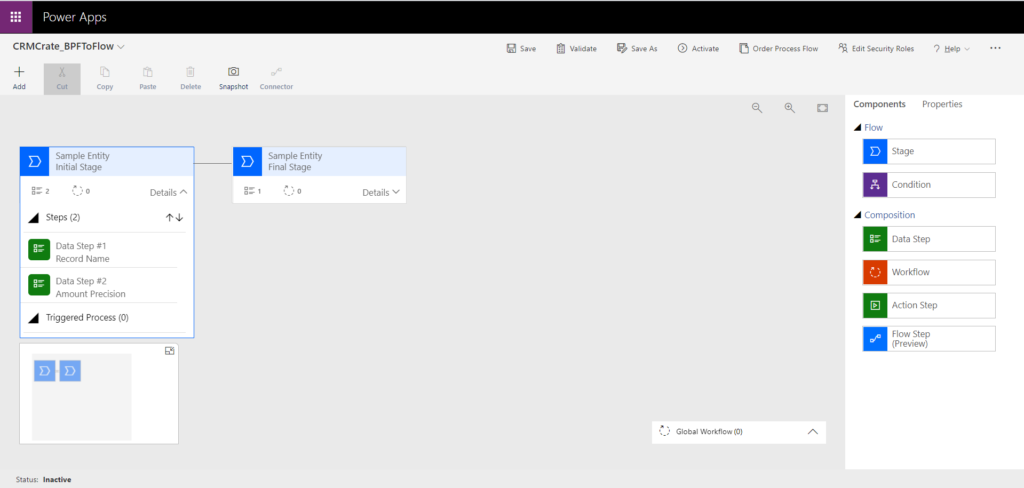
- We will add a new flow trigger in the first stage “Initial Stage” of our BPF.
- Click on the Add button and select “Add Flow Step” as shown below.
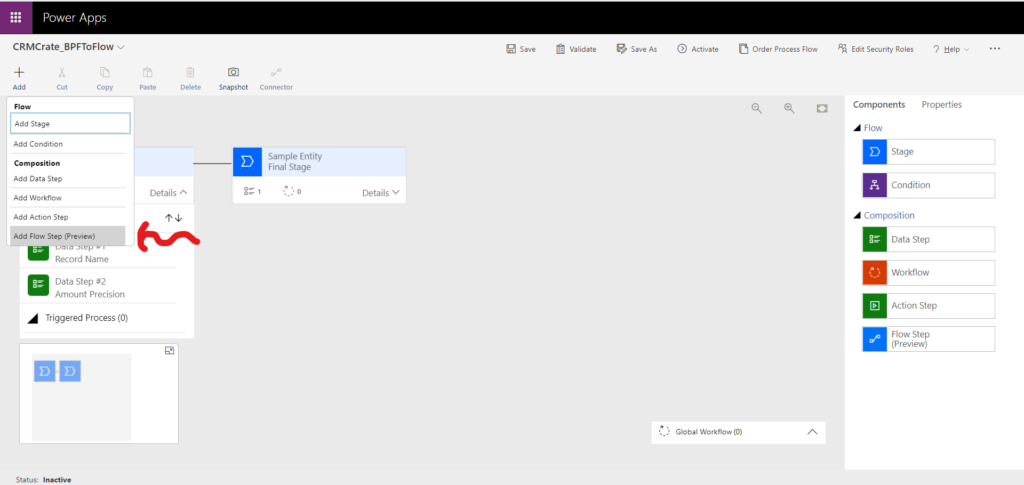
- Now configure the step with the below given details –
- Display Name = Name of the step which you need to be displayed in the BPF.
- Sequence = The sequence of the step which you need to be displayed in the BPF.
- Required = Tick this field if you need to make this step mandatory.
- Select a Flow = This is a lookup field which will populate all the flows present in the above-mentioned solution. Select the previously created Power Automate flow.
- Click on Apply >> Save >> Validate and Activate.
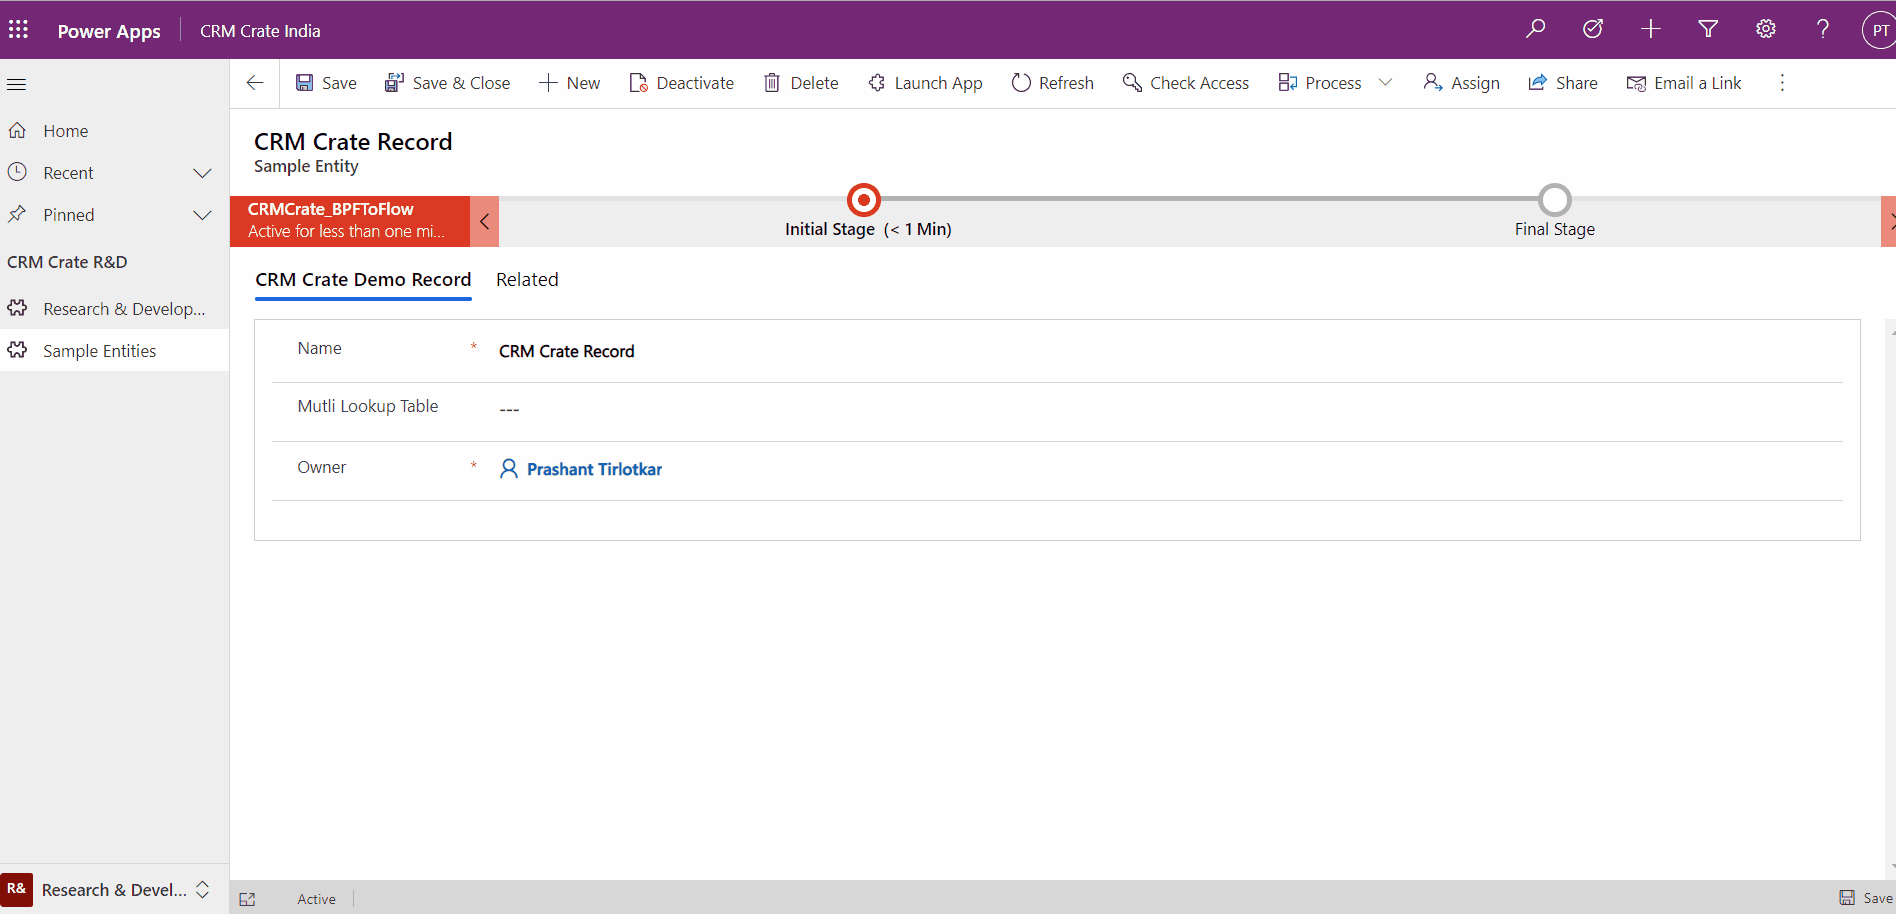
Validate the changes in the Dynamics 365 CRM
Since we have created and deployed Power Automate flow and Business Process Flow, let us now test the feature in Dynamics 365 form.
- Open the Dynamics 365 CRM and navigate to the entity form on which the above BPF is deployed.
- Validate if the Power Automate flow is getting executed from the BPF as shown below.
Thus we learned to call a Power Automate flow from a Business Process Flow (BPF).


