
We will learn how to bulk update records in Microsoft CRM using excel online. In Dynamics 365, we can now easily perform bulk or single data update in the records by leveraging an online excel capability.
Create A View
We will first have to create a view in the entity where you want to perform the data update. In our case, we will perform a data update on Account’s field “Account Number”. Therefore we will create a view in Account entity.
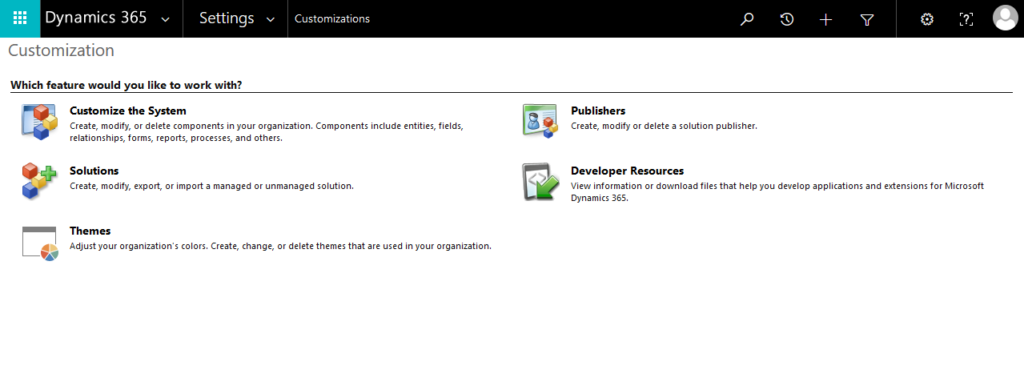
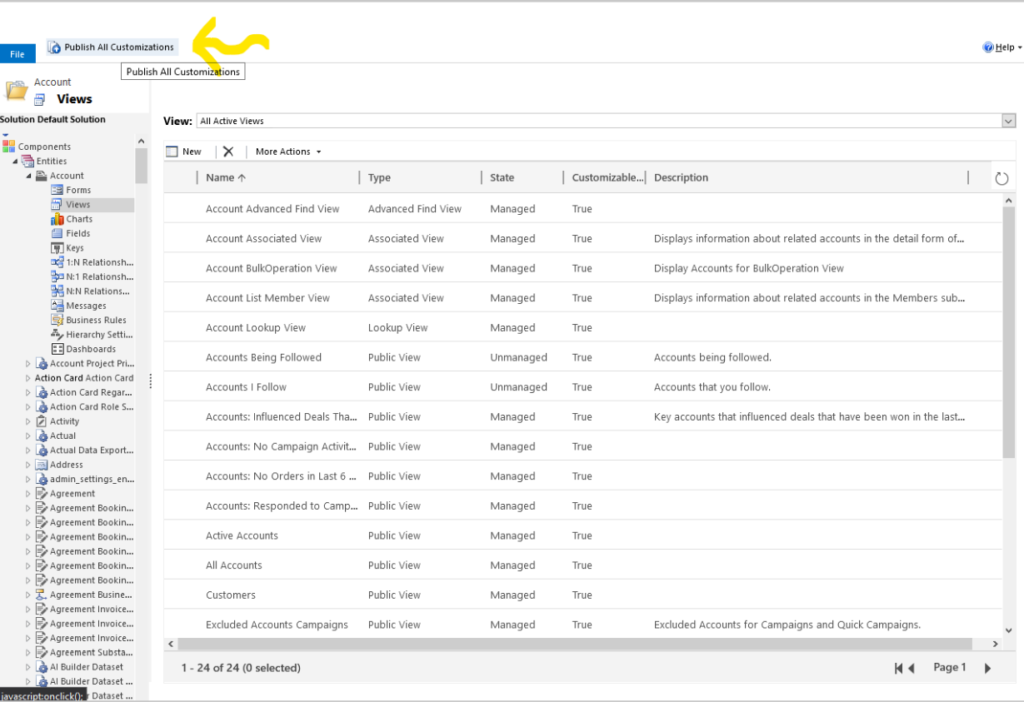
Open the CRM >> Navigate to Settings >> Customizations >> Customize the System.
In the component explorer, expand Entities >> Account >> View.
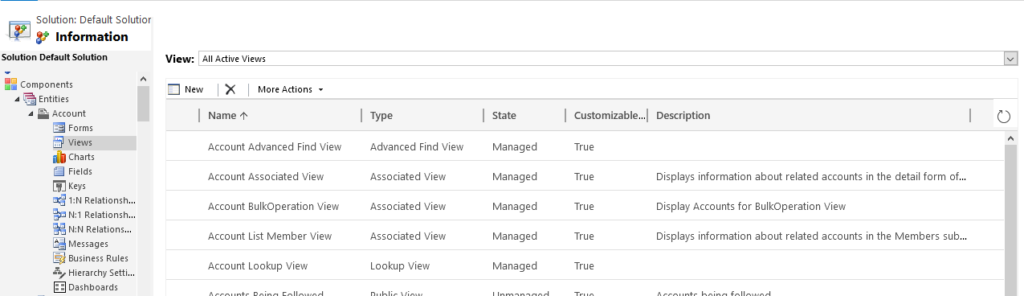
Once the view window is opened, click on New for creating a new view.

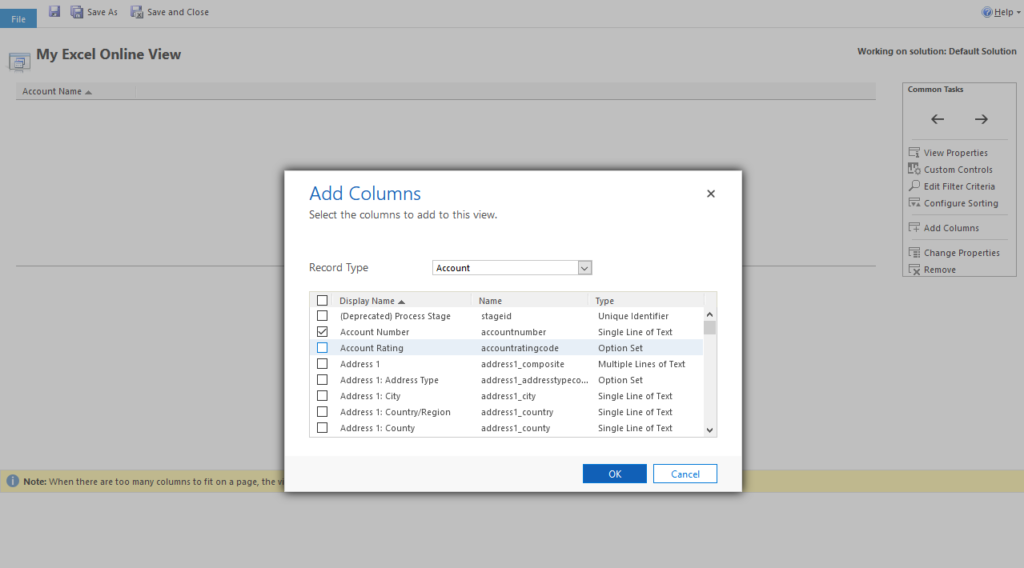
Now, we will add the column in which we have to make the data update on existing Accounts. In our case that column is “Account Number”. Therefore, navigate to Add Columns >> Select “Account Number” >> Click on Ok.
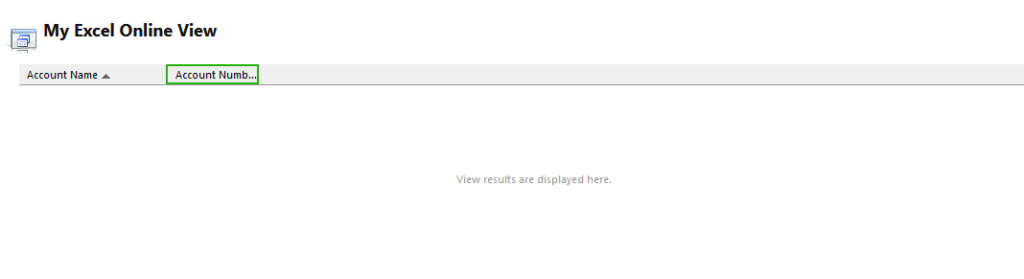
The column Account Number is now added in our view. To deploy the view click and Save and Close and publish all the customizations.
Open Excel Online
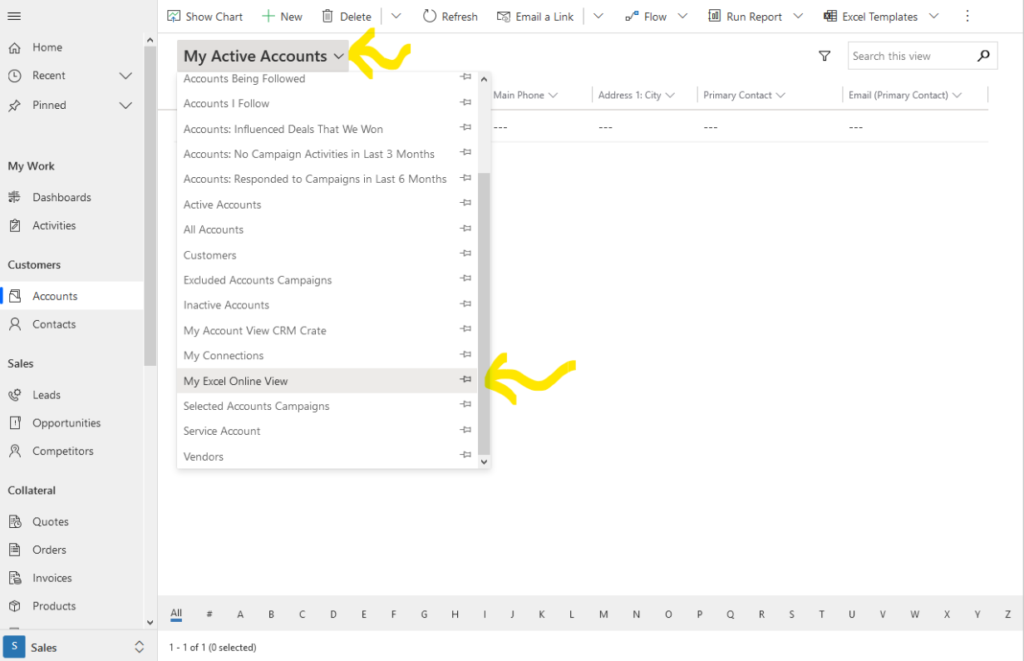
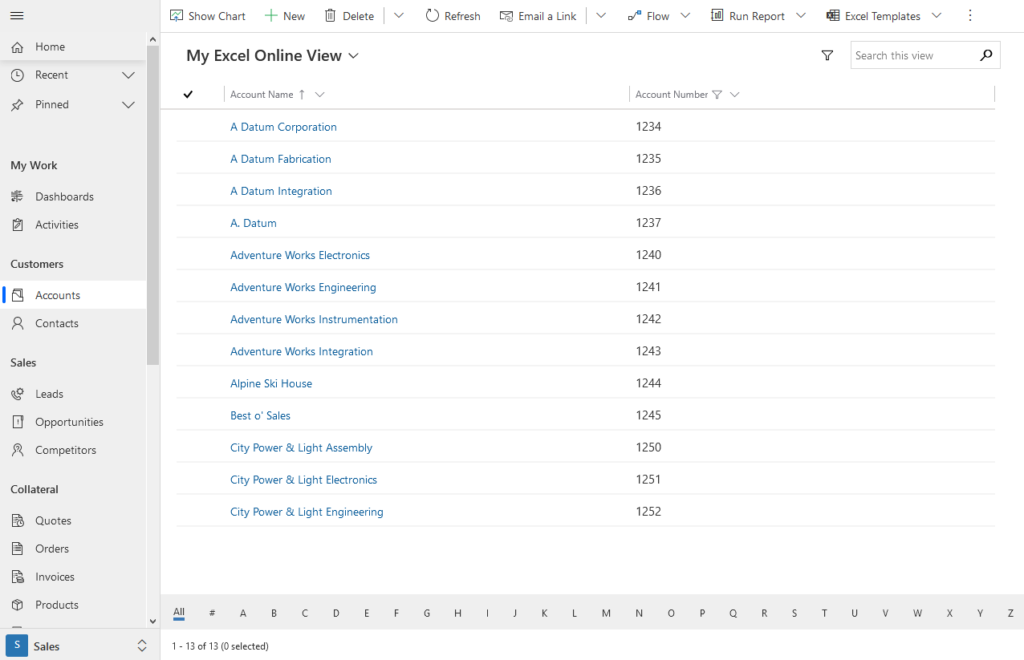
Once you have created a view. Navigate back to the CRM and open the entity to perform data update. In our case, we will navigate to the Account entity. In your entity main page >> Click on view drop down and select the above newly created view.
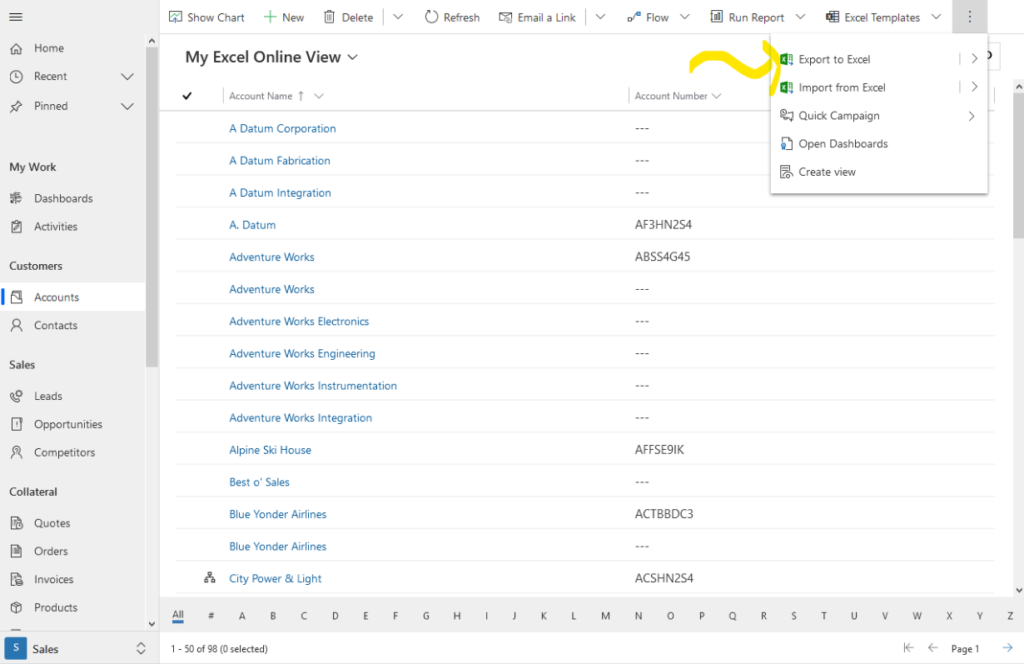
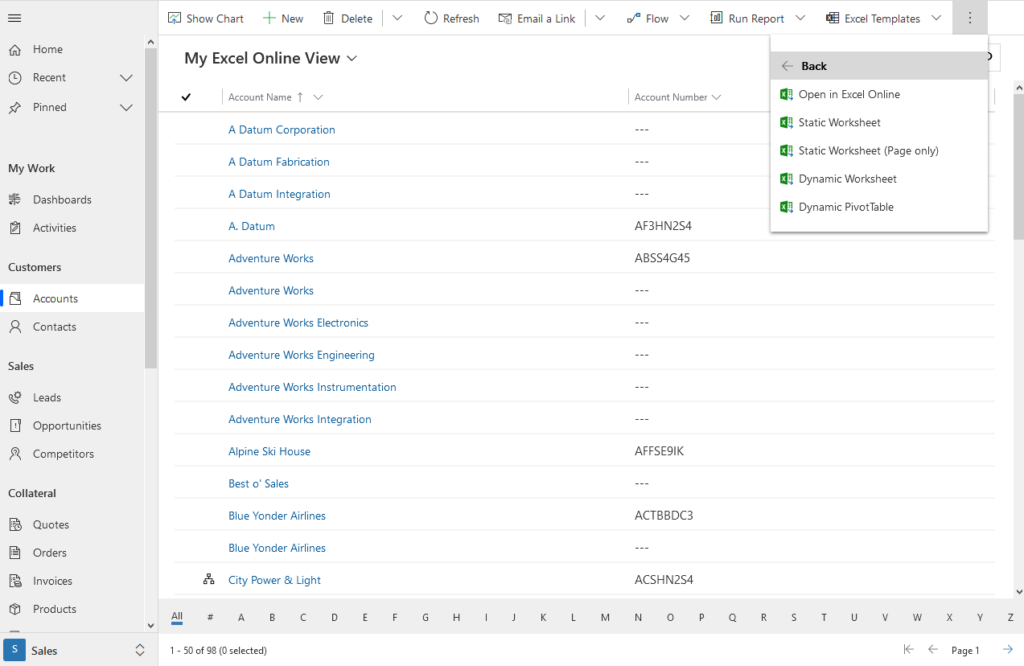
Now, in the top ribbon bar search for “Export To Excel” >> Open In Excel Online.
Now, the data which was populated in the View will now get open in Excel Online. Here you can simply update the column “Account Number” with new values according to your need. In our case, we have entered value our own value in Account Number of top 13 records. Once you have finished updating Excel Online, click on Save.
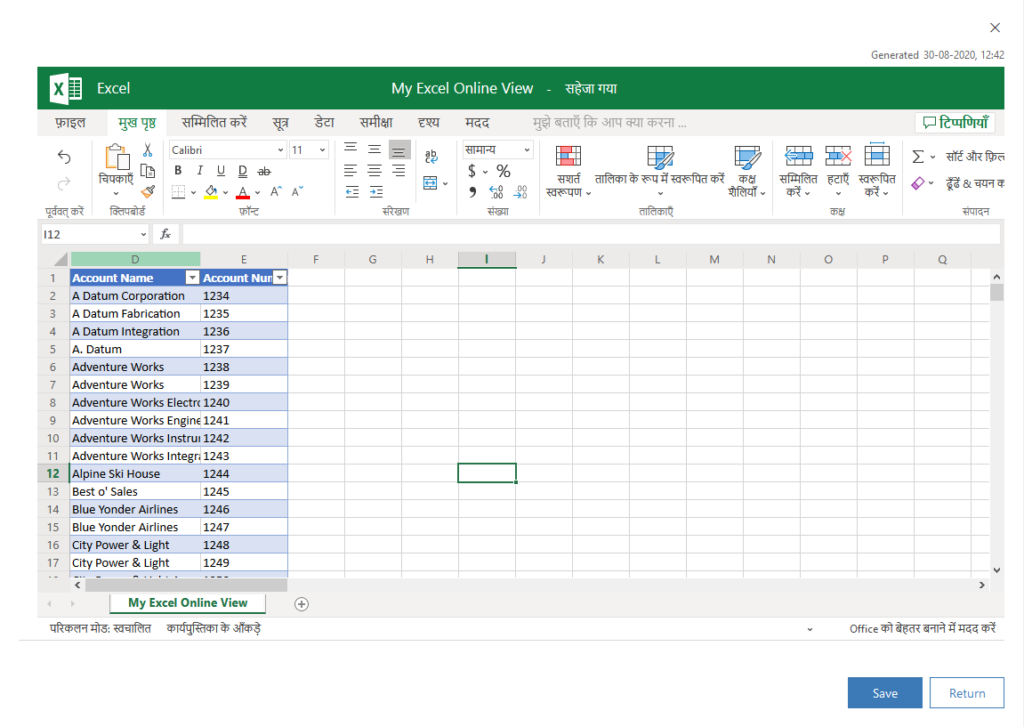
Once you click on Save, the excel data is now submitted for import. Once the out-of-the-box import job is completed, you will observe that the values in field “Account Number” are bulk updated with above given new value.
Thus, we learned how to easily perform bulk data update in Microsoft Dynamics CRM records without having any code dependency.


