Previously we learnt what an Action is, now we will learn to create a basic action in order to derive the business logic.
Case study for our action.
Before beginning technically, let us decide the business scenario for which will build the Action. Lets say when a case is created where the title contains the word ‘bug’, we want to send an email to a developer or admin, and assign the case record to that particular developer or admin. Generally, we could write a workflow to perform these steps and run it on creation of the case. However, what if we want to not have it triggered when a case is created, but we want to run it from code as well, say from JavaScript or C#? We can bundle that functionality into an action and have it called from our front end or plugin code. Therefore writing actions itself seem easily and straight forward.
Creating an Action.
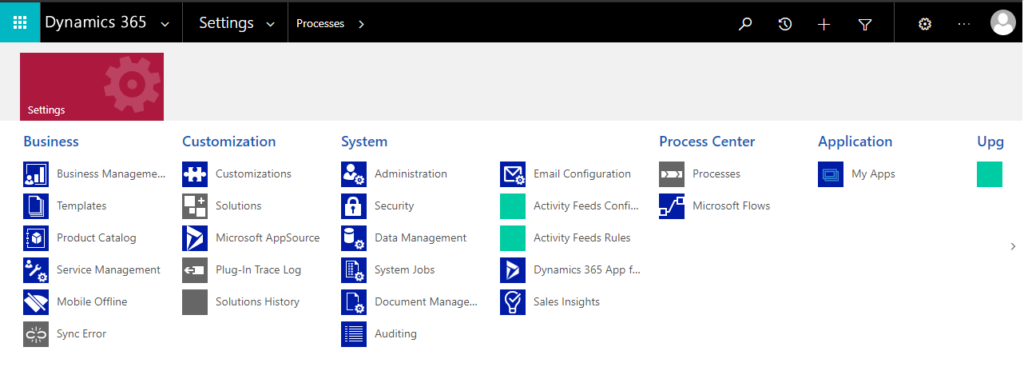
Open CRM Dynamics 365. navigate to Settings > Processes.
In the populated template, select the Category as “Action”.
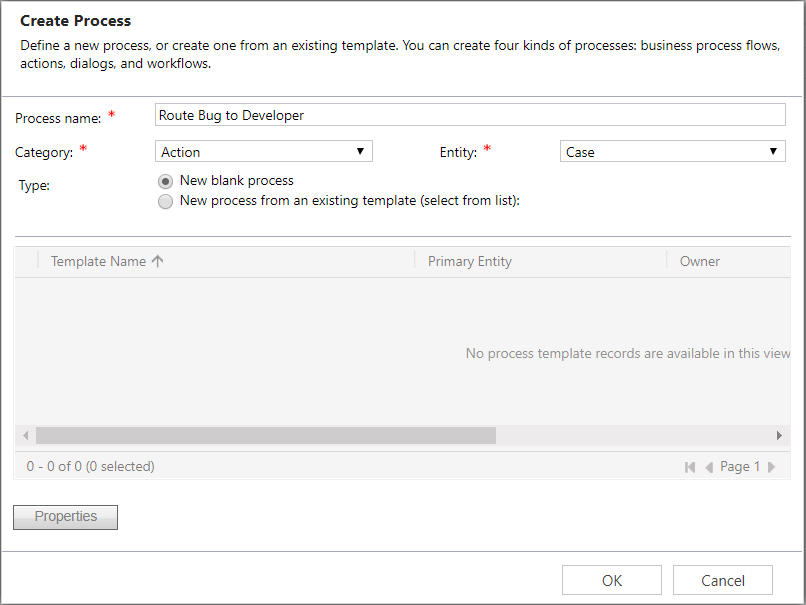
Click on Ok. Now the Process template window should get open.
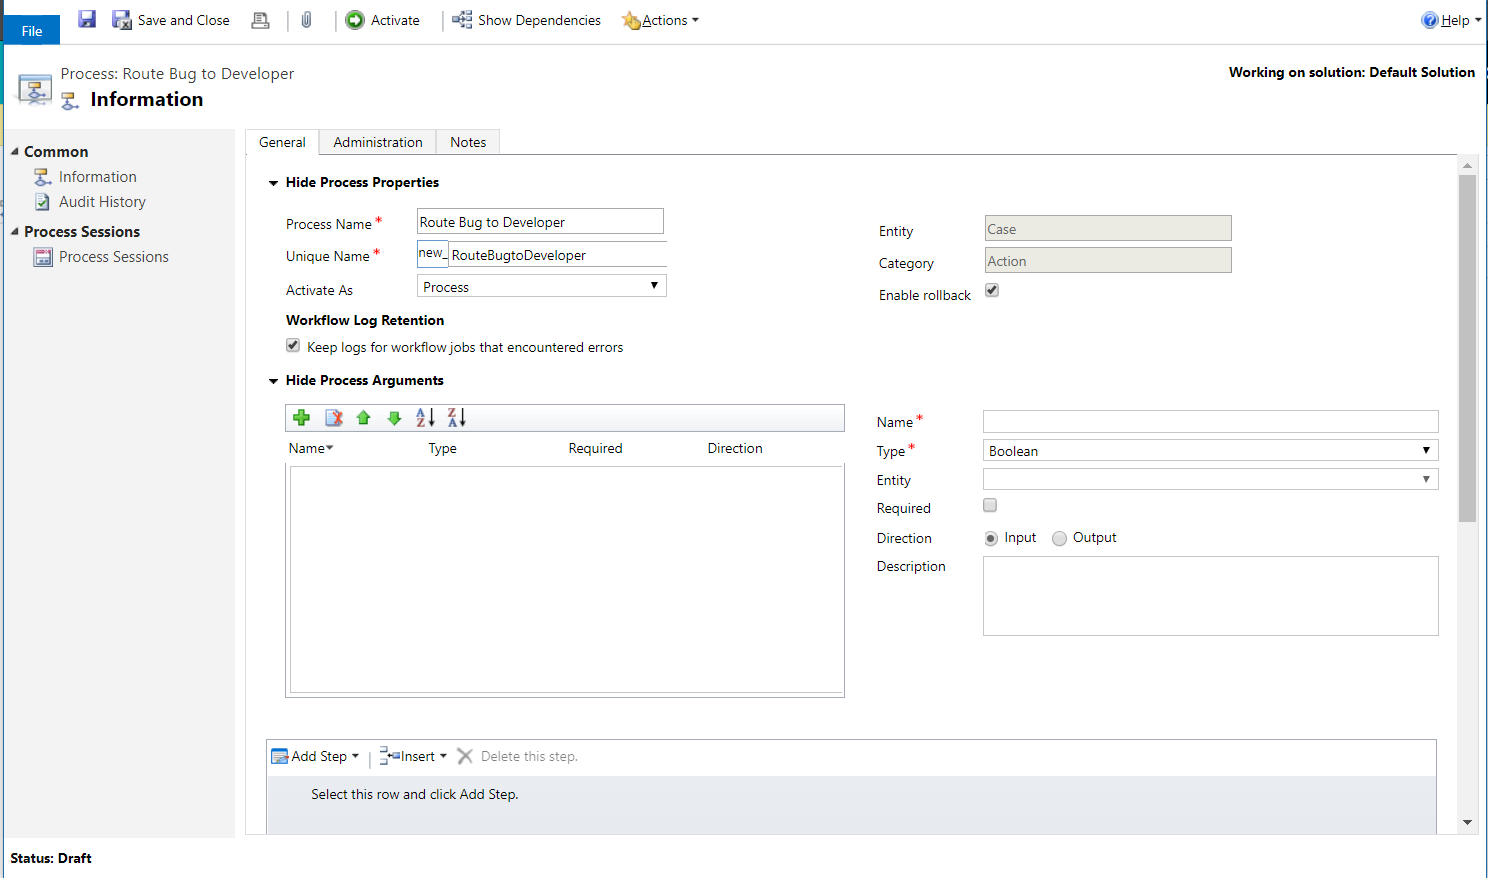
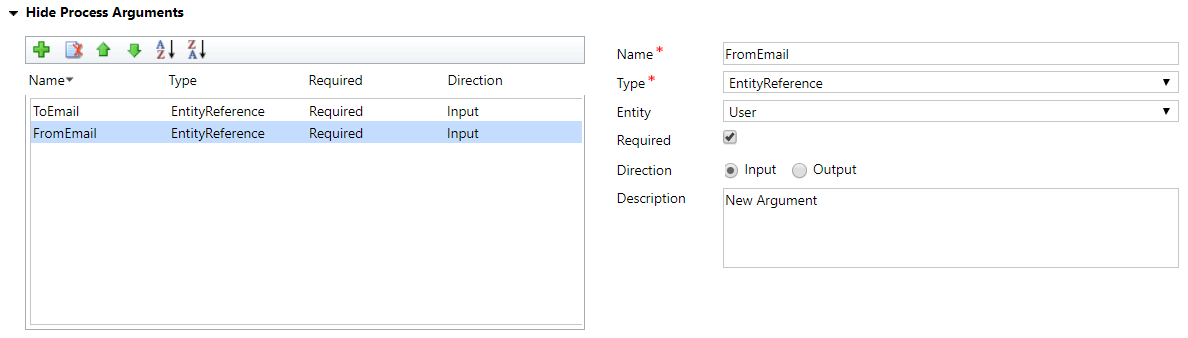
Remember the Process Arguments section. This is the input for our action. As we will be sending an email, we can have a to and from email address here. Add a ToEmail and FromEmail field. These will be EntityReference fields to the User entity –
Now we will add the logic steps to our action. Click on “Add Step”.
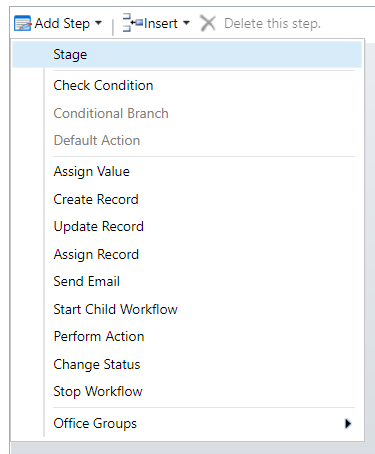
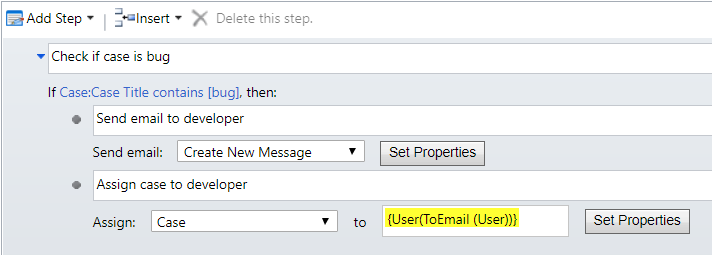
Select the “Check Condition” and here we will create a check condition which describes our above mentioned scenario.

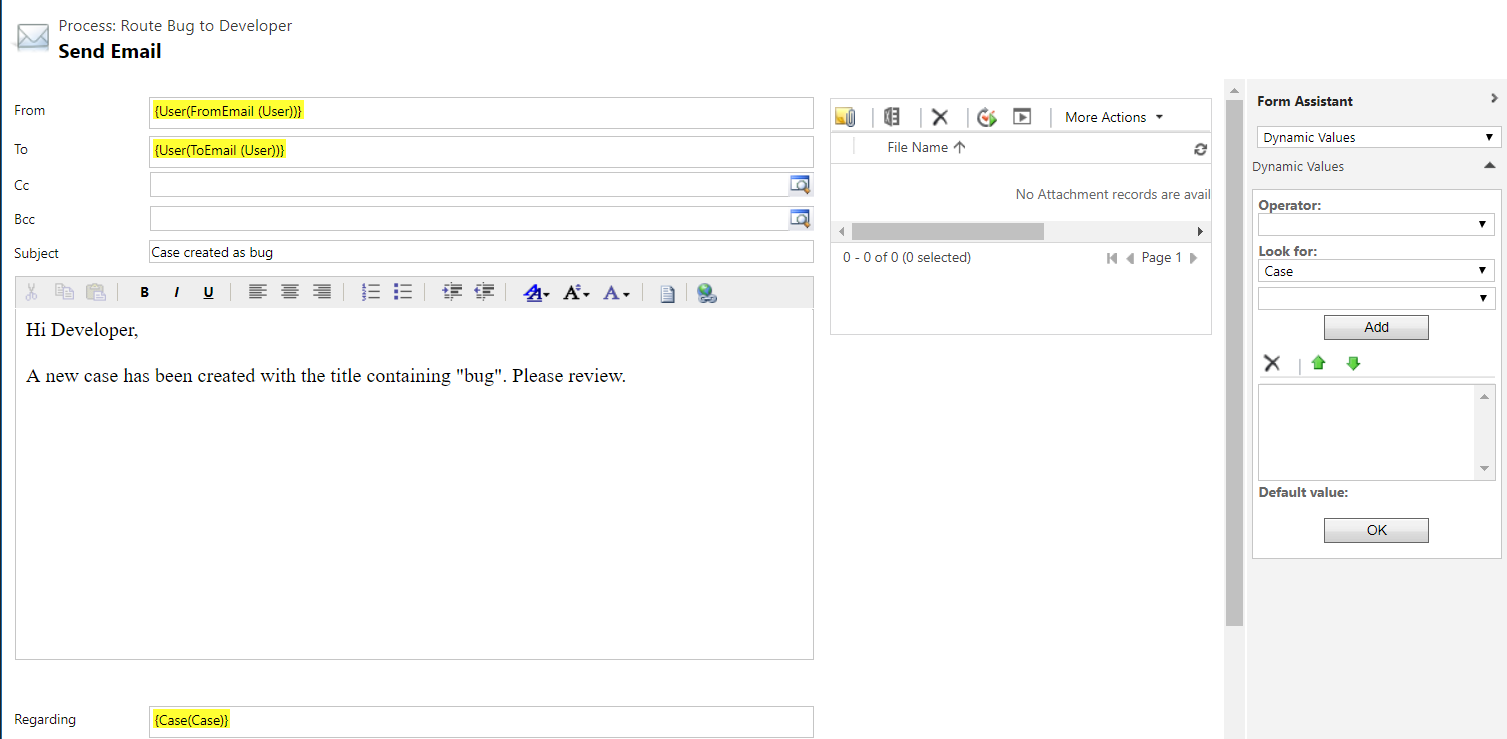
Now add the Send Email step and configure the email to use the input parameters –
After this, we will assign this operated Case record to the developer (User).

Our above created action will not look like this –
Now lets activate our Action by clicking button Activate.
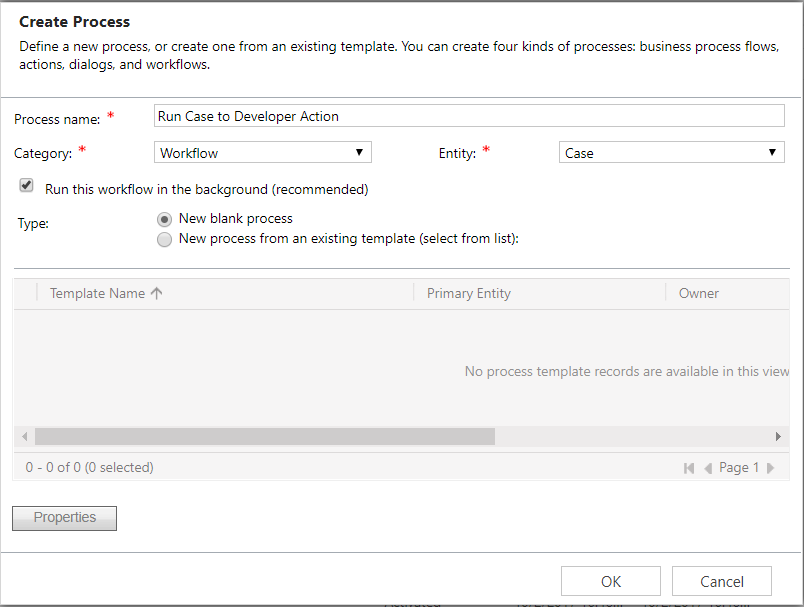
In order to call our Action from another process such as Workflow, let us create a workflow.
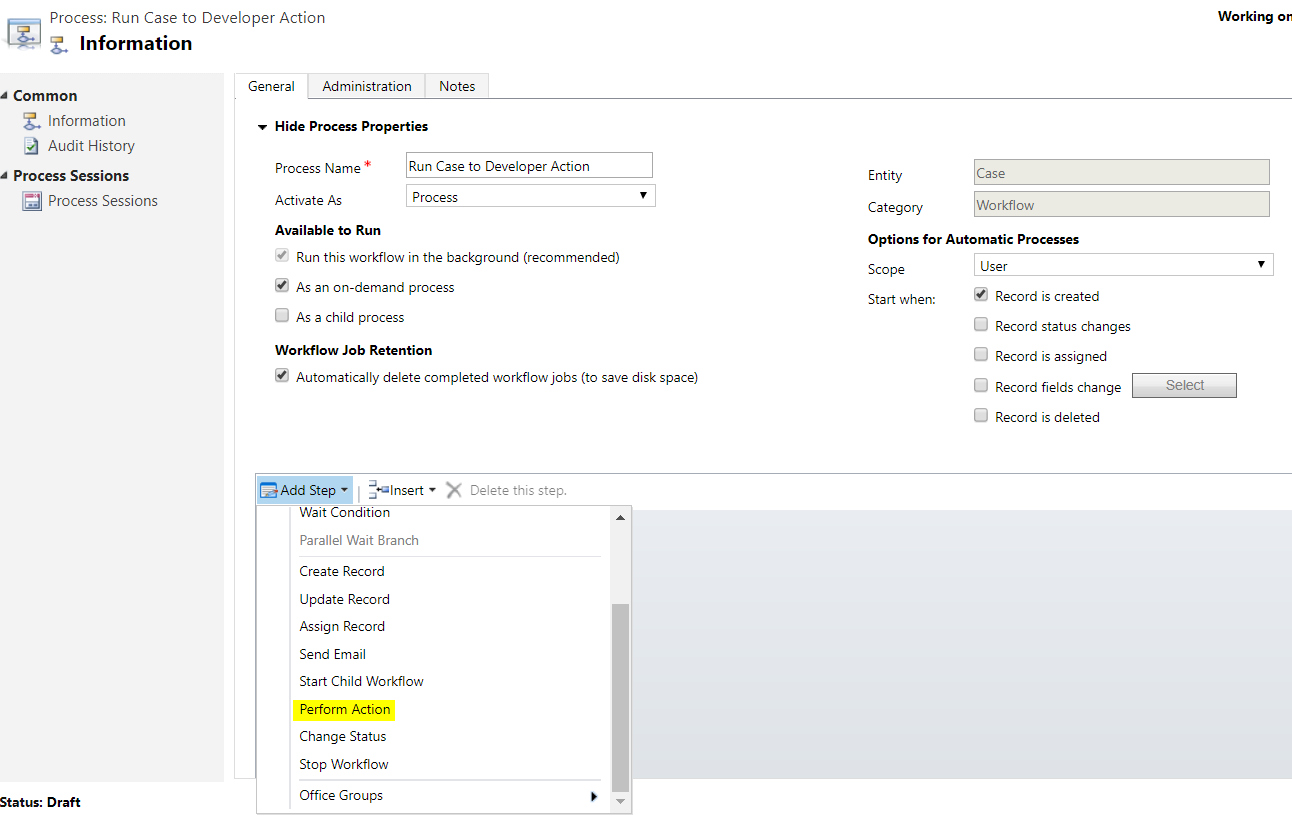
Now, in the section “Add Step” select “Perform Action”.
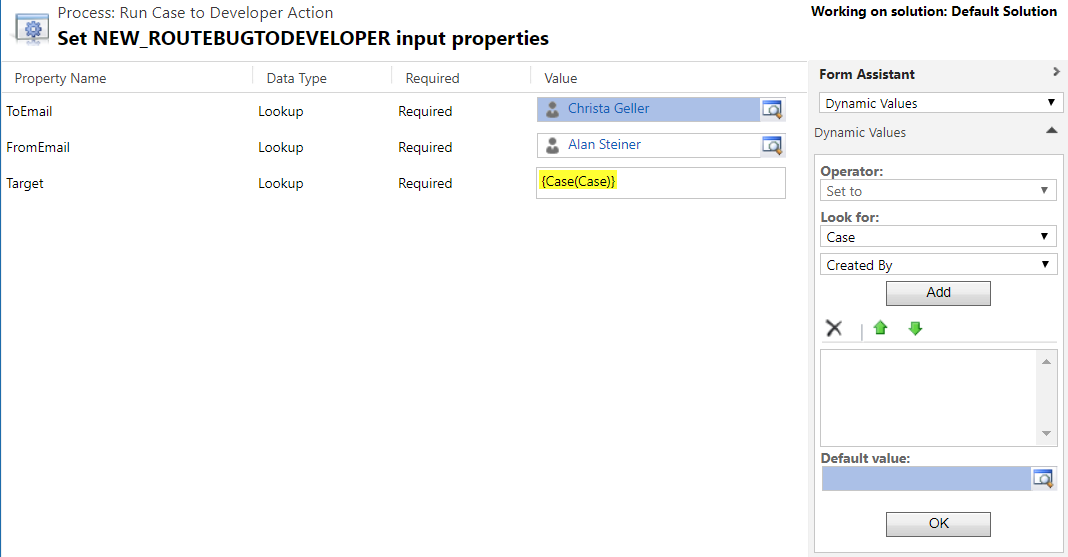
Enter the parameters for the action –

Now lets activate the workflow by clicking on Active the workflow.
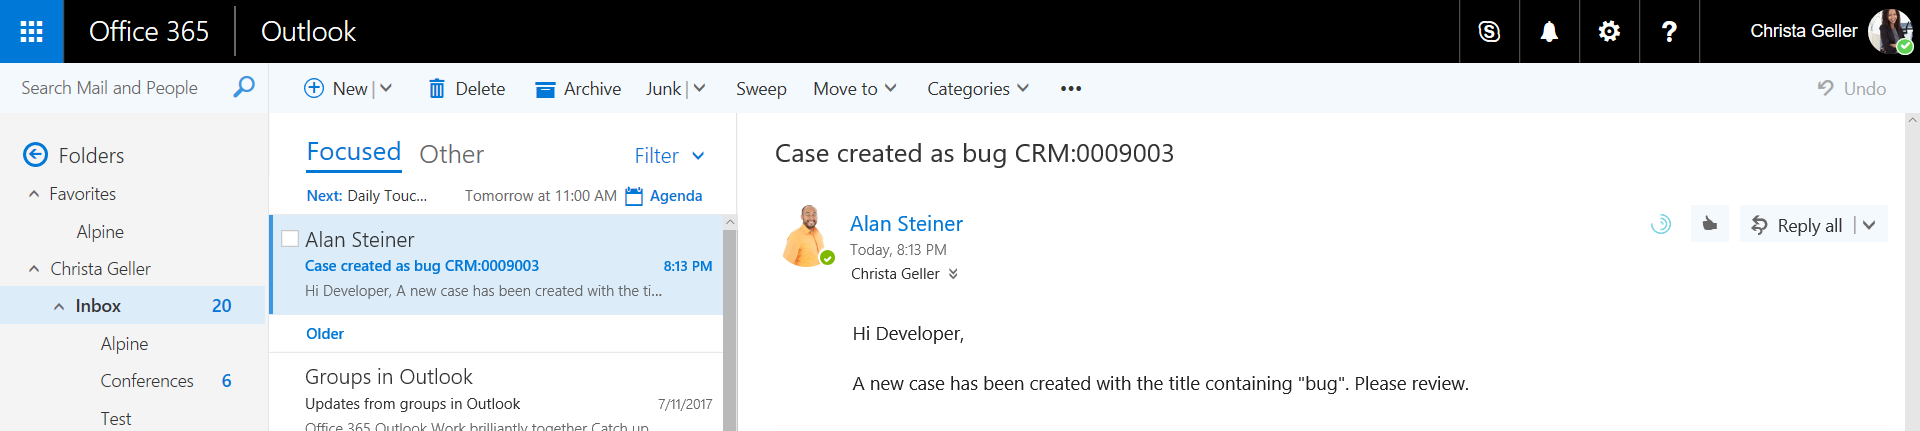
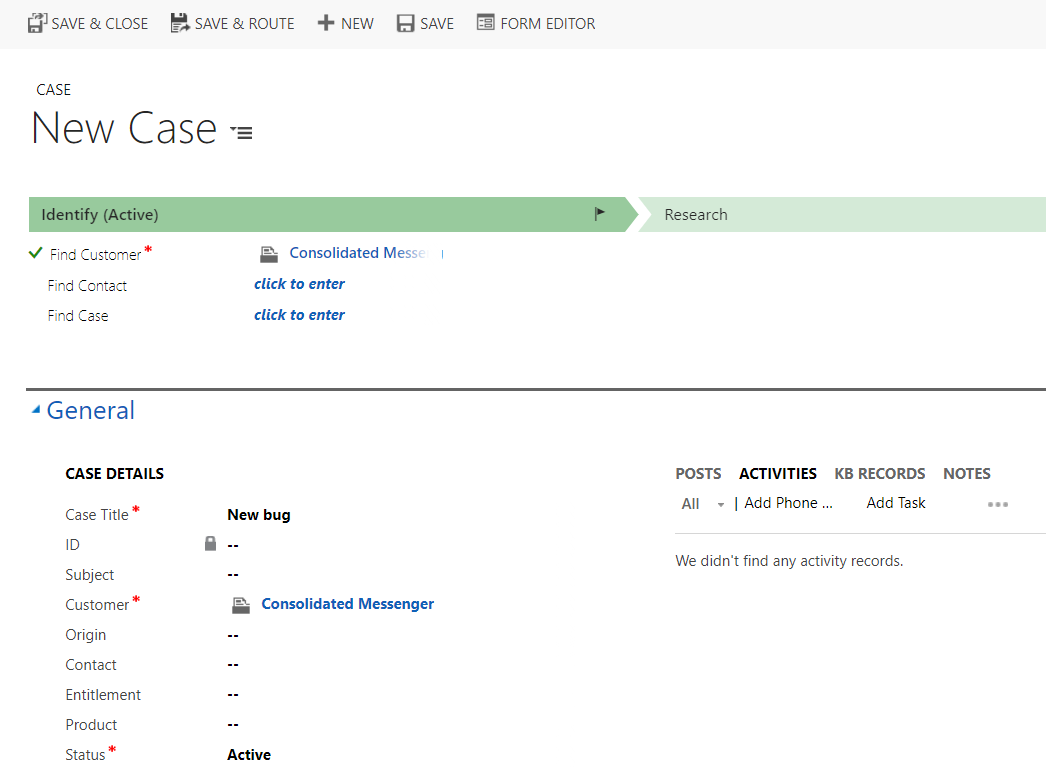
So our Action and Workflow both are now in activated state. Lets test our action by creating a new Case record.
Once you save the case, you will observe that the Case record is reassigned to the developer (user) and an email is sent.