
Previously we learnt what is a workflow. Now let us learn how to create a basic workflow.
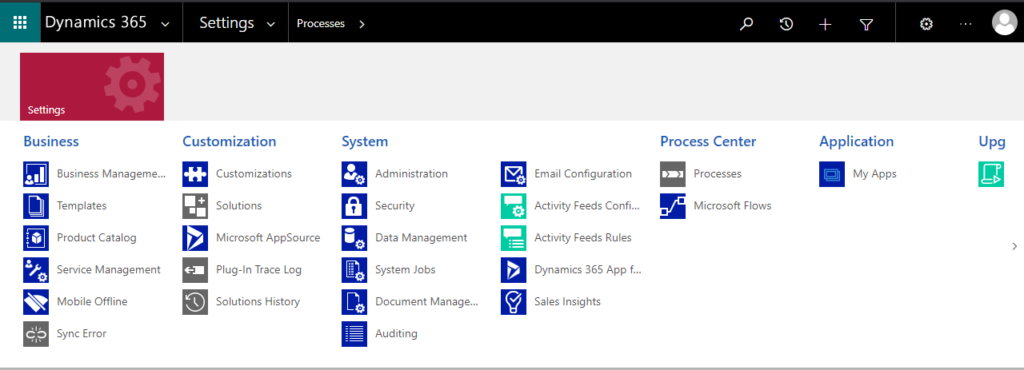
In CRM Dynamics 365, navigate to settings. Under process center click on the tab “Processes”.
In processes click on New to create a new workflow process. Provide name to your workflow and navigate / click on the field “Category”. As you can see there are four types of processes in Dynamics 365. From these we will select the workflow process.
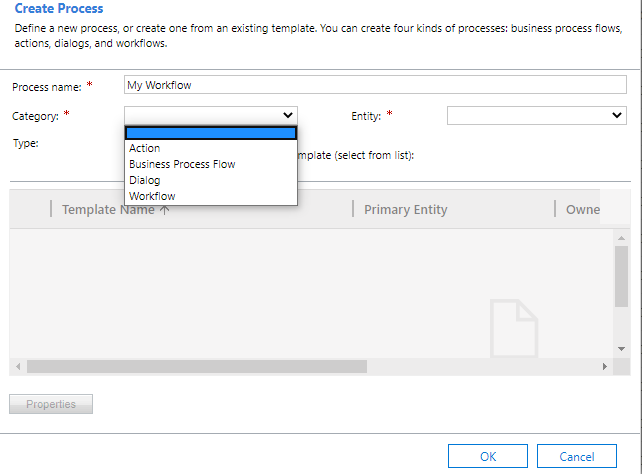
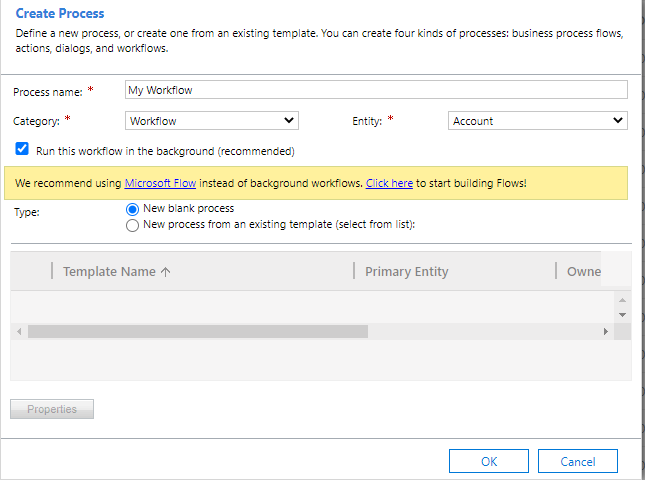
In the field “Entity” select your desired entity which you want to operate or select the Global which represents all the entities. In our case we will select entity “Account”. In field “Type” select the option as new blank process and click on “Ok”.
Now the workflow configuration window will get opened. You can see there are different templates such as Scopes, Messages and Steps. Click on the link to get more information on these templates.
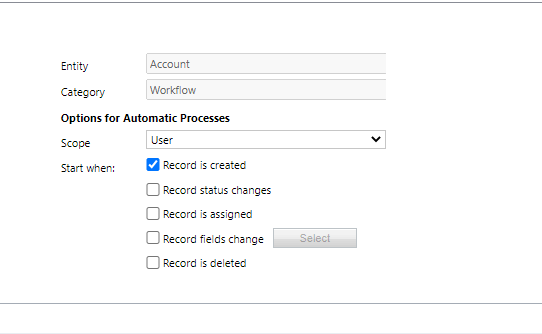
In this example, we will create a basic workflow which will update a certain field “Fax” on the Account form when the Account record is been created.
In order to trigger the workflow on creation of Account record, navigate to the section “Start When” and select “Record is created”.
Now we have the condition for our workflow, further let us perform the operation where we will enter a specific or dynamic value in field “Fax” via our workflow. To add an action or an operation, navigate to the field “Add Step” and click on it. Here you will see the list of logical operations a workflow can handle without having any code dependency.
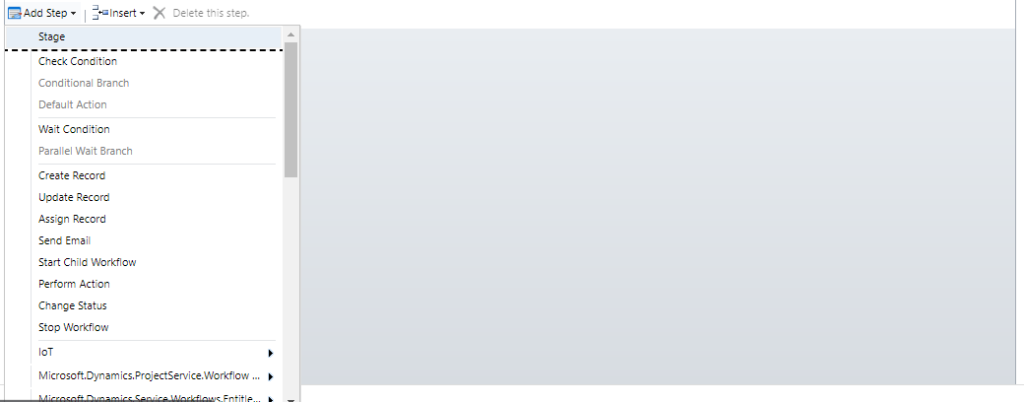
Before entering value in field “Fax” we will ensure that the field is empty. For that select the “Check Condition” from the populated drop down values.
Now this will populate the IF Conditional block.
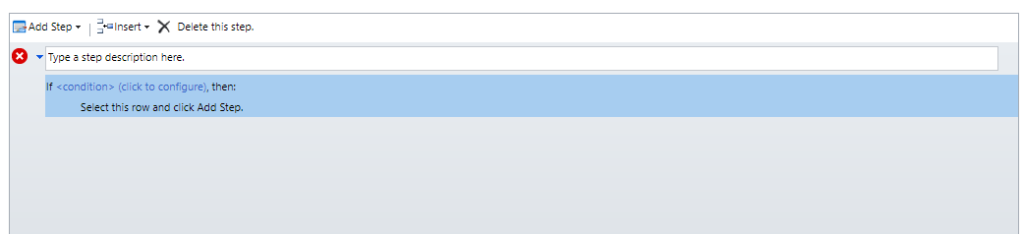
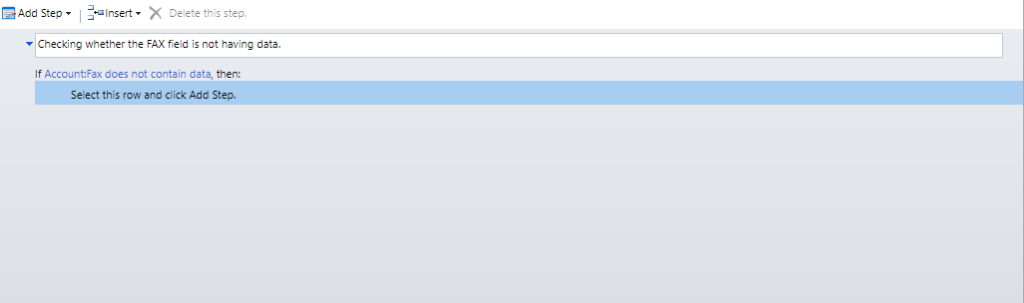
Click on this conditional block. Here create a query where the field “Fax” does not contains data. Save and close this form.

Now selecting the above created IF Statement, click on the tab populated below this statement.
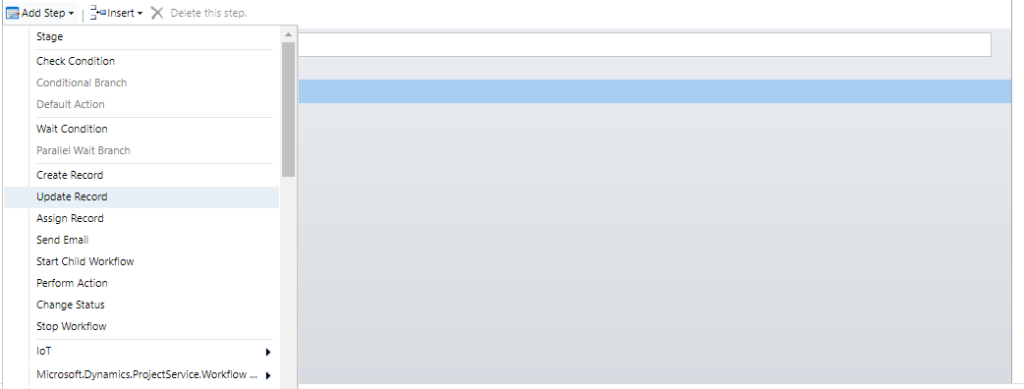
After selecting the line or tab below the IF Statement again click on the button “Add Step” and select value “Update Record” as we will have to update the field “Fax” once the account is been created.
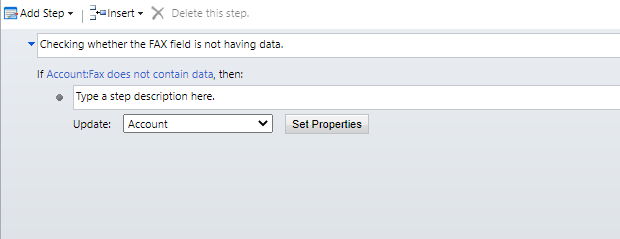
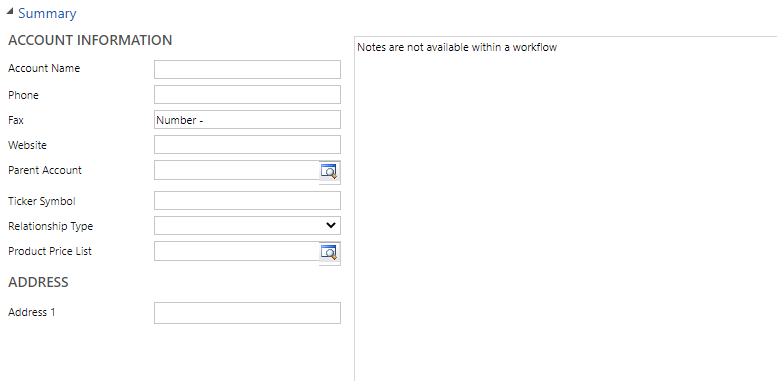
Now click on “Set Properties”. A new window will get opened where the fields from the Account form will get populated.

Here navigate to field “Fax”. Here we have two options, either we can enter a static value or we can enter a dynamic value. If we enter a static value then the field “Fax” will always get populated with this particular value on the creation of account record. In case of dynamic value, the live data or value will come the field during the creation of the Account record. For now we will populate field “Fax” with both static and dynamic value.
Considering the static value, click on field “Fax” and enter any value in it. In our case we have entered value as “Number – “.
Now for the dynamic value, navigate to the section “Form Assistant” and here you will find the components such as operator, lookup entity and its fields. For the demonstration purpose will append the dynamic value from field “Account Number” after our above mentioned static value. There select “Account” in the field “Look for” and select the field “Account Number” and click on “Add” and “Ok”.
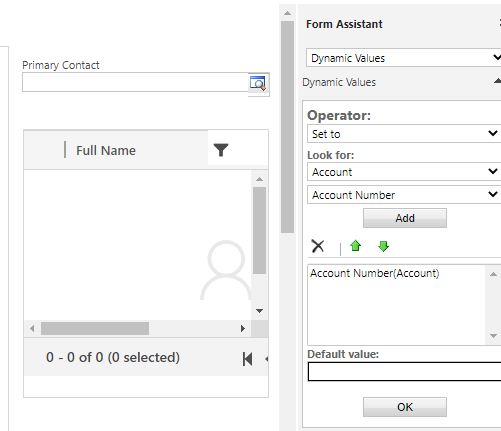
Now again navigate back to field “Fax”, you will notice that the dynamic value is automatically appended after our static value. Click on Save and Close.
Now our workflow is ready. Navigate to the top bar and click on activate.

Once the workflow is activate, you need to test the workflow or check the output. Navigate to the Account entity. Create a new Account record. Considering our above created workflow, while creating a new Account record do not enter value in field “Fax” and enter a valid value in field “Account Number”. Now click on save. Here you will observe that value in field “Fax” will get auto populated in the format “Number – {Your entered account number}”.


