
In this course, we will learn to connect the Dynamics 365 CRM using a Console Application. Before we start, make sure to subscribe to CRM Crate so that you stay up-to-date in field of Microsoft Dynamics 365 CRM.
Why should we use a Console Application to connect with Dynamics 365 CRM?
Below are few practical scenarios for which we can use a console application to connect with Dynamics 365 CRM –
- Perform the complex and huge data migration.
- Provide client a UI or CMD based windows application to run the process as per the need.
Pre-requisite for building a Console Application
- Visual Studio 2015 / 2017/ 2019
- CRM SDK Nugget Packages
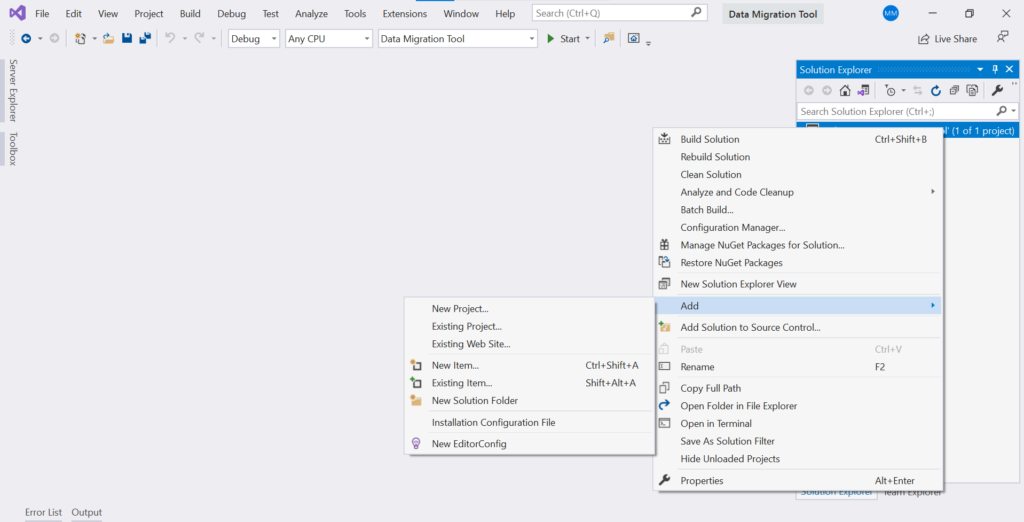
Create a new Console Applicaton Project
- Open the Visual Studio >> Create a new project as shown below.
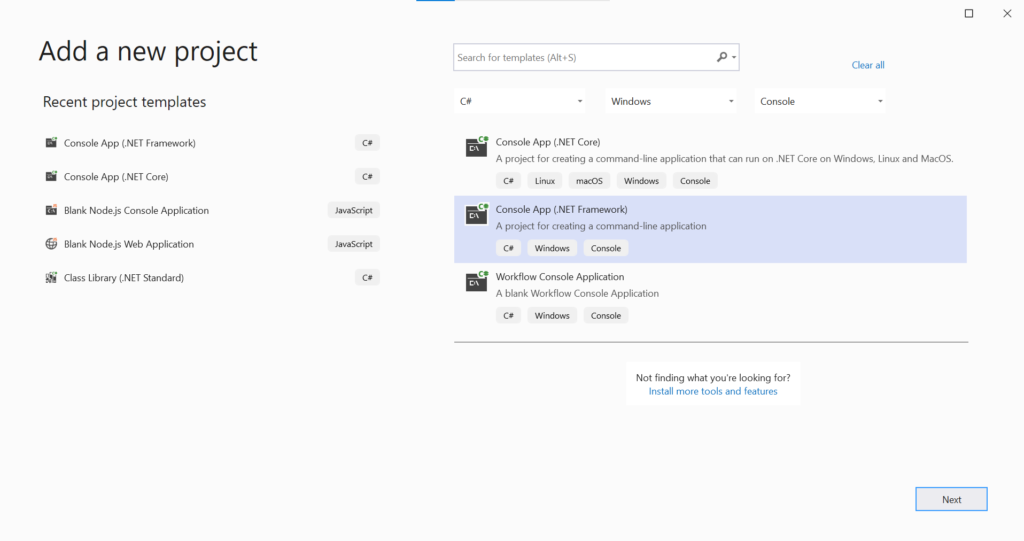
- Select “Console App (.NET Framework)”. Name the new console application and click on Create.

Install the neccessary Nugget Packages
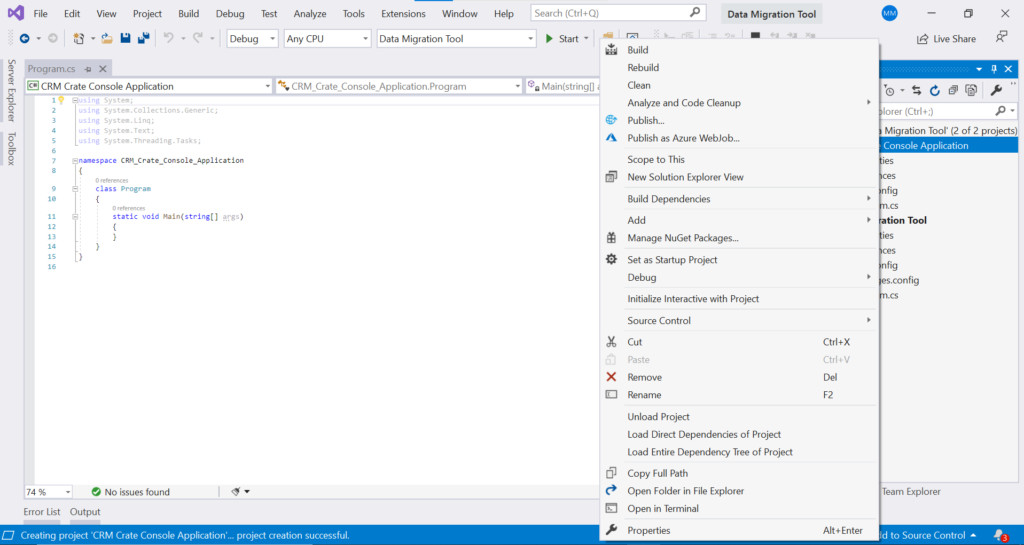
- Right click on the newly created Project >> Select “Manage NuGet Packages”.
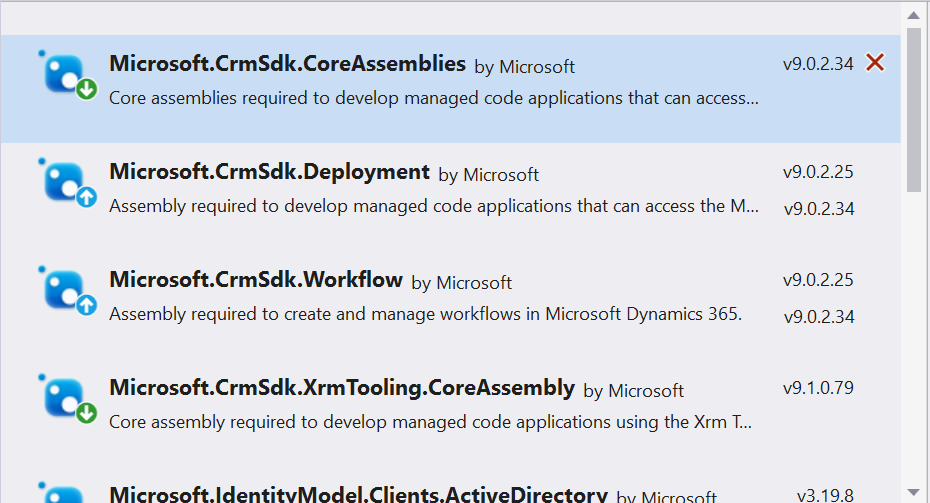
- Install the below given nugget packages –
- Microsoft.CrmSdk.CoreAssemblies
- Microsoft.CrmSdk.Deployment
- Microsoft.CrmSdk.Workflow
- Microsoft.CrmSdk.XrmTooling.CoreAssembly
- Microsoft.IdentityModel.Clients.ActiveDirectory
- System.Configuration.ConfigurationManager
Connect to CRM using the C# console application code
- We will need three parameters for connecting our console application to Microsoft Dynamics 365 CRM. Store the below given three parameters in your App.Config file.
- CRM Web URL.
- CRM User Login ID.
- CRM User Password.
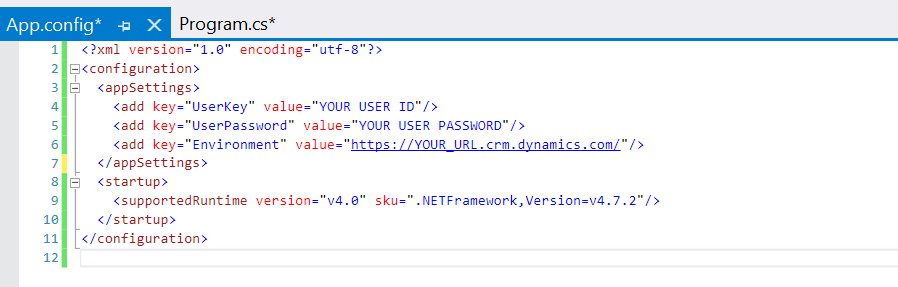
<?xml version="1.0" encoding="utf-8"?>
<configuration>
  <appSettings>
    <add key="UserKey" value="YOUR USER ID"/>
    <add key="UserPassword" value="YOUR USER PASSWORD"/>
    <add key="Environment" value="https://YOUR_URL.crm.dynamics.com/"/>
  </appSettings>
  <startup>
    <supportedRuntime version="v4.0" sku=".NETFramework,Version=v4.7.2"/>
  </startup>
</configuration>
Use the below given code for Connecting the Dynamics CRM.

using System;
using Microsoft.Xrm.Tooling.Connector;
using Microsoft.Xrm.Sdk;
using Microsoft.Xrm.Sdk.Query;
using System.Diagnostics;

namespace CRM_Crate_Console_Application
{
    class Execution
    {
        static void Main(string[] args)
        {
            Console.WriteLine("Console Application Started!");
            try
            {

                //Step 1 - Retrieving CRM Essential Information.
                string sEnvironment = System.Configuration.ConfigurationManager.AppSettings["Environment"].ToString();
                string sUserKey = System.Configuration.ConfigurationManager.AppSettings["UserKey"].ToString();
                string sUserPassword = System.Configuration.ConfigurationManager.AppSettings["UserPassword"].ToString();


                //Step 2- Creating A Connection String.
                string conn = $@" Url = {sEnvironment};AuthType = OAuth;UserName = {sUserKey}; Password = {sUserPassword};AppId = 51f81489-12ee-4a9e-aaae-a2591f45987d;RedirectUri = app://58145B91-0C36-4500-8554-080854F2AC97;LoginPrompt=Auto; RequireNewInstance = True";

                Console.WriteLine("Operating Environment : " + sEnvironment);

                //Step 3 - Obtaining CRM Service.
                using (var service = new CrmServiceClient(conn))
                {

                    if (service != null)
                    {
                        //Executing YOUR CRM OPERATIONS.
                    }
                }
            }
            catch (Exception ex)
            {
                Console.WriteLine("Error Occured : " + ex.Message);
            }
        }
    }
}
- Code Logic Explaination –
A. Step 1 = Retrieve the three essential parameters (URL, User ID and Password) from the App.Config.
B. Step 2 = Create a string connection made up of CRM URL, User ID, Password, App ID and Redirect URI.
C. Step 3 = Utilize the class “CrmServiceClient” for obtaining the CRM service. Pass the above created connection string to CrmServiceClient and recieve the CRM Service in the return.
Once the service is obtained, you can perform any operations within the CRM as per your needs.
Thus we learned how to connect the Console Application with Dynamics 365 CRM.


