
In this course, we will learn to embed a Canvas App in the Schedule Board of Dynamics 365. Before we start, make sure to subscribe to CRM Crate so that you stay up to date in the field of Dynamics 365.

Why do we need to add a Canvas App or a HTML in the Schedule Board?
Dynamics 365 for Field Service provides all necessary features which are needed by an organization in its schedule board. But there can be requirement where we need to add some new custom functionalities within the out of the box schedule board UI. We can use the below given solution to add our own custom UI (HTML or Canvas App) features in the schedule board.
Embedding a custom Canvas App / HTML UI in the Schedule Board
In our scenario, we will add a new Power App within our existing schedule board. Follow the below steps to embed an App in the schedule board.
Step 1 – Create a new Canvas App
- Open the Power App portal (https://make.powerapps.com/) and create a new Canvas App.
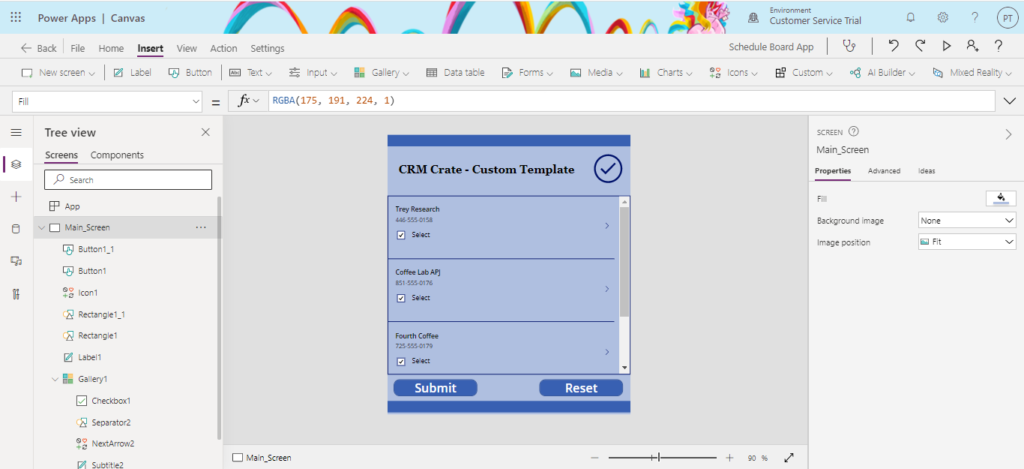
- Create a new Canvas App as per your requirements. Once done, save and publish the application.
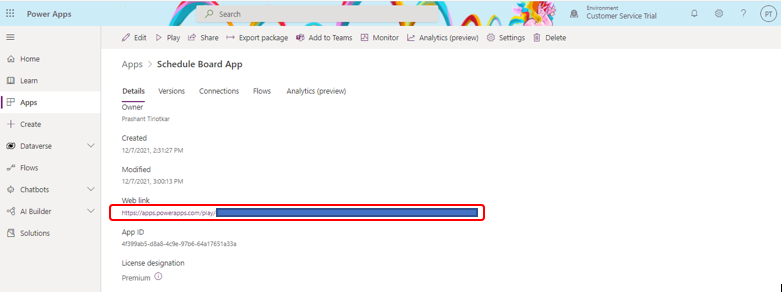
- Now, navigate back to the main application lists, select our newly created Canvas App and click on “Details” as shown below.

- In the App Details, navigate to the field “Web Link” and copy the application URL.
Step 2 – Create a new HTML web resource in the Dynamics 365
- Microsoft has provided a supportive way to add a custom UI within the schedule board with help of the HTML web resource.
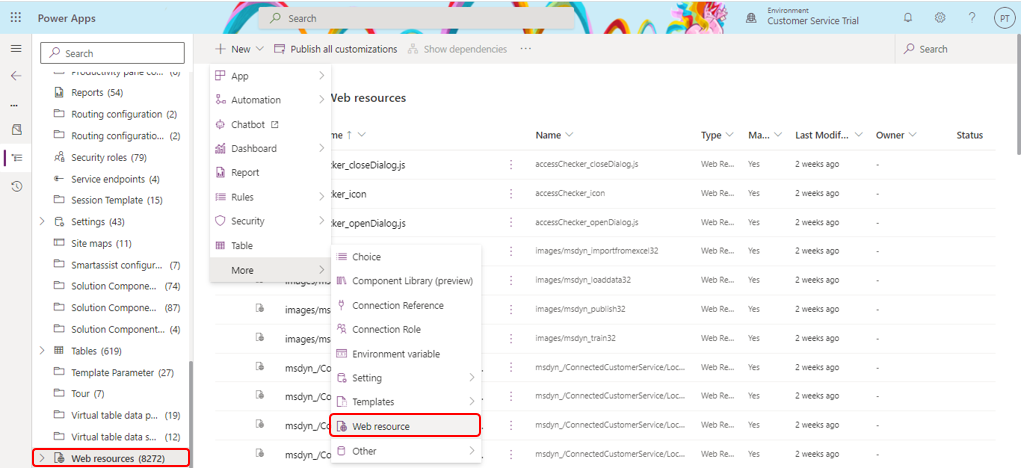
- In-order to create a new HTML web resource, open the Dynamics 365 customizations >> Web resource as shown below,
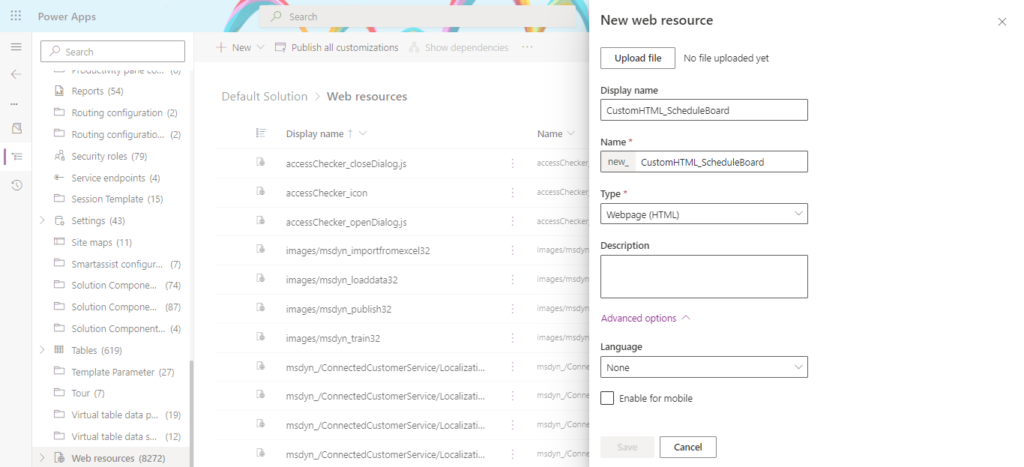
- Now let us create a new iFrame based HTML code for displaying the previously created Canvas App. Use the below HTML code and paste the previously copied application URL in the given code block.
<html><head><meta></head><body onfocusout="parent.setEmailRange();" style="overflow-wrap: break-word;">
<iframe width="400" height="460" src="YOUR_APP_URL?source=website&screenColor=rgba(165,34,55,1)" allow="geolocation; microphone; camera">
</body>
</html></iframe></body></html>- Upload the above HTML code in the web resource and click on publish.
Step 3- Configure the Schedule Board to display the HTML web resource
- Open the Dynamics 365 for Field Service and navigate to the schedule board.
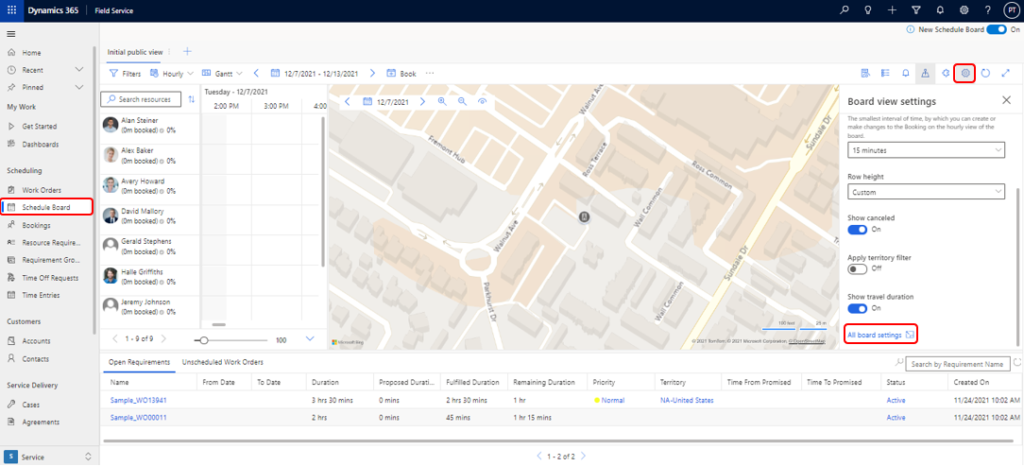
- Here, click on the settings (Gear Icon) >> “All board settings” as shown below.
- In the schedule board settings, navigate to the tab “Custom Web Resource” and select the recently created HTML web resource as shown below.
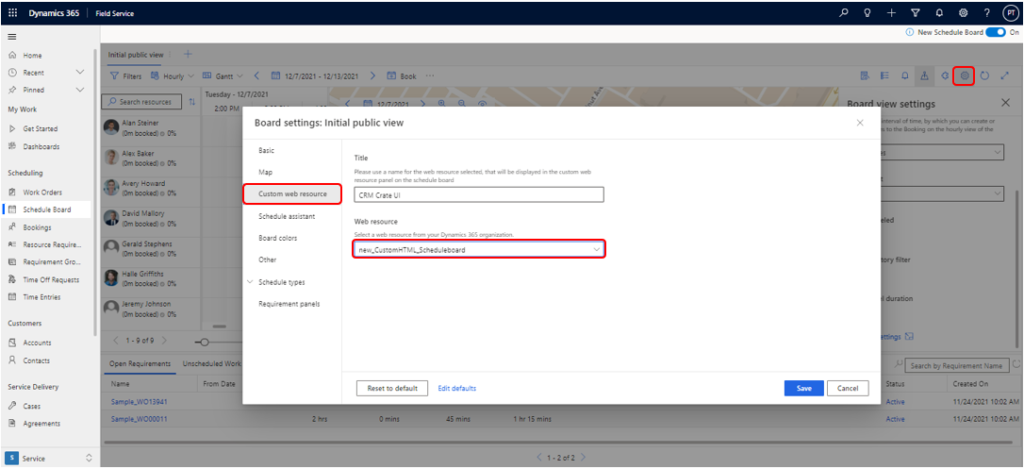
- Click on the Save button once the configuration is completed.
Validate the Canvas App based custom UI in the Schedule Board
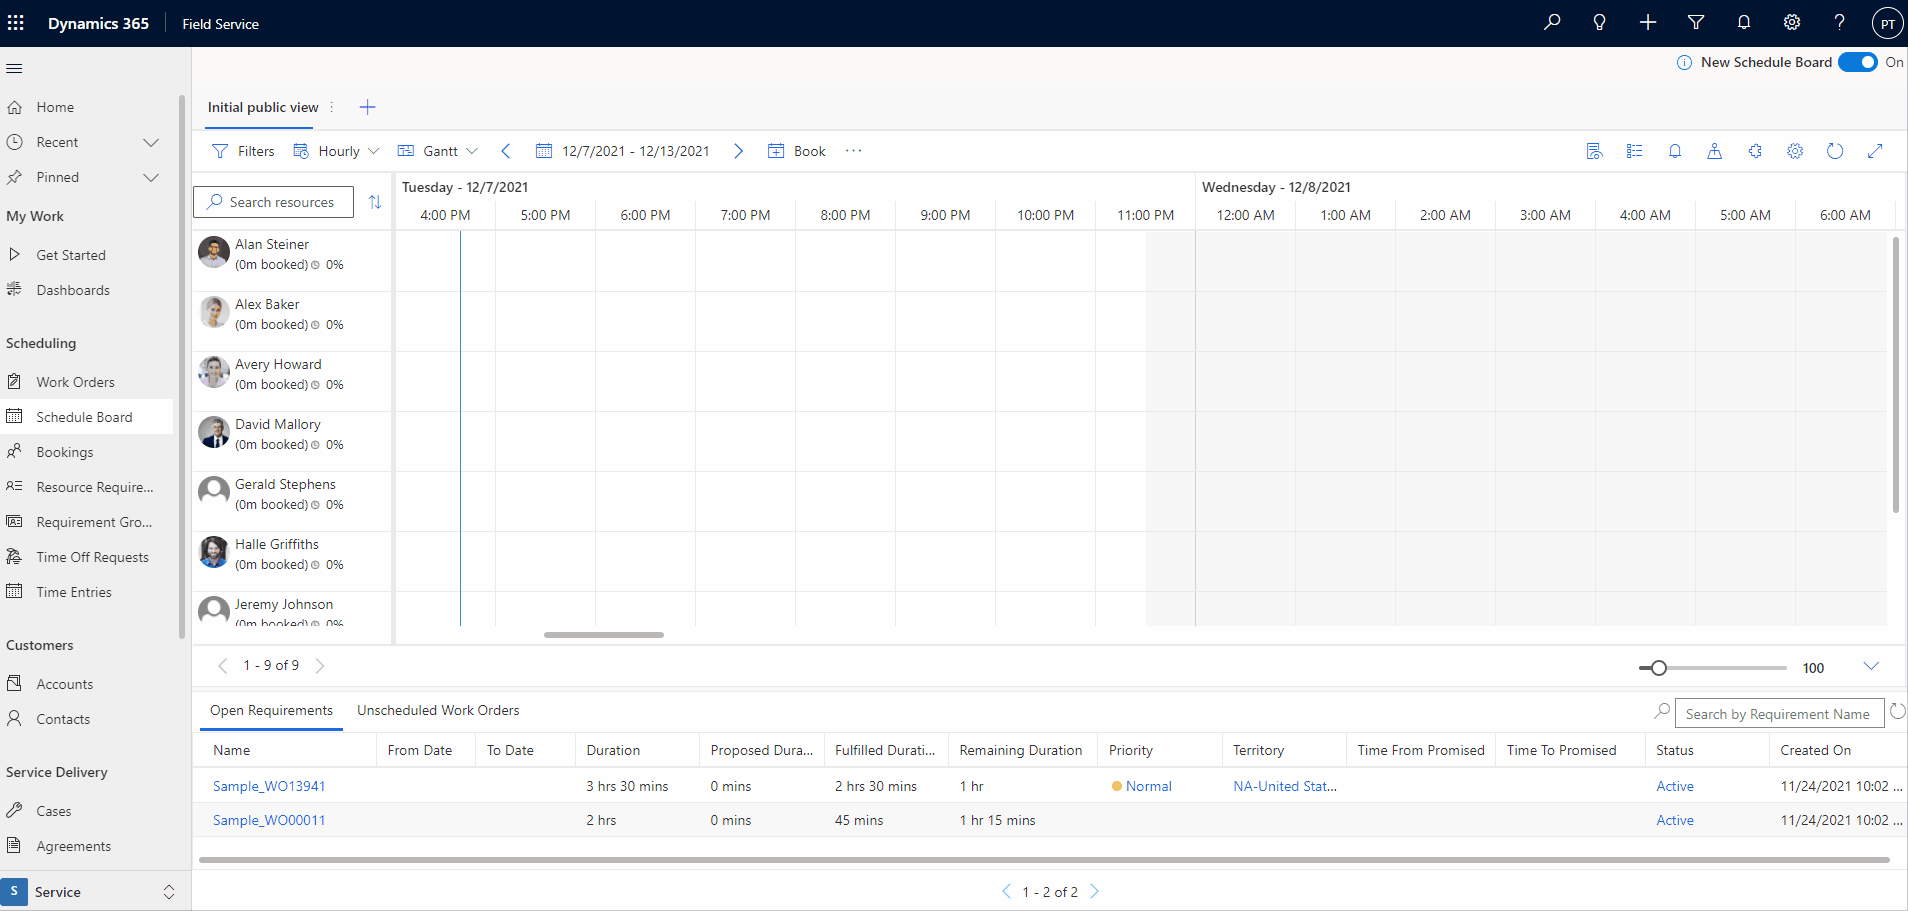
Since we have created a new Canvas App and embedded it into the schedule board, let us now validate the changes in the Dynamics 365 for Field Service as shown below.
Thus, we learned to embed a Canvas App in the Schedule Board of Dynamics 365.


