
In this course, we will learn to open a custom page on a button click in model-driven app (Dynamics 365). Before we start, make sure to subscribe to CRM Crate so that you stay up to date in the field of Dynamics 365.

What are Custom Pages?
Microsoft has announced the public preview of Custom Pages which was demonstrated at Microsoft Business Applications Summit.
A custom page can be used in places such as main area, dialogs, and the new app side pane. This allows scenarios like a pixel perfect landing page with data pulled from across the organization, data driven pages that use a record’s data to change the experience, dialog designed to optimize specific business actions, and productivity tools that support the main tasks for the app.
The custom pages can be opened from the sitemap (New Preview) for easy access or can be opened from existing model-driven app logic using the Client API. Also the custom pages can open other custom pages or model pages.
Click on the given link for understanding & creating the custom pages in Dynamics 365 CRM (Model-Driven App) : https://www.crmcrate.com/power-apps/understanding-and-creating-custom-pages-in-dynamics-365/
Open a Custom Page on a ribbon button click
Follow the below steps for opening a custom page on a button click in Dynamics 365.
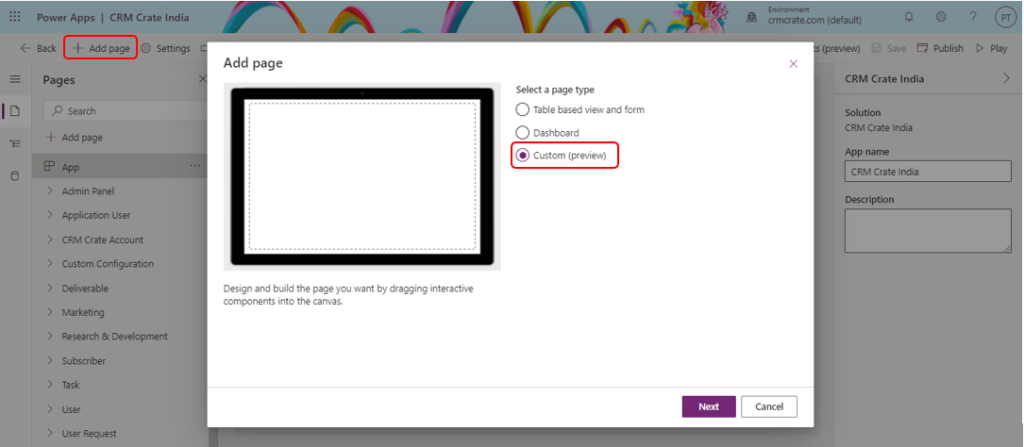
Step 1 – Create a Custom Page in model-driven app

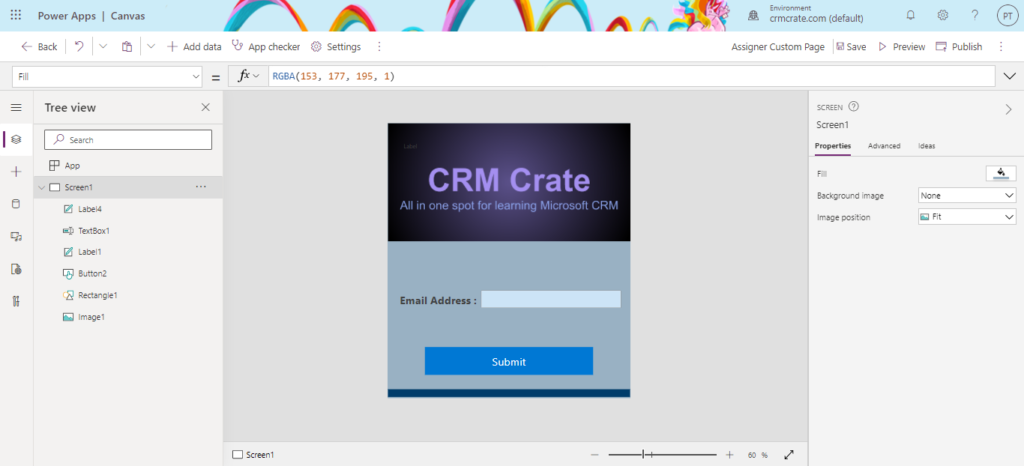
Step 2 – Design & customize the page in the Canvas App editor
- Now the newly created Custom Page will get appeared in the model-driven app sitemap. Save & publish the changes.
Step 3 – JavaScript logic for opening a Custom Page
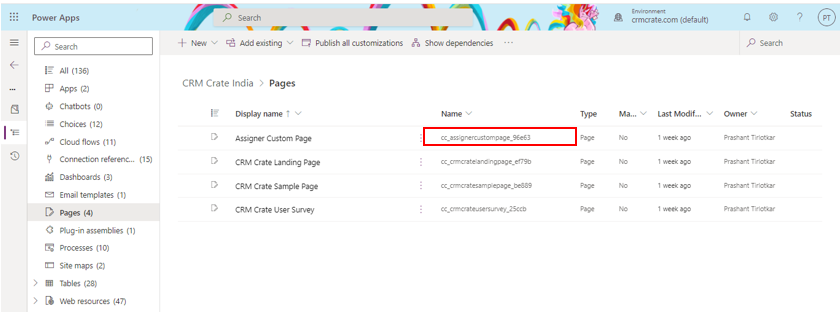
- Open the newly created Custom Page in the powerapps solution explorer and copy the page name as shown below.
- We will use the Xrm.Navigation.navigateTo() client Web APi for opening a Custom Page in Dynamics 365.
Xrm.Navigation.navigateTo(pageInput,navigationOptions).then(successCallback,errorCallback);
Navigates to the specified table list, page, table record, or HTML web resource.
- Utilize the below JavaScript snippet code and insert the previously copied custom page name in the input page parameter.
//CRM Crate - JavaScript Snippet.
function callMethod (executionContext) {
formContext = executionContext;
var recordId = formContext.data.entity.getId();

//Initiating Web Resource Parameter.
var pageInput = {
pageType: "custom",// Set pageType as "custom"
name: "cc_assignercustompage_96e63", // Custom Page Name
entityName: "cc_subscriber", // Entity Name
recordId : recordId // Input Parameter For Custom Page
};
//Declaring HTML Page Dimensions.
var navigationOptions = {
    target: 2,
    position: 1,
     height: 720,
    width: 600,
    title: "CRM Crate Custom Page" // Enter Title Of Your Choice
};
//Using navigateTo Client API.
Xrm.Navigation.navigateTo(pageInput, navigationOptions).then(
function success() {
// Run code on success
formContext.data.refresh();
},
function error() {
// Handle errors
formContext.data.refresh();
}
);
}- Add the above JavaScript code on the ribbon button click event and publish the customizations.
Validate the Custom Page in Dynamics 365
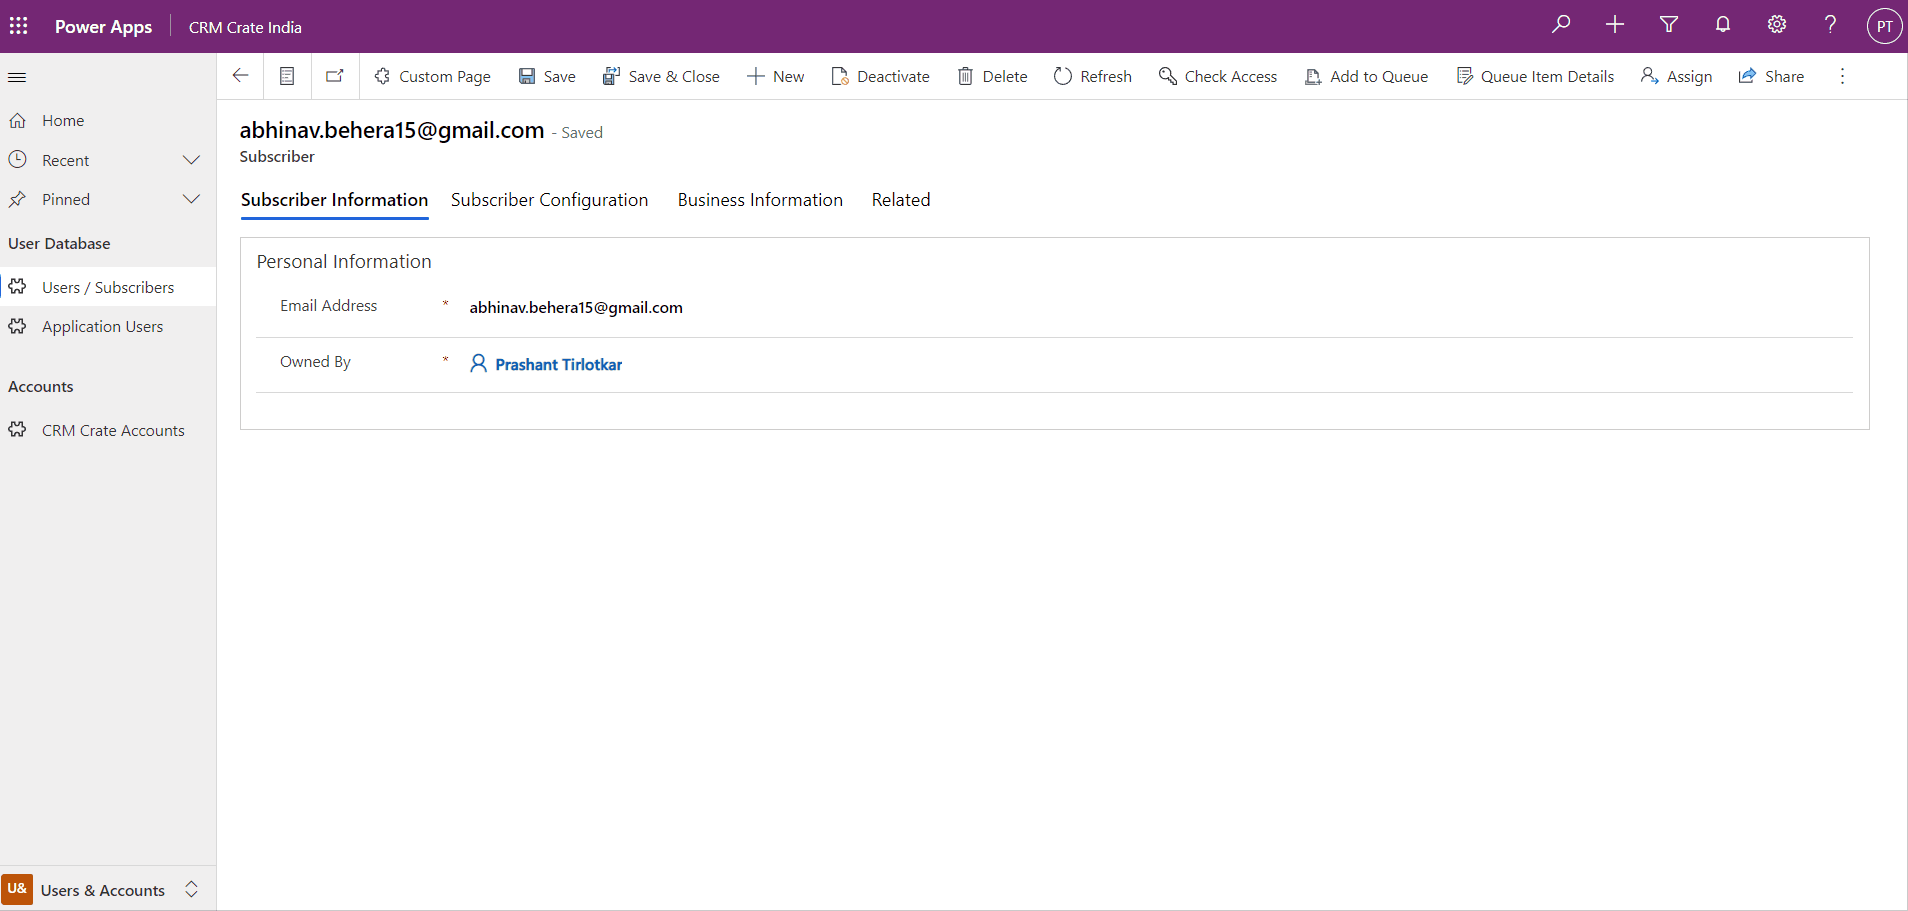
Since we have created and configured the Custom Page in our sitemap, let us now validate the changes in the Dynamics 365 as shown below.
Thus, we learned to open a Custom Page on a button click in model-driven app (Dynamics 365).


