
We will learn to create a new Canvas App from an image. Before we start, make sure to subscribe CRM Crate so that you can stay up to date in the field of Power Apps.
Prerequisites for creating a Canvas App from an image
- A Power Apps license.
- If you’re using your own image, the image file extension must be .jpg or .png. Also, the image must contain a clearly legible one-page form with a light background color. For the best results, edit your image so that it has a white background and high contrast.
Fundamentals for creating a Canvas App from an image
The application making cycle typically involve a design phase to plan out what the app should look like. Whether the design is based on an existing paper form, a whiteboard drawing, or even an image of a legacy app, it can take a considerable amount of time to build the app from scratch.
With the “Image to Application” feature, you can now create an application from a visual design and connect it to data through a few simple steps in the guided interface. This feature makes it easy for makers of all skill levels to jumpstart the app development process.
Below are few important pointers related to the new “Image to Application” capability.
- Power Apps doesn’t persist the image that you upload. The uploaded image is only processed in-memory to generate the app.
- The styling of the components in the app, such as fonts and colors, will be based on the Office Blue theme in Power Apps.
- If you want the exact design styles to be preserved when you create your app, consider creating a canvas app from Figma.
Creating a new Canvas App from an image
Follow the below steps for creating an application.
Step 1 – Upload an Image
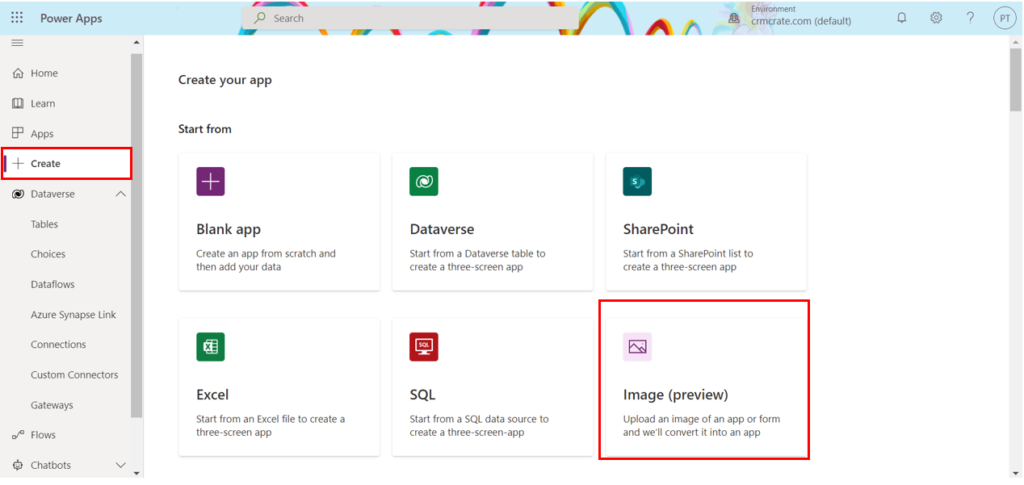
- Sign in to Power Apps studio.
- Select + Create from the left-pane >> Images as shown below.
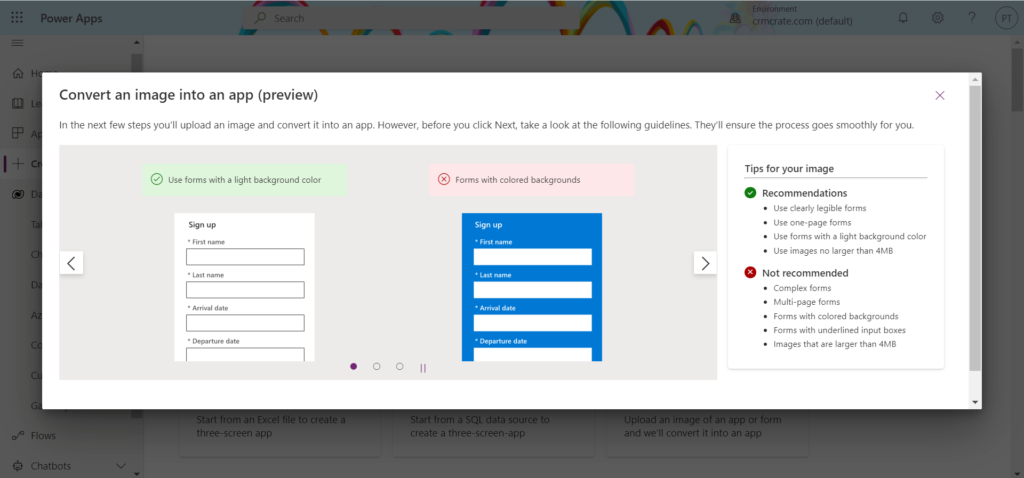
- Review the examples of recommended images and tips. For the best experience, make sure your image adheres to these recommendations. Once you’re done, select the Next button.
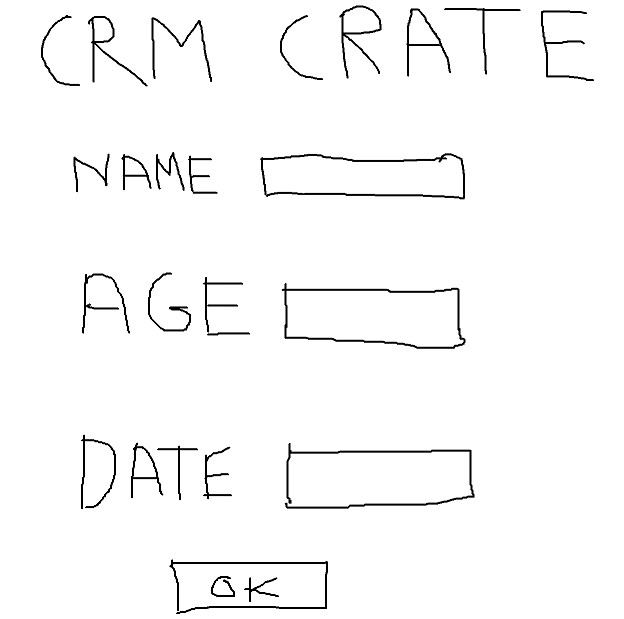
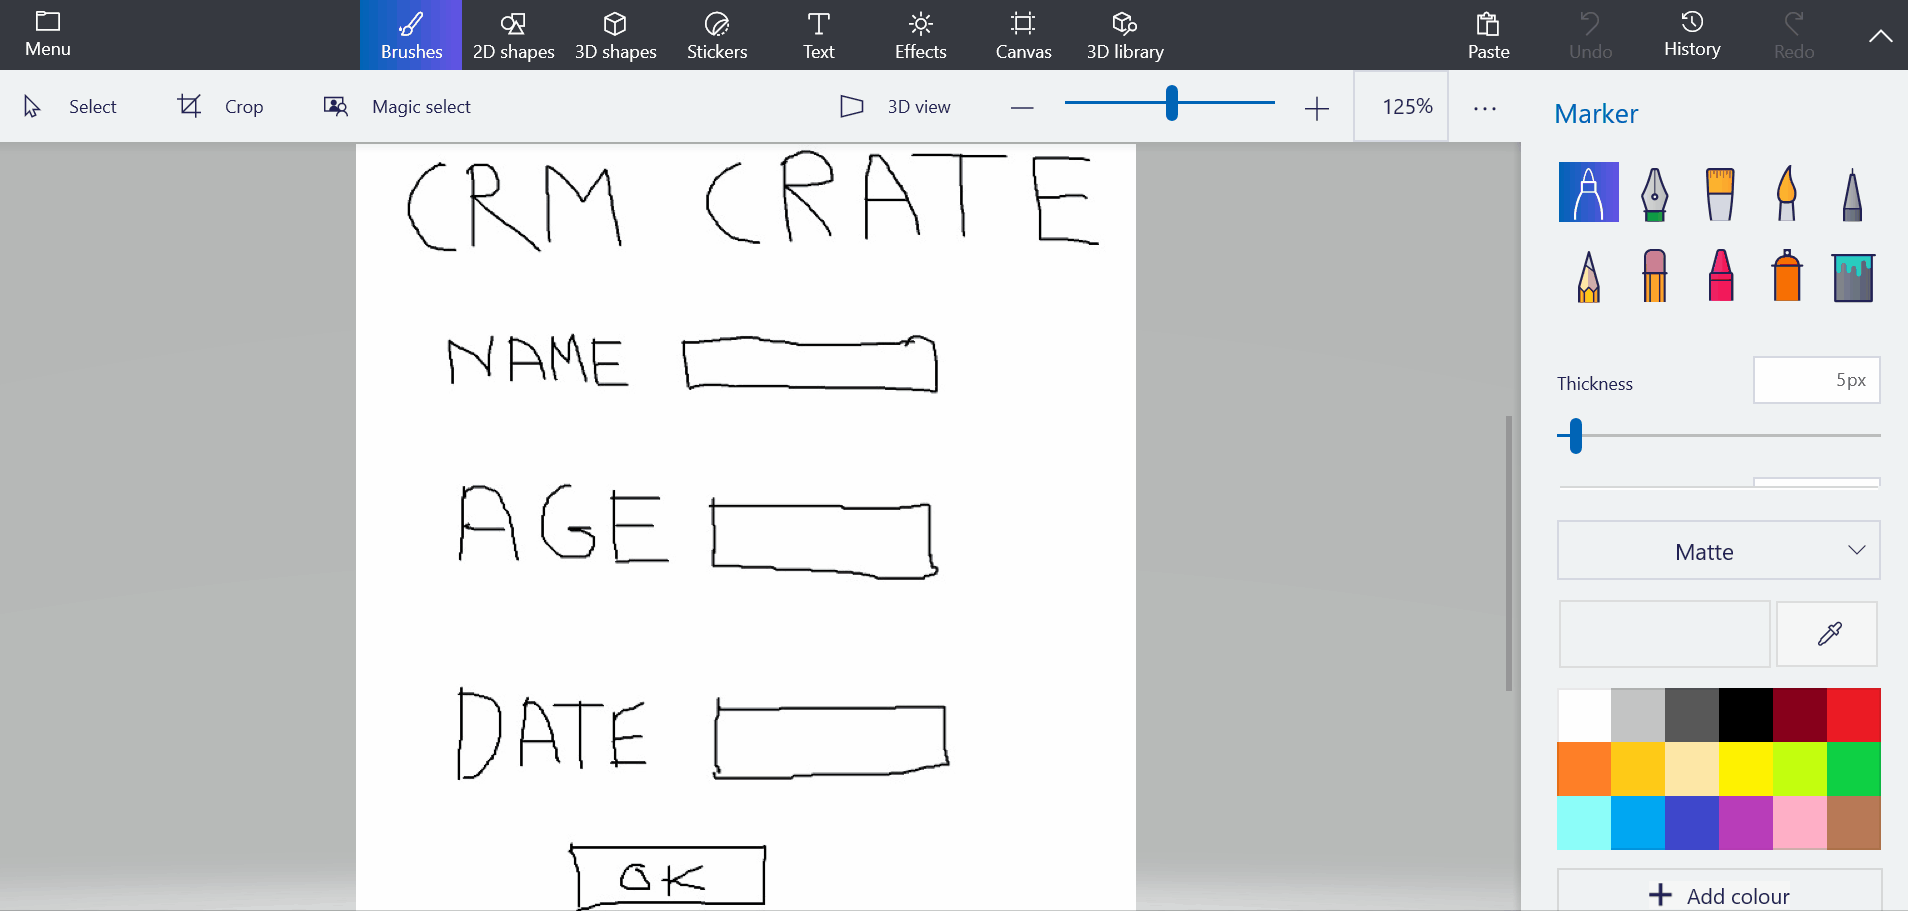
- Prepare the drawing image as per your requirement. We have used the below shown image for creating an app.
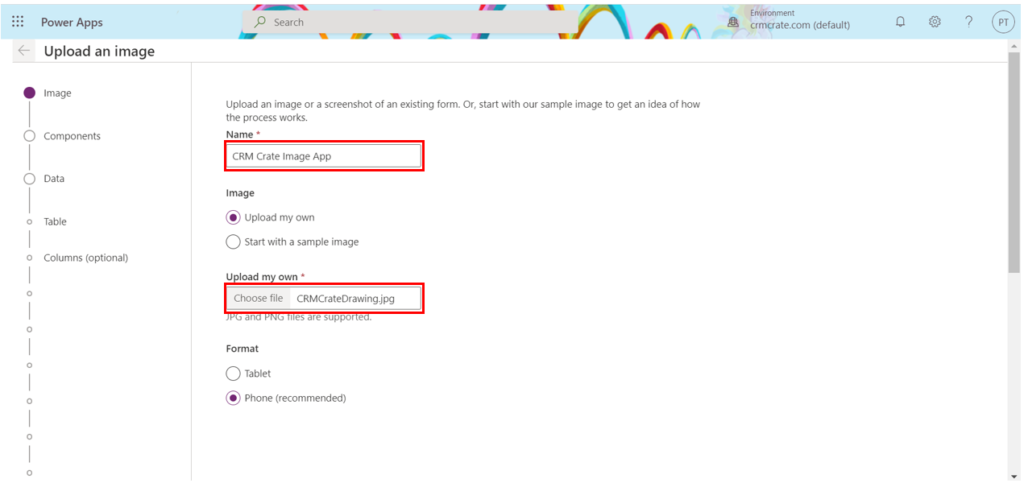
- Now, provide a name for your app and upload the image as shown below.
Step 2 – Configure component for your app
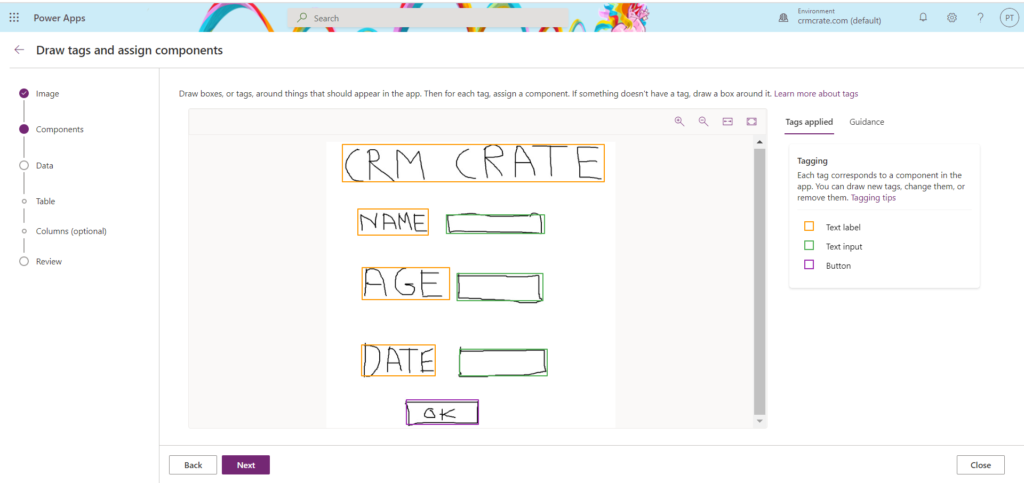
- Power Apps will create an outline for your app according to the image dimensions. Further, you can specify the attribute data types as shown below. Click on next once the configuration is done.
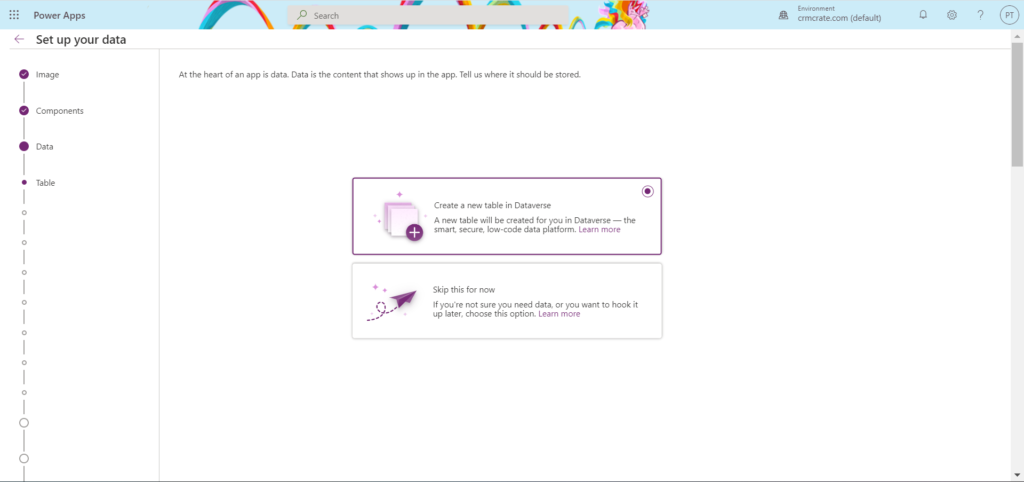
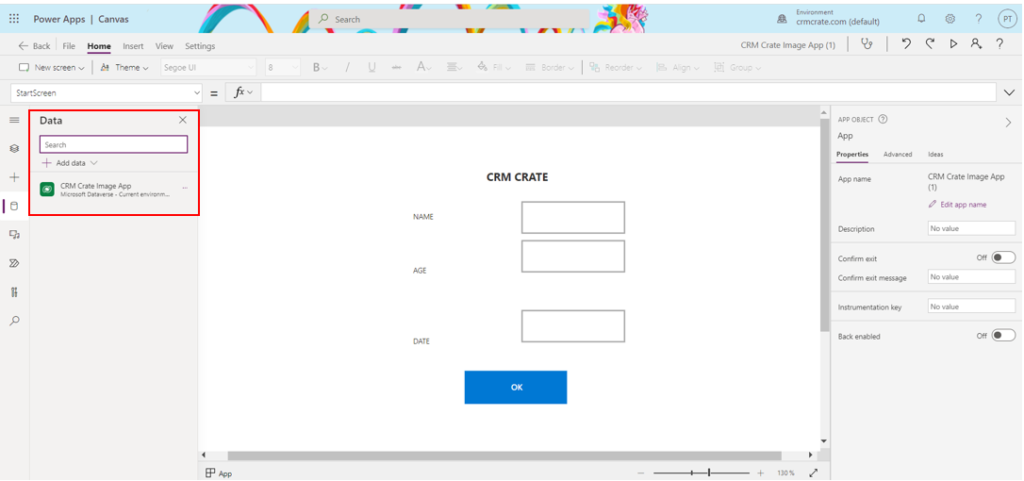
Step 3 – Add a data source for your app
- You can add a new table in Dataverse for this app or skip this step. For demo purpose we will create a new table in Dataverse for our app.
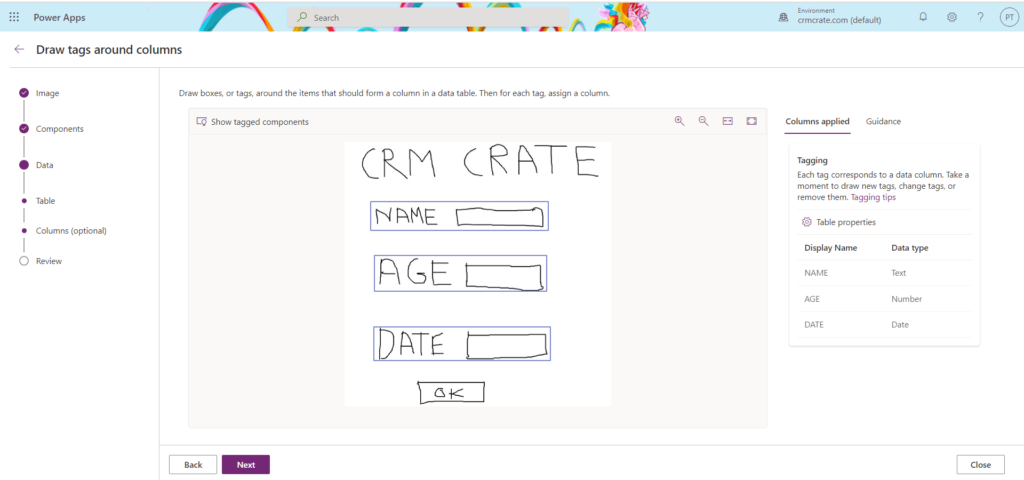
- If you chose to create a new table in Dataverse, you can now edit the table and column details. Each tag corresponds to a data column based on the form fields that were identified in your image.
- Select a tag to modify the column properties, such as Display Name, Name, and Data type. To remove an existing column, select the tag and then select Delete column.
- You can add a data column by drawing a new tag and setting the properties. When tagging columns, most of the time you’ll draw a tag around two things: a label, and something the user will enter data into, like a text input.
- Upon selecting Next, you’ll be able to review the table and column structure.

- Once you’ve completed the review, select Create to create the app. Note that the app creation might take a minute or two.
Step 4 – Customize the app in the studio
- Once the app is created, your new app will open up in Power Apps Studio so you can continue building and customizing your app.
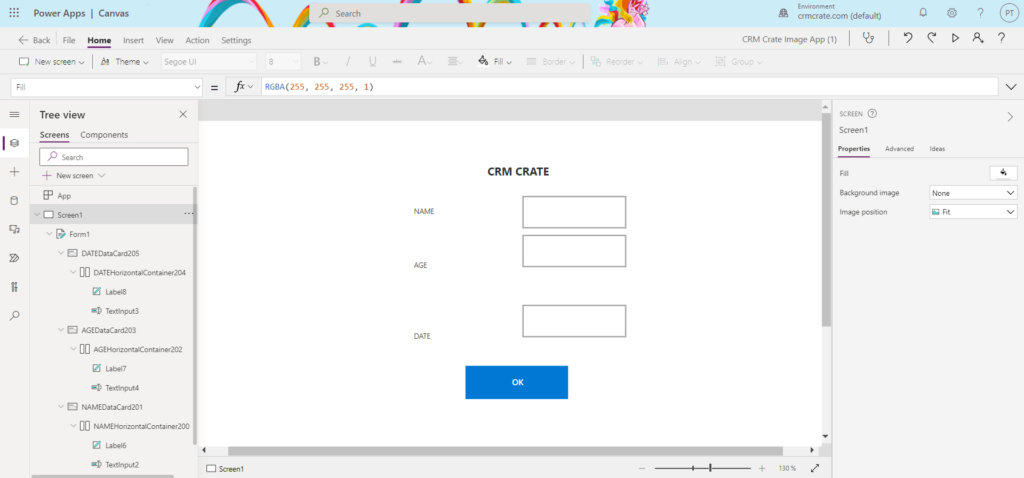
- If you chose to create a new table in Dataverse, your form will be automatically connected to the new table as shown below.
This is how we can create a brand new Canvas App with help of a simple image or sketch.
What are the image requirements?
- The image you want to upload must have the file extension of .jpg or .png. If you have a design image with another file extension, save the image file with .jpg or .png file extension in order to use it with this feature.
- Image size must be less than 4 MB.
- If you’re using screenshots or digital sketches, alter the background to light, pure-color if white is not available.
- If you’re taking a picture, use higher contrast or make it brighter. Make sure the part you want to tag is clear and bright.
- If you’re taking a picture using a camera or phone, use higher contrast to favour light backgrounds. You can use any available photo editing apps to edit the picture contrast.
- If you’re using hand-drawn images, try to use white sketch pad without any lines on it.
What are the limitations of this feature?
- Support for responsiveness is limited. More information: Building responsive canvas apps
- Complex forms, forms with colored backgrounds, multi-page forms, and forms with underlined input boxes aren’t supported.
- Support for styles is limited. The styling of the components in the app, such as fonts and colors will be based on the Office Blue theme in Power Apps.
- You can upload only one image at a time to create an app.
- Only canvas apps are supported.
- Supported components: Button, Check box, Data cards, Date picker, Drop down, Edit form, Label, Radio, Rating, Slider, Text input, Toggle


