
We will learn how to create and share personal views in Microsoft Dynamics CRM 365. Before we start click here to understand different types of views in Microsoft CRM. One of the best capabilities of Microsoft Dynamics 365 is its ability to access and utilize the valuable data using the views. And on top of it, CRM now allows user to create its own personal view so that he/she can make the view according to their needs and requirement.
Creating a new Personal View.
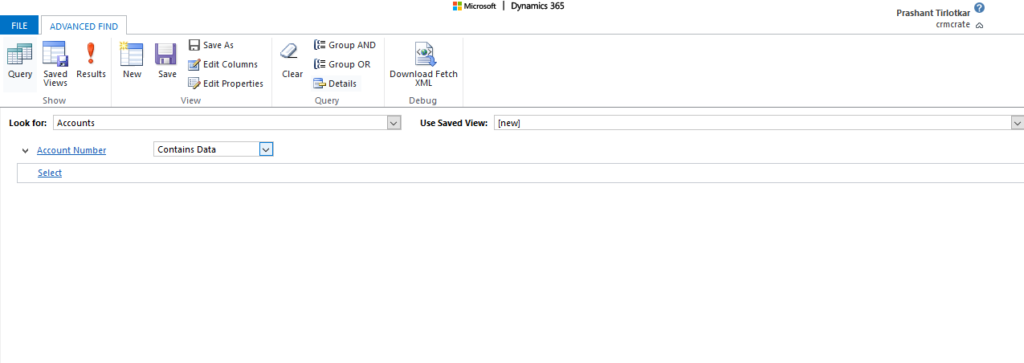
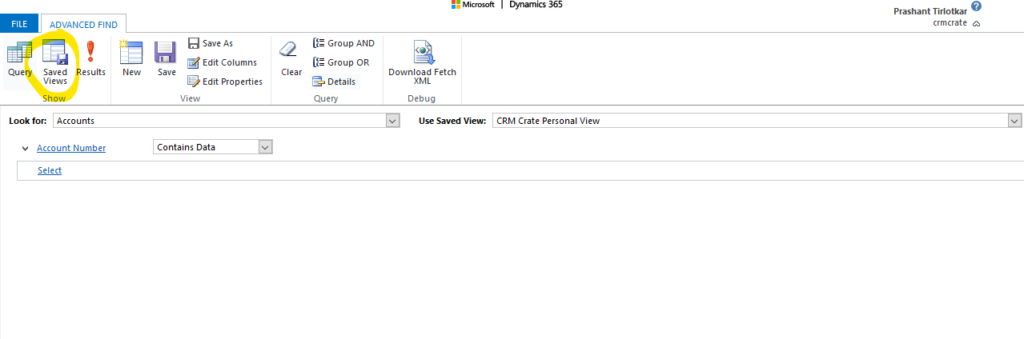
In your Dynamics CRM, navigate and open the Advance Find. Create your own personal query as per your need in the Advance Find. In our case, we have created a query on Account entity which shows account records whose field “Account Number” contains data.
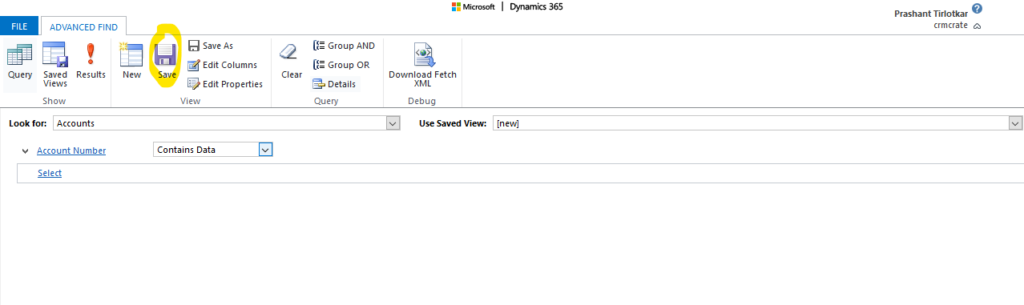
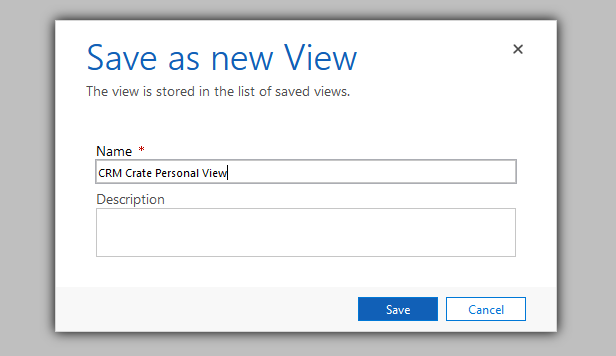
Once your query is completed, navigate to the advance find component bar and click on Save, provide a unique name to your View and again click on Save.
You can access you view in the Advance Find saved views section as shown below.
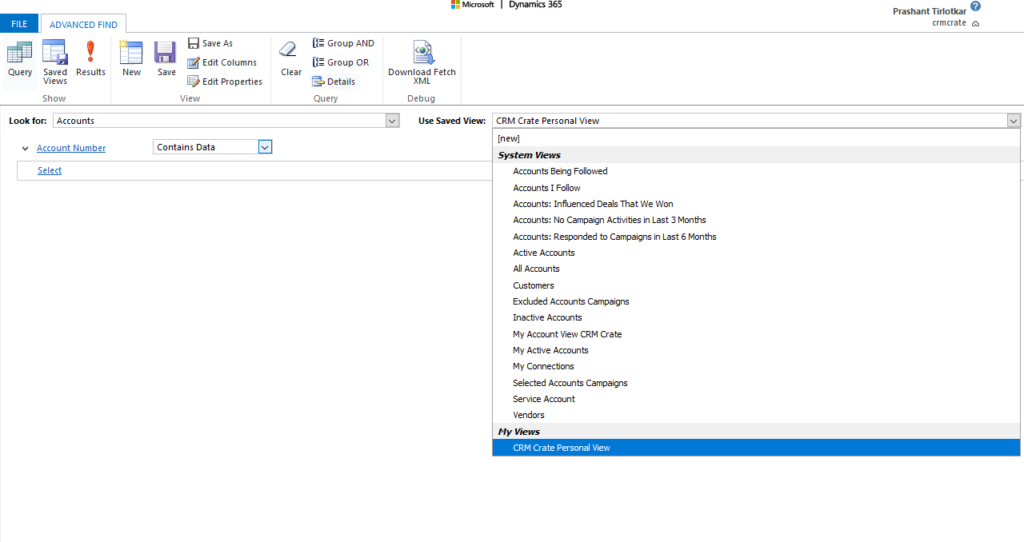
Now your Personal View is been saved in your CRM. Note, this view is only visible to the user who created the view. In order to make this view available to other user you need to share this view.
Sharing a Personal View.
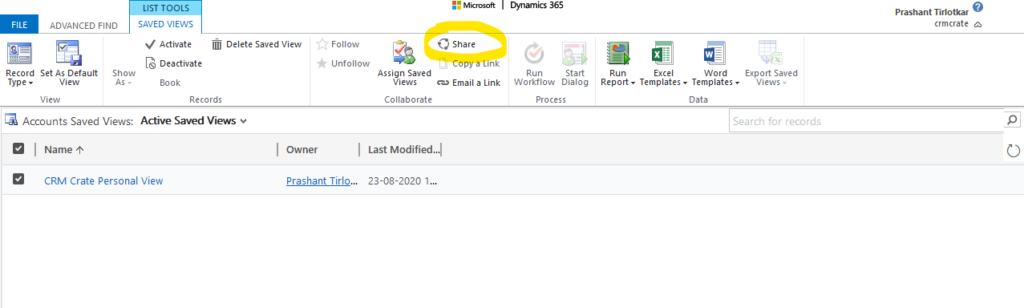
Once you have created your own personal view, now you will share this view with other users so that they can access it. To share the view, navigate to Advance Find panel and click on Saved Views
In Saved Views you can find all of your Personal Views. Select the personal view which you have to share with other users and click on Share.
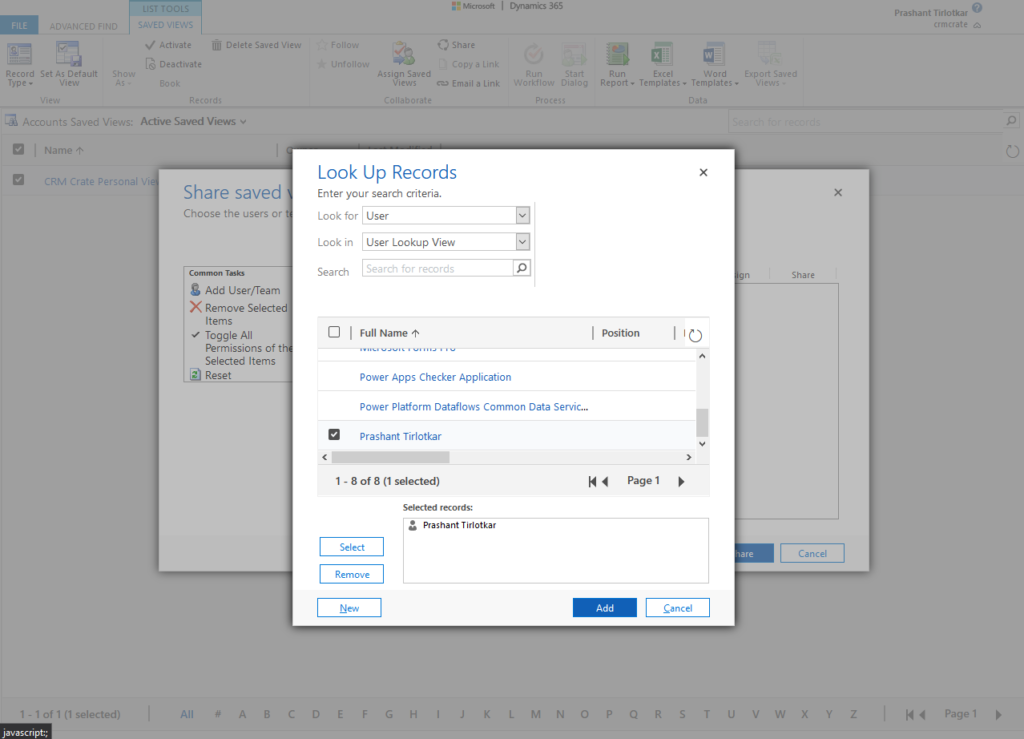
Now the share saved view editor should get open. Click on “Add User / Team” where you will be able to find a user or a team and select them according to your need. Once selected click on Add.
Your view is successfully been shared with the selected user, now its time to give extra privileges to shared user such as Write / Delete / Assign / Share access.
In our case, we will give “Write” and “Assign” access to our user as shown below. Finally click on Share.

To validate, sign in to the main CRM with the shared user credentials and you will find that the view is now readable and editable even to the new user.


