We will learn to set up notifications in Model-Drive App of Dynamics 365. Before we start, make sure to subscribe to CRM Crate so that you stay up-to-date in field of Dynamics 365.
What are the “In-App” notifications in Model-Driven app?
With the new “In-App” notifications, users can be alerted to key items to address, which makes them more likely to be successful.
In-app notifications in model-driven apps are displayed to users as a notification either in the notification center. Notifications are directed to a specific user and can be sent through external systems, Power Automate, or from within the system. This new in-app notification feature allows you to create notifications that will show in the browser.
How to enable the “In-App” notifications?
As per the Microsoft updates by date “28th September 2021”, this feature is not yet released in the Microsoft’s release plan.
| Enabled for | Public preview | Early access | General availability |
|---|---|---|---|
| Users by admins, makers, or analysts |  Jul 22, 2021 Jul 22, 2021 | – | To be announced |
Follow the below steps to enable the “In-App” notifications (Preview).
Important Note: –
- Please keep in mind that this is a preview feature so we wouldn’t recommend doing this in a production environment. Please ensure to use a sandbox instance instead.
- Ignore the below steps if you are already have the “In-App” notifications enabled in your Model-Driven App.
Step 1 – Collect App ID
We need to collect the unique App ID defined for our Model-Drive App.
- Open the Model-Driven App or Dynamics 365 in the browser and copy the URL.
- From the copied URL, extract the GUID for parameter “appid” as shown below.
Collect App ID-
Web URL = https://crmcrateindia.crm8.dynamics.com/main.aspx?appid=f4390255-0c86-eb11-a812-6045bd726f3b&forceUCI=1&pagetype=dashboard&id=81430b27-92d9-eb11-bacb-6045bd730eae&type=system&_canOverride=true
App ID – f4390255-0c86-eb11-a812-6045bd726f3b
Step 2- Collect Setting Definition ID
We need to collect the unique Setting Defination ID defined for the “In-App” notifications.
- Open the below given API URL (Get Request) as shown below.
Collect Setting Definition ID-
API URL = https://<Your Dynamics 365 URL>/api/data/v9.1/settingdefinitions
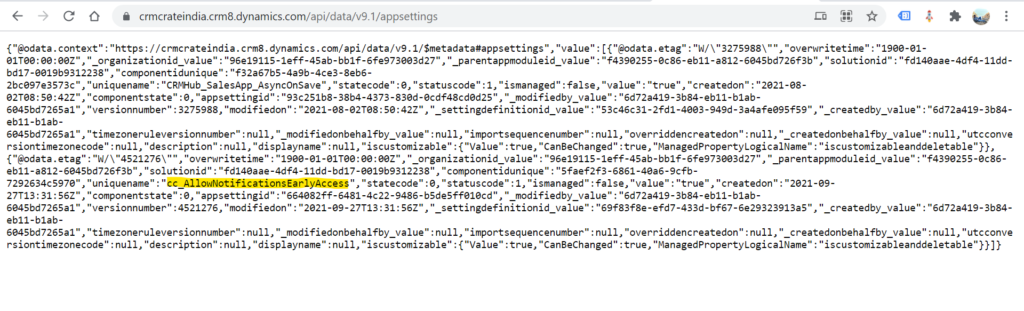
- Once the above API response has appeared, search for the term “AllowNotificationsEarlyAccess” as shown below.
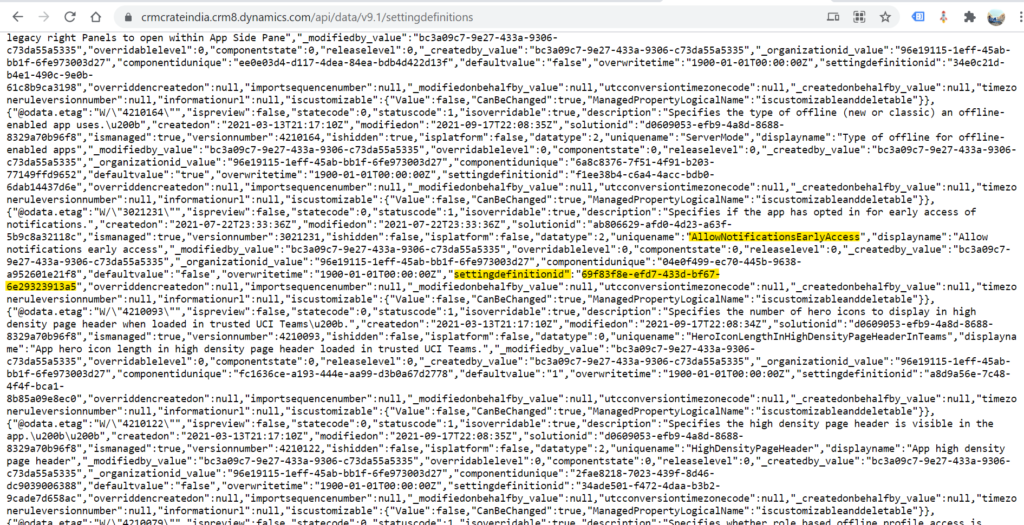
- Copy and collect the GUID value of “settingdefinitionid”.
Step 3 – Create a new record in the App Setting table / entity from backend.
Now, we will create a new in App Setting table using a console application. Click here to learn more about console application in Dynamics 365.
- Create a new console application (.Net Framework 4.7.2) with the code given below.
                using (var service = new CrmServiceClient(conn))
                {
                    if (service.IsReady)
                    {
                        Entity appSettingRecord = new Entity("appsetting");
                        appSettingRecord.Id = Guid.NewGuid();

                        //Paste the previously collected App ID.
                        appSettingRecord.Attributes["parentappmoduleid"] = new EntityReference("appmodule", new Guid("f4390255-0c86-eb11-a812-6045bd726f3b"));
                        //Paste the previously collected Setting Definition ID.
                        appSettingRecord.Attributes["settingdefinitionid"] = new EntityReference("settingdefinition", new Guid("69f83f8e-efd7-433d-bf67-6e29323913a5"));

                        //Use the default value for unique name as "prefix_AllowNotificationsEarlyAccess".
                        appSettingRecord.Attributes["uniquename"] = "cc_AllowNotificationsEarlyAccess";
                        appSettingRecord.Attributes["value"] = "true";
                        service.Create(appSettingRecord);
                    }
}- Paste the previously collected App ID and Setting Definition ID in the above code and execute the console application.
- Once done, navigate to the below given API URL for validating the newly created record in the App Settings table.
Validate App Setting Record –
API URL = https://< Your Dynamics 365 URL >/api/data/v9.1/appsettings
- We can view the newly created row with unique name “prefix_AllowNotificationEarlyAccess” as shown below.
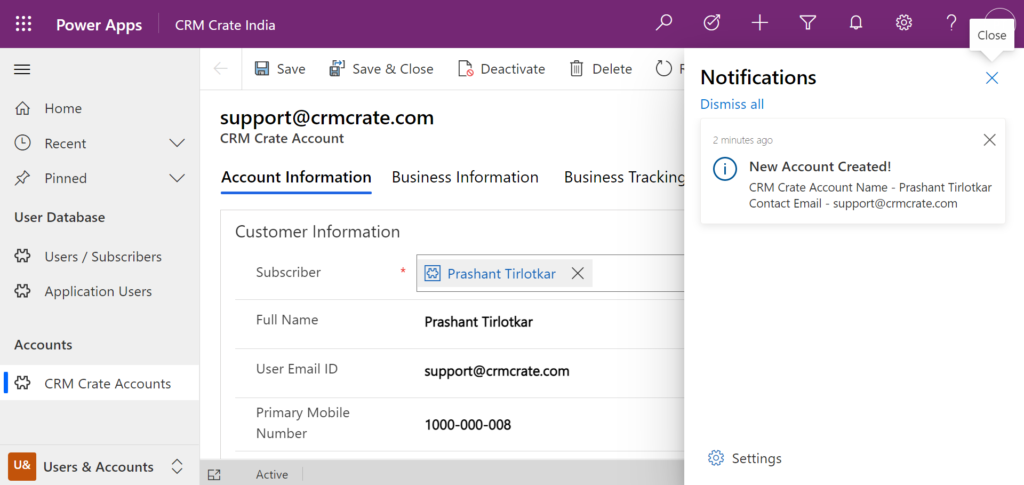
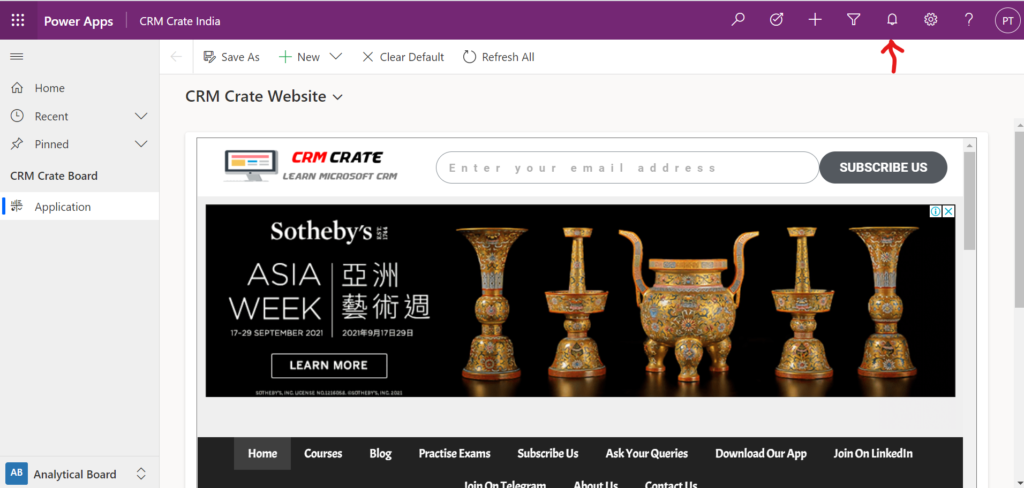
Step 4 – Validate if the notification button is visible in the Model-Driven App.
- Since we have configured the App Settings in our Model-Driven App, let us now verify if the notification button is visible in the Model-Driven App as shown below.
Step 5 – Create a demo Power Automate flow.
- We will utilize the Power Automate flow to create notifications on creation of an entity record.
- Navigate to the Power Automate studio and configure the flow as shown below.
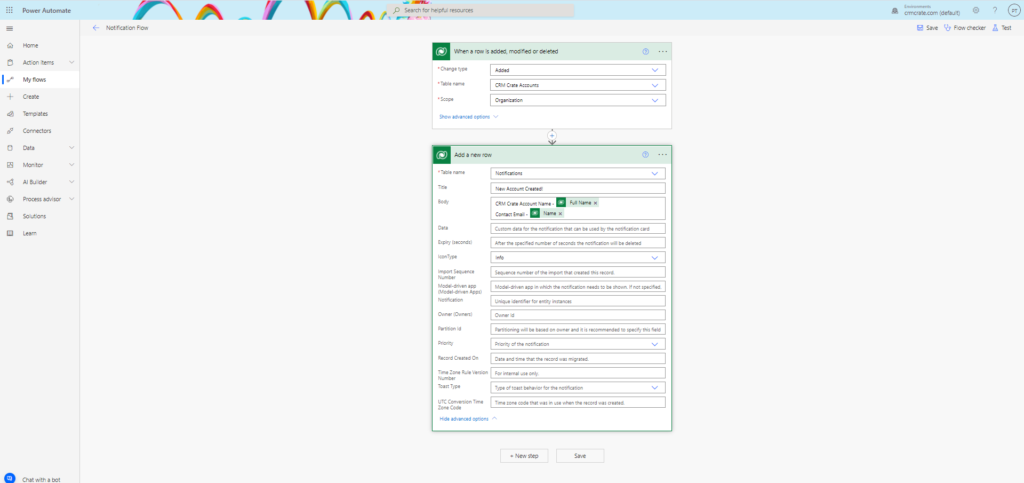
- In the above flow, we are creating a record in “Notification” entity on creation of record in “CRM Crate Accounts” entity.
- Once done, validate and save the Power Automate flow.
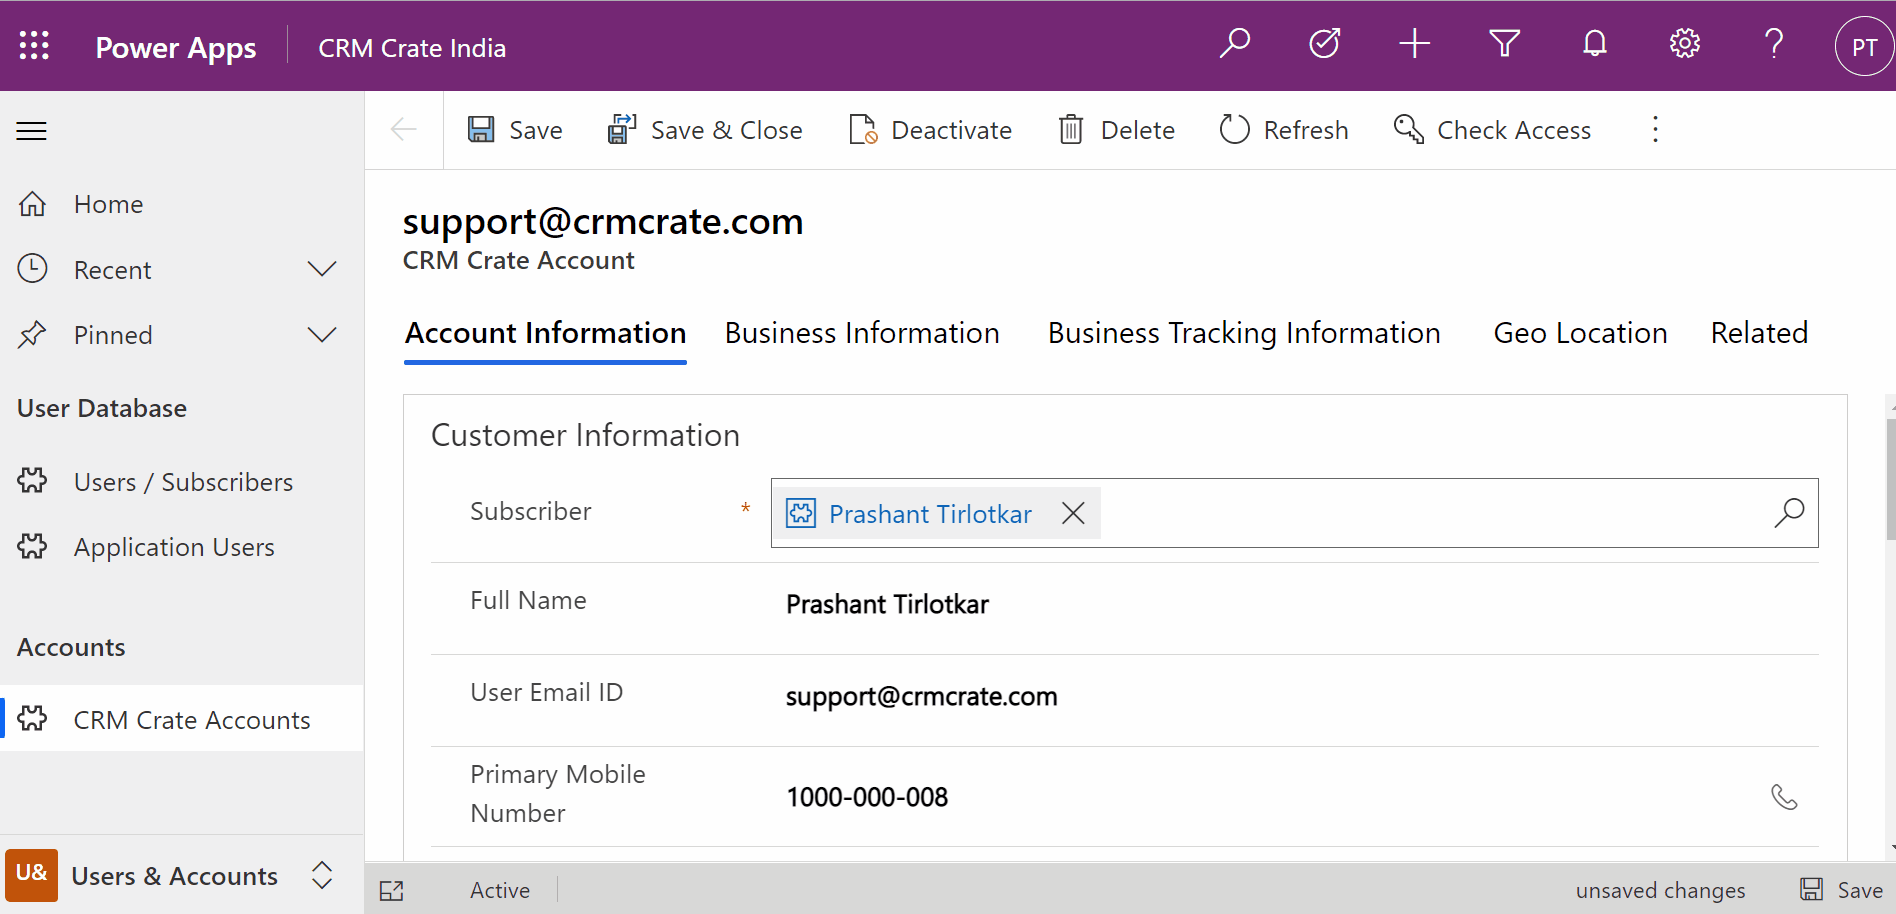
Validate the “In-App” notifications in Dynamics 365 Model-Driven App.
Open the Dynamics 365 (Model-Driven App) and perform the actions to trigger the above created Power Automate flow and validate the notifications as shown below.
Thus we learned to set up notifications in Model-Drive App (In-app notifications).


