
Welcome to the tutorial for POSTMAN API testing. In this course, we will understand the API testing using POSTMAN tool along with the practical examples. Before we start, make sure you have gone through the below listed courses.
- What is an API? | Understanding fundamentals with an example
- What is REST API? | Create a Twitter API using Python
What is POSTMAN tool?
The POSTMAN is an API development tool which helps to test, build and customize/modify the APIs. It has an ability to make various types of HTTP requests(GET, POST, PUT, PATCH). In other words, the POSTMAN is an interactive and automatic tool for verifying the APIs of your organization or project. It is a Google Chrome application for interacting with HTTP APIs. POSTMAN provides you with a friendly GUI for building requests and reading incoming responses. It works on the backend, and makes sure that each API is working as intended.
Why should you use POSTMAN?
With over 5000000 users nowadays, the Postman has become a tool of choice for the following reasons:
- Use of Collections – Postman lets users create collections for their Postman API calls. Each collection can create subfolders and multiple requests. This helps in organizing your test suites.
- Accessibility – To use Postman tool, one would just need to log-in to their own accounts making it easy to access files anytime, anywhere as long as a Postman application is installed on the computer.
- Creating Environments – Having multiple environments aids in less repetition of tests as one can use the same collection but for a different environment. This is where parameterization will take place which we will discuss in further lessons.
- Automation Testing – Through the use of the Collection Runner or Newman, tests can be run in multiple iterations saving time for repetitive tests.
- Collaboration – Collections and environments can be imported or exported making it easy to share files. A direct link can also be used to share collections.
- Continuous Integration – With its ability to support continuous integration, development practices are maintained.
- Debugging – Postman console helps to check what data has been retrieved making it easy to debug tests.
Download & install the POSTMAN application
- Click here to download POST Application for windows. Download and install the application.
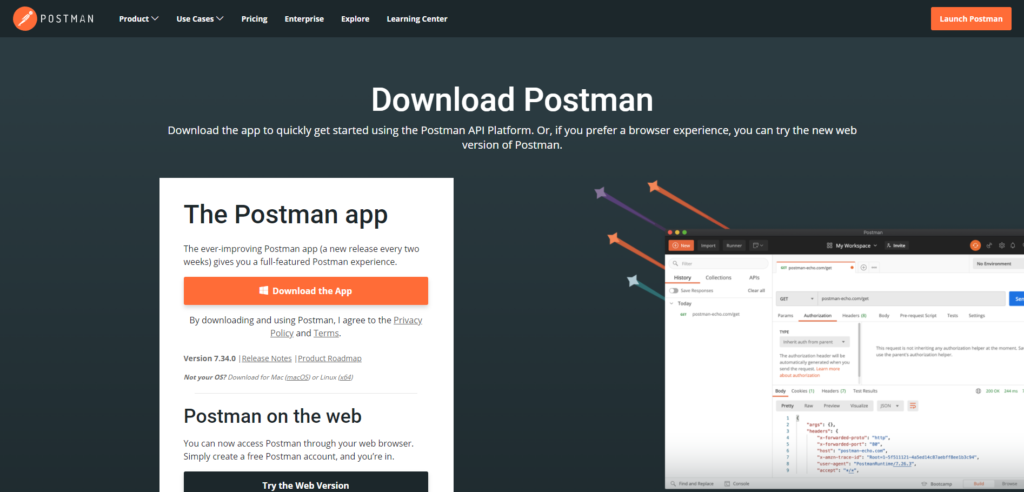
- Once installation is completed, create a new POSTMAN account and sign into POSTMAN application as shown below.
Request Web Page using POSTMAN
As our first basic example, lets send a request to a website using POSTMAN and in return receive the complete web page html of that particular website.
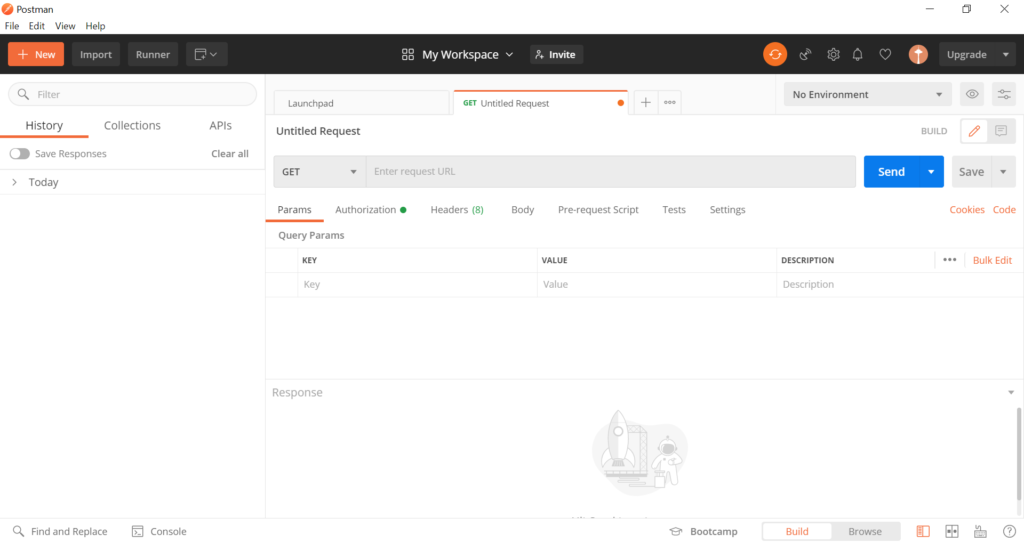
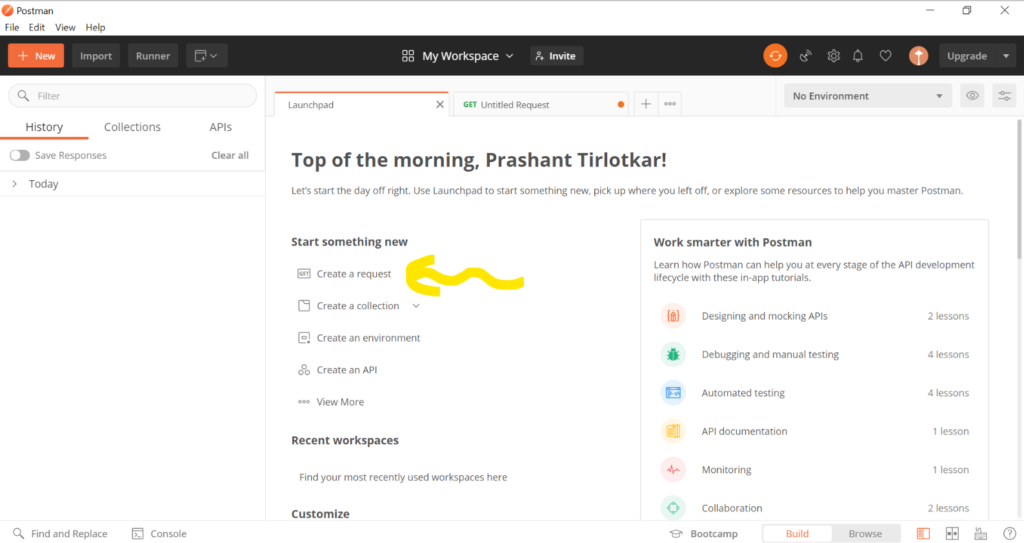
- In the POSTMAN application, navigate to the dashboard or launch page. Click on Create Request.
- Here we can see the multiple request (GET, POST, PUT, PATCH etc) which can be made using the POSTMAN.
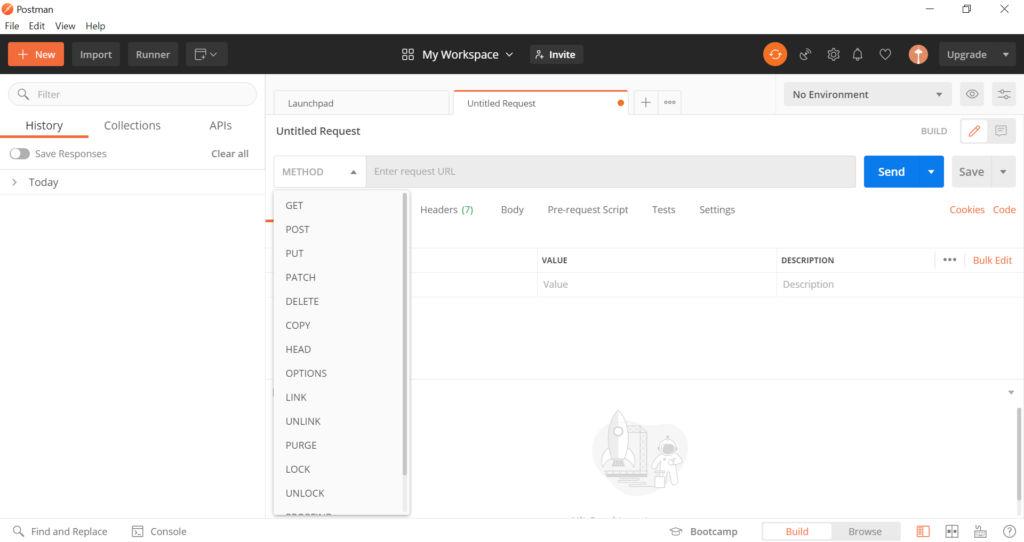
- For now, we will select the “GET” method and enter the website URL in the request URL field as shown below. Later, click on Send.
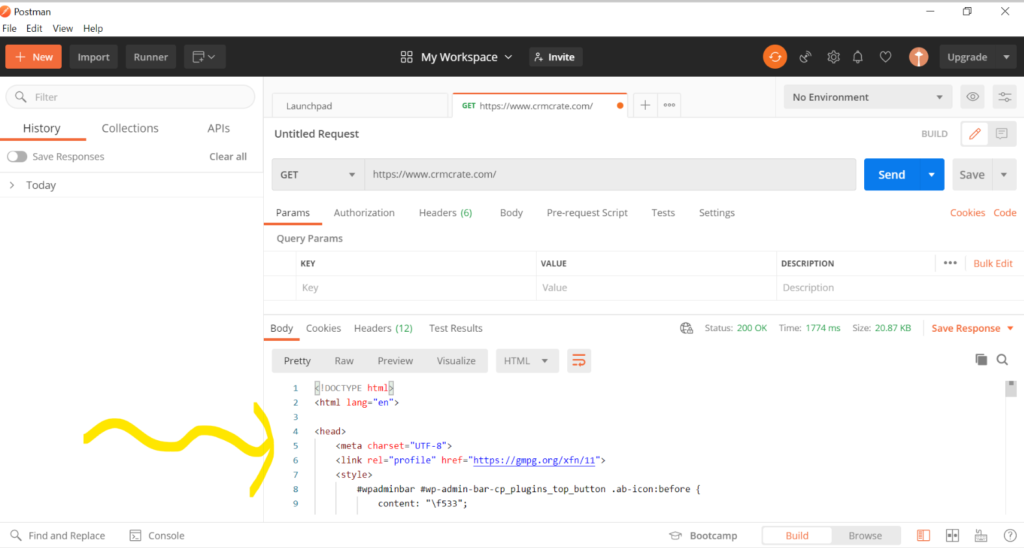
- After send a GET request to the website “www.crmcrate.com”, we received the response from CRM Crate which contains body (HTML, JSON etc), cookies, headers ad test results.
Testing & requesting No Authentication APIs
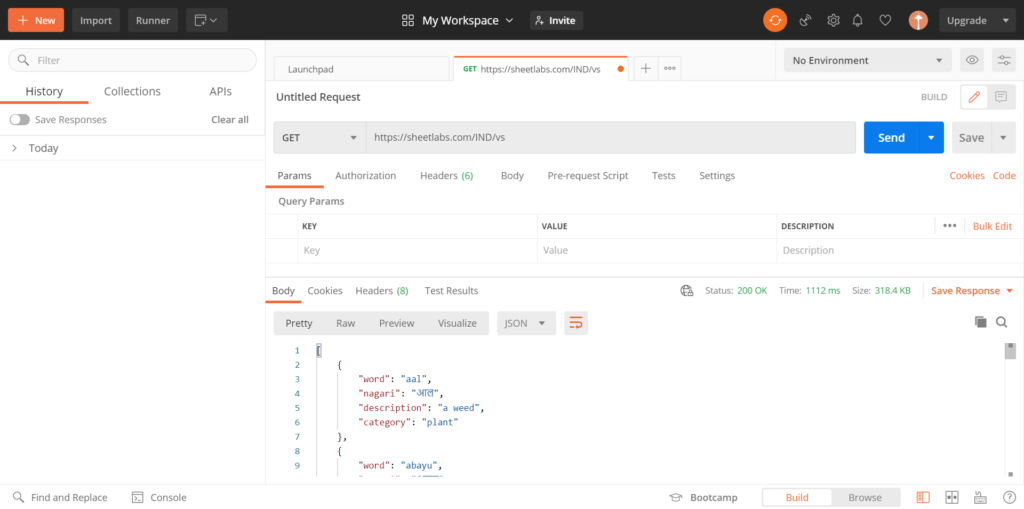
- Now we will make a request to an API which needs no authentication (This means anyone can access information from this API). For the demo purpose, we will use the API which is listed below. Note : This API will return the list of Sanskrit language (Ancient Indian Language) words and its description in JSON form.
https://sheetlabs.com/IND/vs
- Copy the above API URL and paste it in the POSTMANs request URL field. Click on send request. Here, we will receive JSON file containing the Sanskrit language words along with its meaning as shown below.
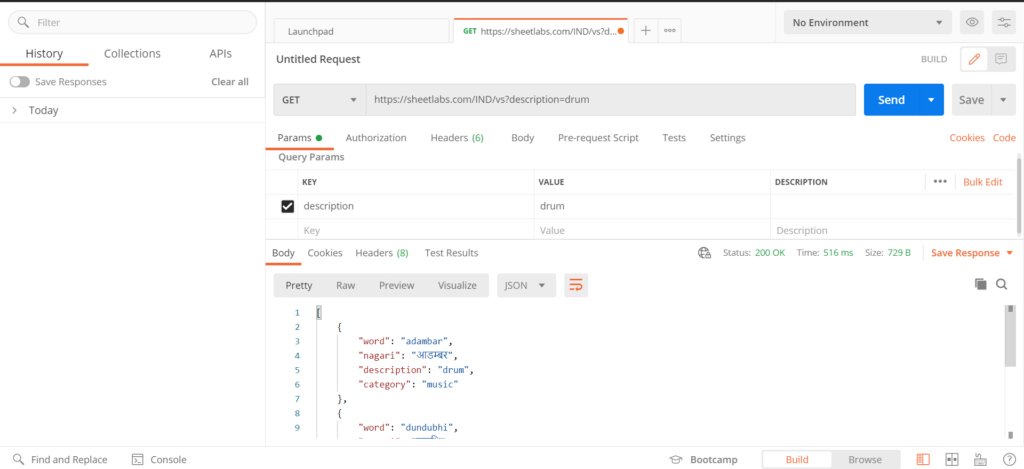
- Additional, we pass parameters which requesting the API so that the response is more filtered as per our needs. For example, lets request the Sanskrit word with “description” as “drum”. For this, navigate to the Params tab and enter the parameter as KEY = “description” and Value = “drum”. On running the request, we will only receive the Sanskrit word with description as “drum”. Similarly, we can pass multiple parameters to fetch more filtered results.
Testing & requesting Basic Authentication APIs
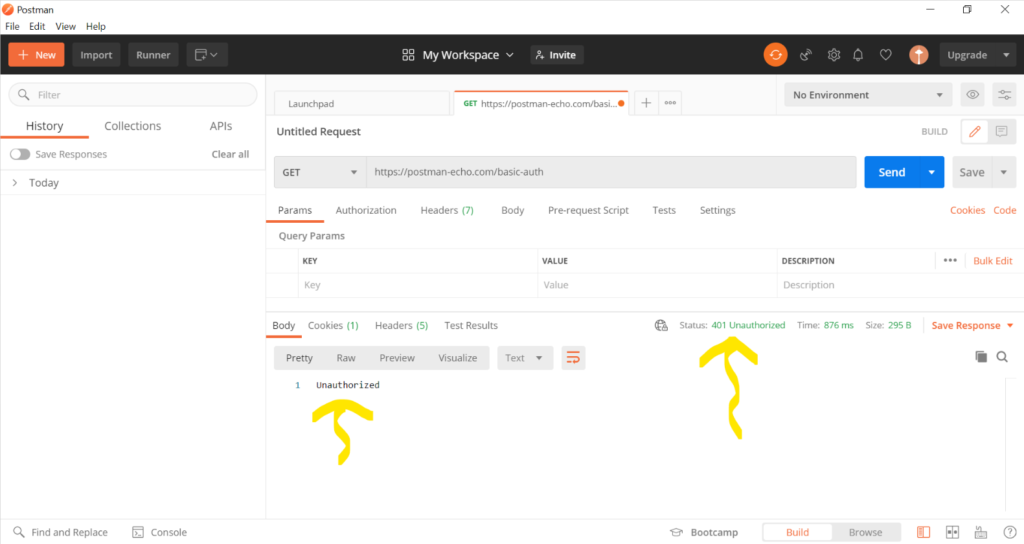
- Lets test the APIs which requires basic authentication such as username and password. Copy the below API URL and make a request in POSTMAN.
https://postman-echo.com/basic-auth
- Since, this API URL requires basic authentication (user requesting an information from this API needs to have the username – password authentication), we have received the “Unauthorized” POSTMAN response with 401 error as shown below.
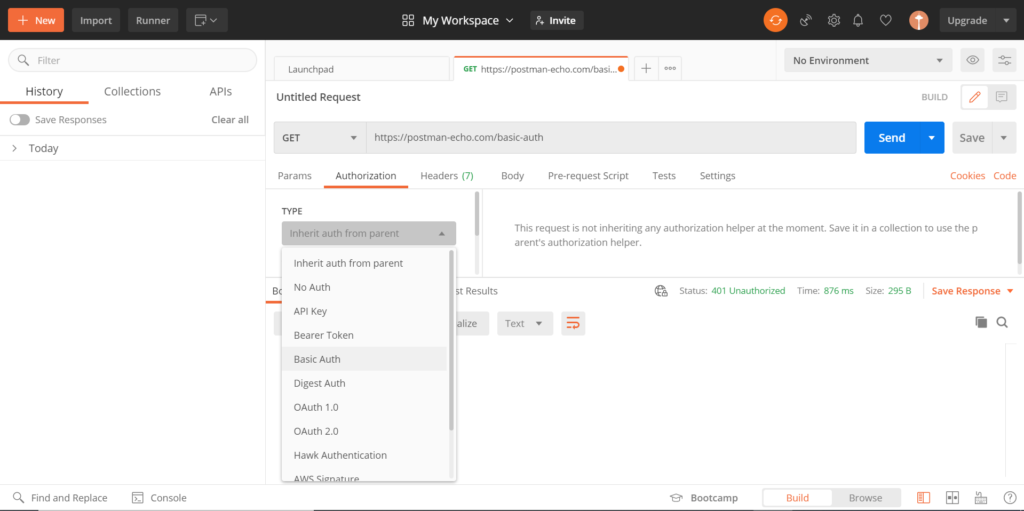
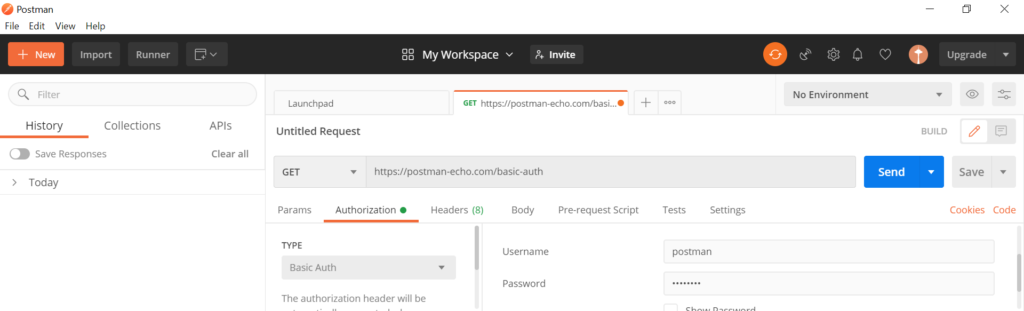
- We will again make the request on the same API using the valid username and password. In POSTMAN, navigate to the tab called “Authorization” and select type as “Basic Auth”.
Copy paste the below given username and password and make a new API request on the same URL.
User Name : postman
Password : password
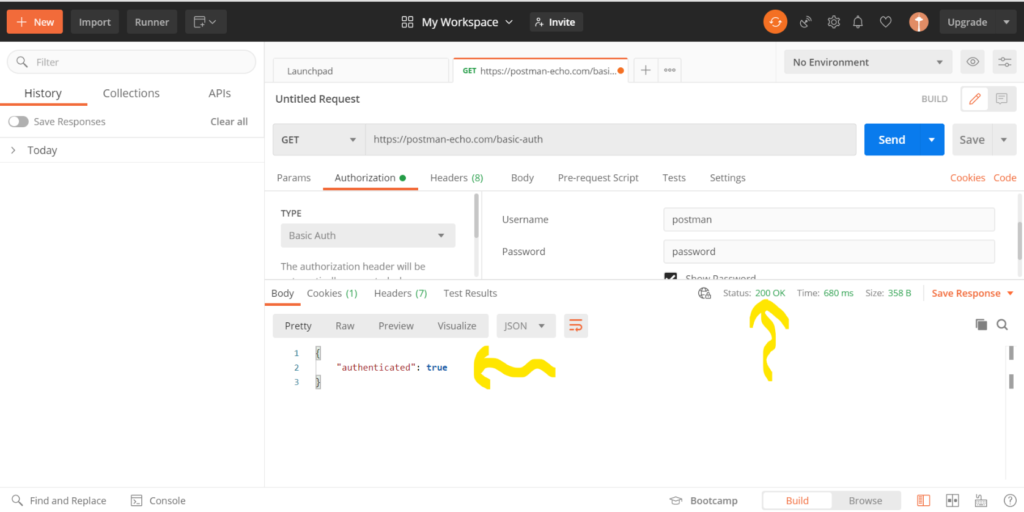
- Now, as we passed the valid authentication with the API request, the POSTMAN will return the success message in its response as shown below.
- The authorization headers, token will be present in the tab “Headers” as shown below.
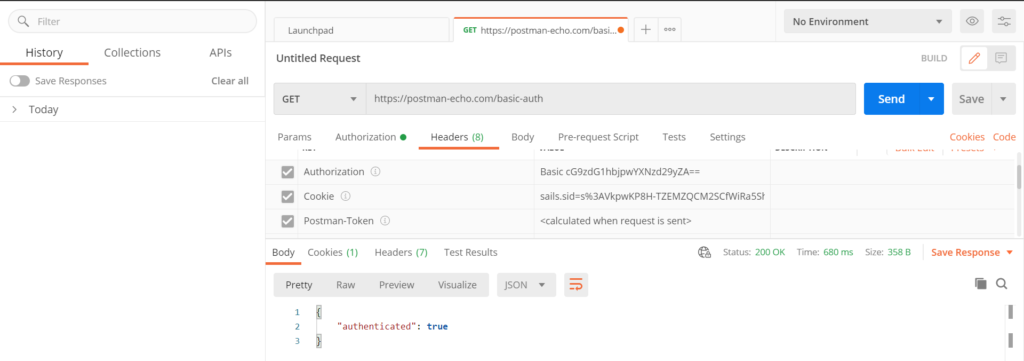
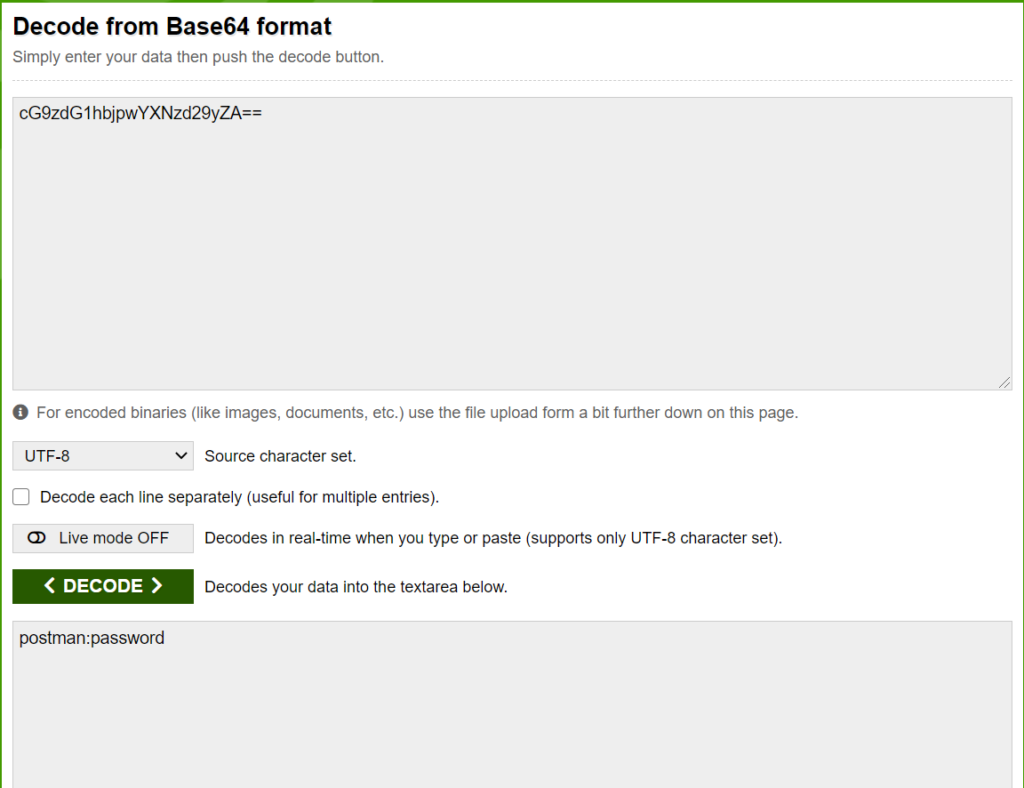
Note : – The value in header “Authorization” is nothing but the password. If we convert this value “cG9zdG1hbjpwYXNzd29yZA==” from Base64 to regular text. It will give the below result.
Base 64 Encode – Decode Website : https://www.base64decode.org/
Calling API using Bearer Token
Bearer authentication (also called token authentication) is an HTTP authentication scheme that involves security tokens called bearer tokens. The name “Bearer authentication” can be understood as “give access to the bearer of this token.” The bearer token is a cryptic string, usually generated by the server in response to a login request. The client must send this token in the Authorization header when making requests to protected resources.
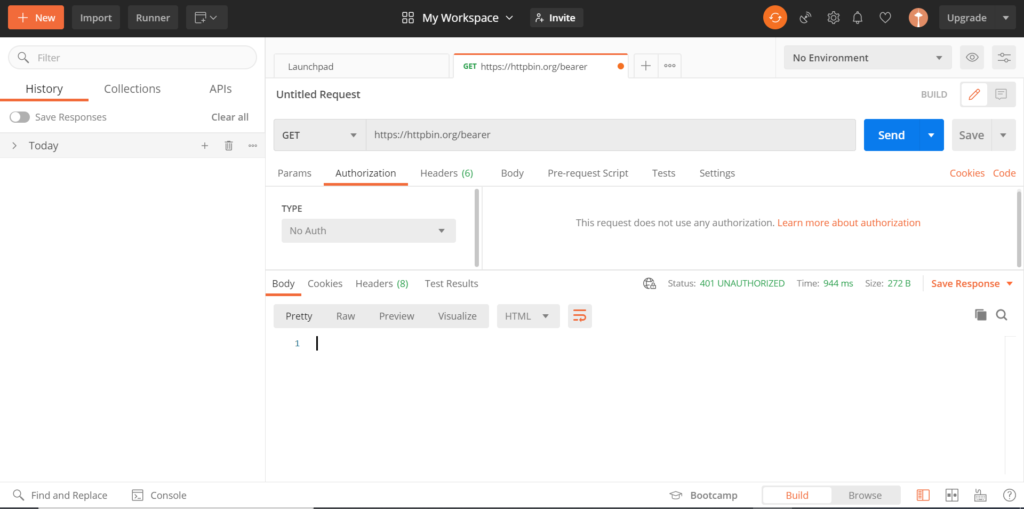
- We will make a request to an API which requires a bearer token. Copy the below API URL and send a request using POSTMAN application.
https://httpbin.org/bearer
- As we have not passed any bearer token in the request header, we have received 401 error in response.
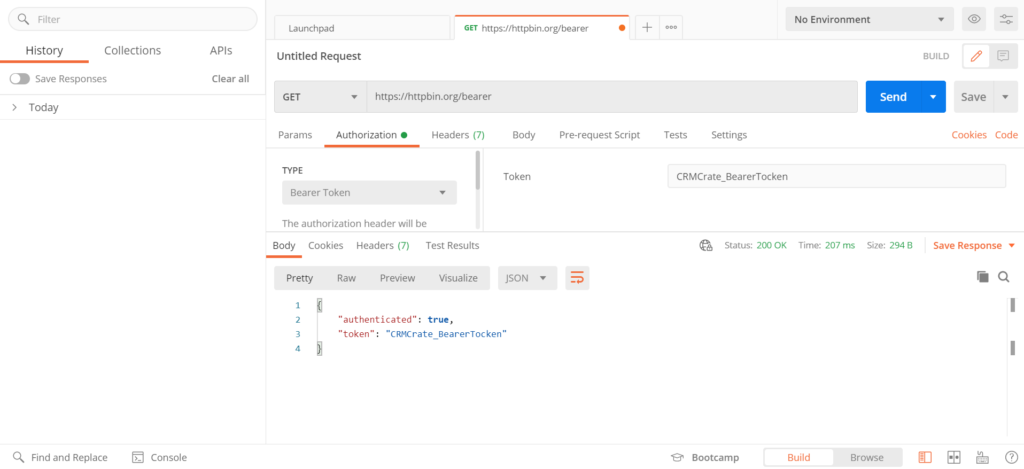
- In order to successfully authenticate the API, navigate to the POSTMAN’s Authorization tab and select Type as “Bearer Token”. In the field Token, enter the below given bearer token value. Once done, click on Send. Note : – This API is designed for demo purpose and it accepts any value as its bearer token.
CRMCrate_BearerTocken
- Now, the POSTMAN have received the API response as 200 – Authenticated as shown below.
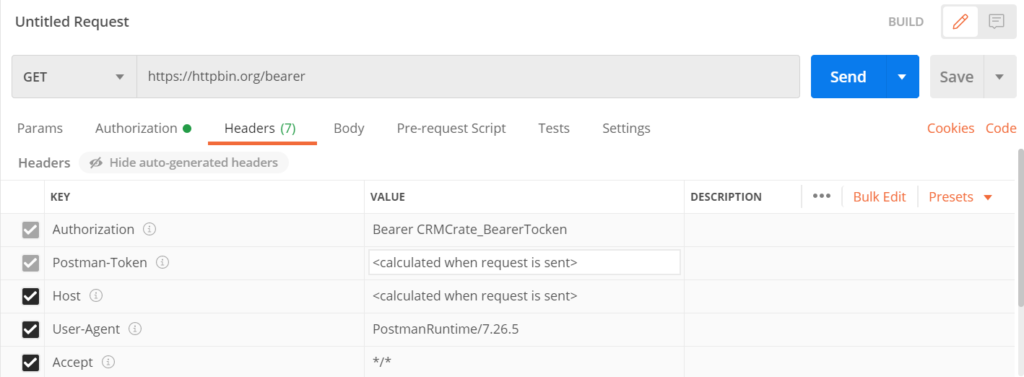
- To check the HTTP header which we have requested to the API, navigate to the Header tab, here we can see our bearer token which is passed in our request’s header.
Testing OAuth Web APIs
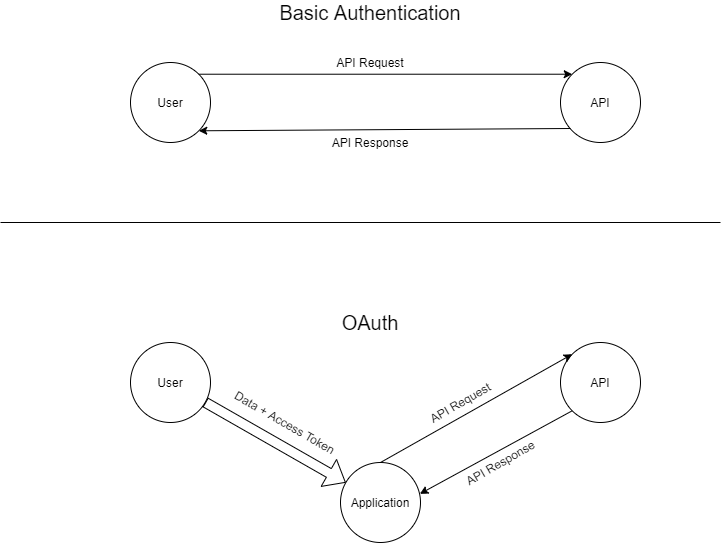
The major difference between the Basic Auth and OAuth is the medium of authentication. In Basic Auth, the authentication directly takes place between the user and the API (Program), whereas in OAuth there is a Application which acts as an agent between User and the API(Program).
This means that the user will send the request to the application using the application’s access token, later the application itself will send the API request to the API as shown below.
- We will user the Google as our application. Create a new demo Google account. We recommend to create a new demo Google account for the API testing due to security reasons.
- Once done, navigate to the Google API library by clicking here(https://developers.google.com/oauthplayground/).
- Here, search for Gmail API v1 and expand it. Select all the listed APIs and click on Authorize APIs. Make sign-in using your newly created Google account and give all access to your API.

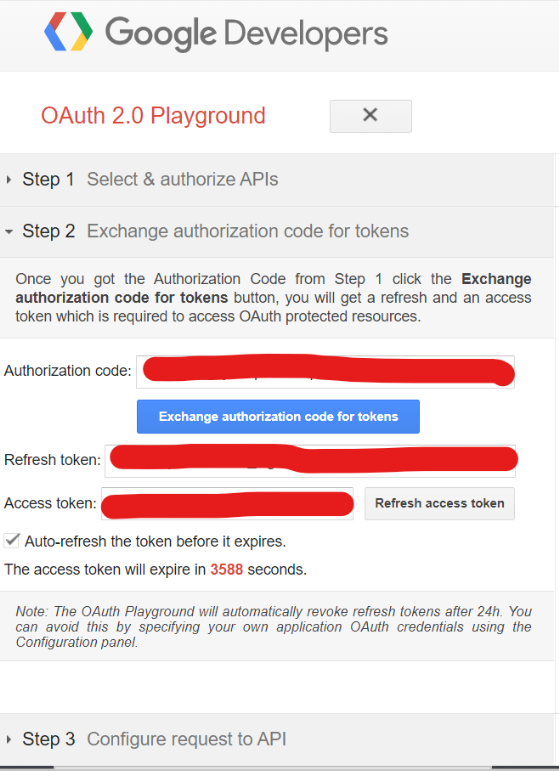
- The Google Developer console should now get opened. Here, make sure the auto-refresh token checkbox is checked so that the Access Token is auto refreshed whenever it gets expired.
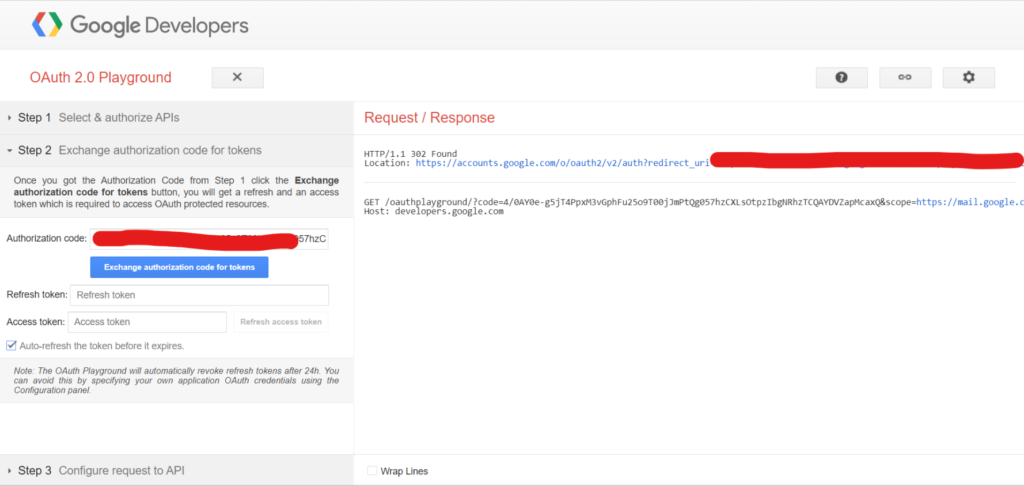
- In the same section, click on Exchange authorization code for tokens to get the Access Token as shown below.
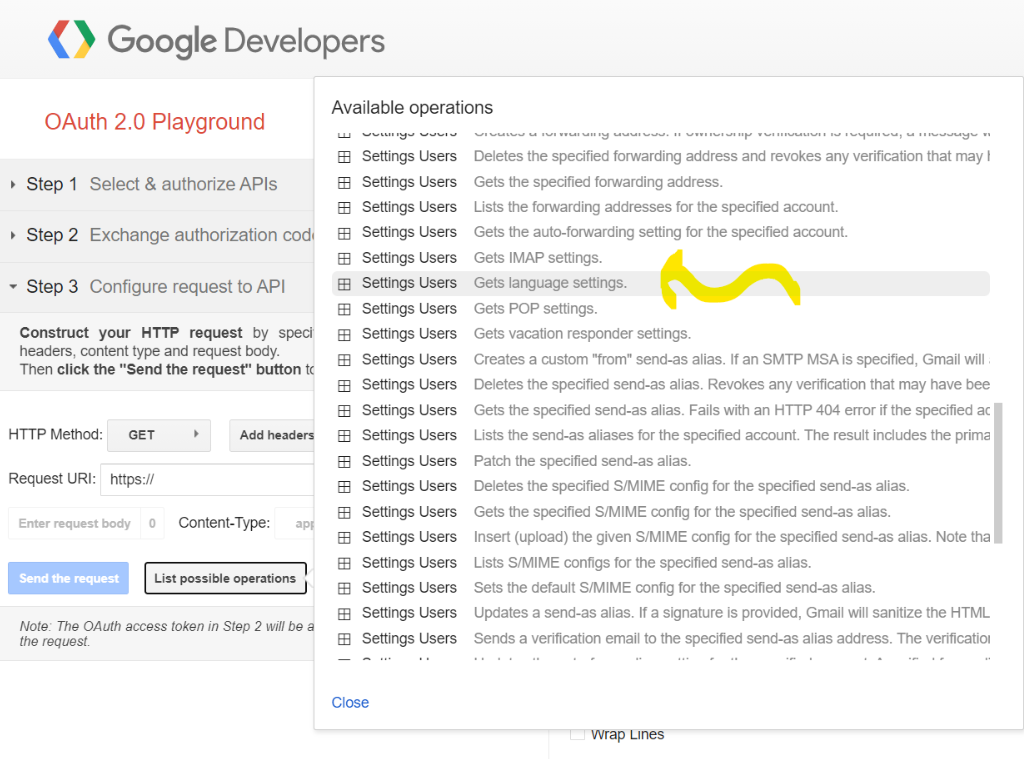
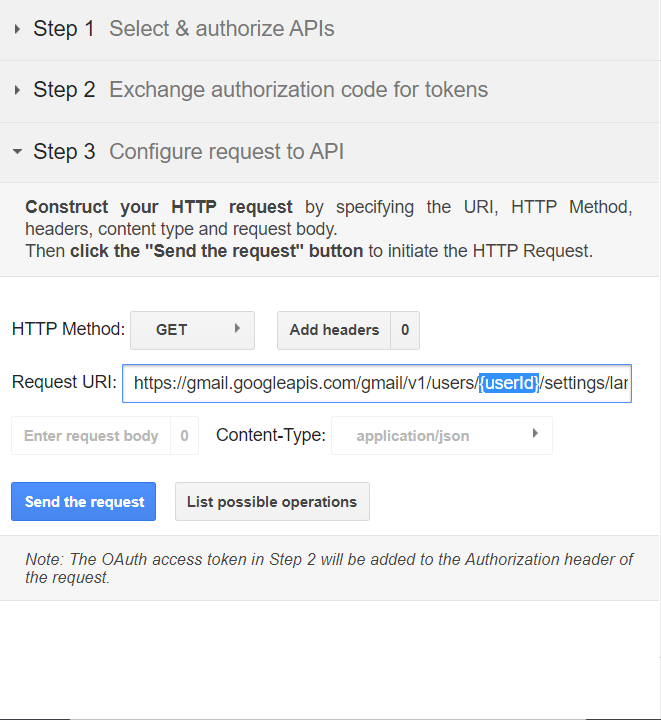
- Once done, navigate to the step 3 and click on List of possible operations. This is the list of API operations available to be performed. For our demo, lets select the operation called “Get Language Setting” which will return the user language in response.
- Now, the Google API will get auto-populated in the field “Request URL”. In the API URL, replace the “{userId}” with your logged in user’s gmail address as shown below.
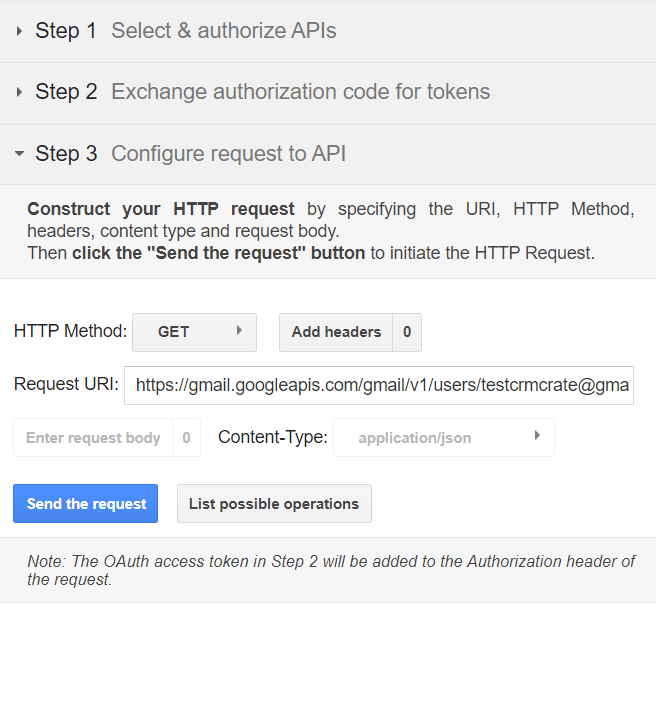
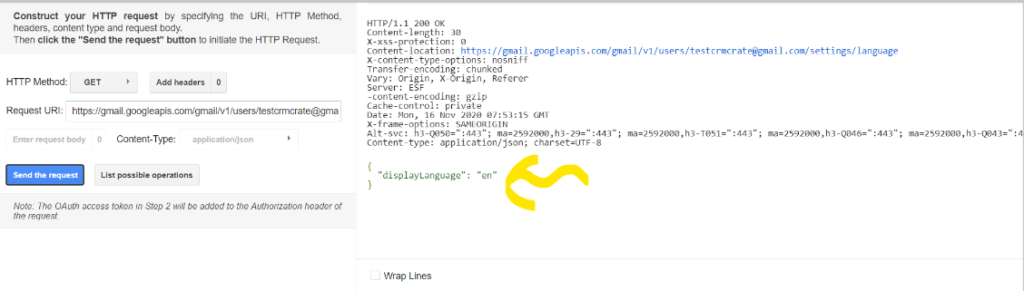
- Now, click on Send the request button. This will request the API call using OAuth, the response will be fetched in the right hand panel of the screen as shown below. The API returns the language “en” which means English in its response.
- Lets do the same API call using the POSTMAN application. Open the POSTMAN, copy the same request URL and set the request type of GET.
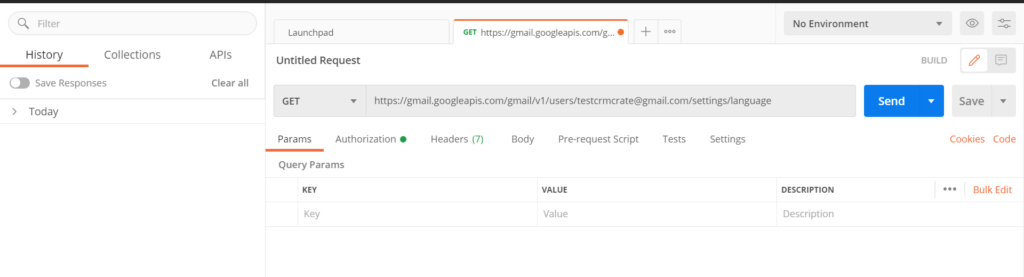
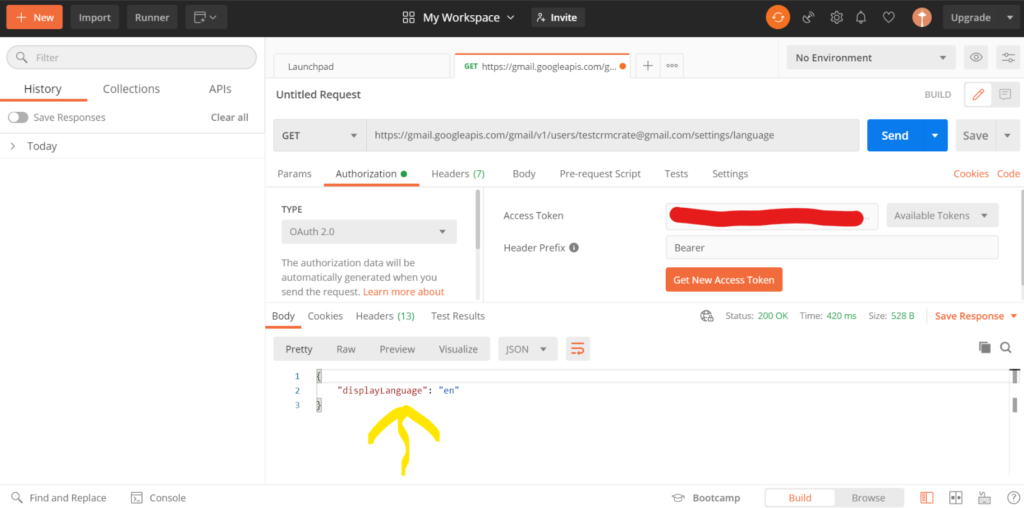
- Since this API supports OAuth, navigate to the tab “Authorization” and select Type as OAuth 2.0. Copy the Access Token from Google Developer console’s step 2 as shown below and paste it in the Access Token field of POSTMAN application. Click on Send.

- Now, the OAuth API is been called using the Access Token (Google Application), the API returns the user language in its response as shown below.
Conclusion
We learned the fundamental concepts of WEB APIs, POSTMAN and implemented API testing using the POSTMAN application.


